SFX190
Contents
[hide]Introduction
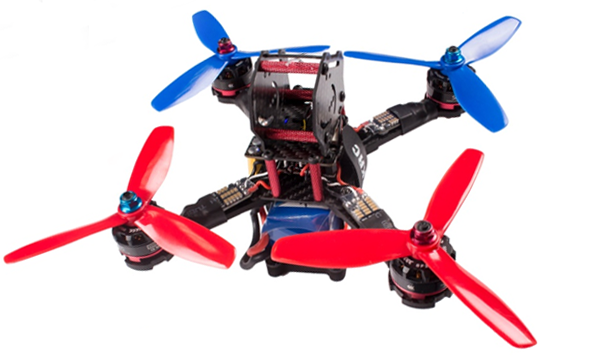
The SFX190 kit is an X-shaped quadcopter designed for aircraft hobbyists for FPV racing. It features stability, agility, and activity. No matter in high or low altitude, or in a forest, it’s quite easy for SFX190 to hop. The SFX190 applies the SF Racing F3 flight controller, 20A high-speed ESCs and brushless motors. The FPV camera position is vacant for professionals to update the hardware for advanced application. In addition, it comes with a receiver and the FS-i6X Radio Transmitter which uses full-directional and double-gain antenna for stable and strong signal transmission as well as constant direction. Whether you’re into small space flight, or exciting rapid 3D flight, it’s perfect.
Features
- With ultralight and high-intensity carbon fiber frame, the mini X-shaped quadcopter is pre-assembled and tested.
- SF Racing F3 board allows firmware flashing on Cleanflight or Betaflight; Integrated with gyroscope and accelerometer for stable flight.
- Uses low-noise 4-axis 2205 2300KV brushless motors; with D-SHOT supporting professional racing drone ESCs; adopts 5045 three-blade propellers with high intensity.
- Weight: 269.3 g (battery not included); Duration of flight: 13 mins; Working voltage: about 14.8V (a 4S Li-Po battery recommended for power)
Prior to flying the plane, you need to know more about the plane and flight. Please read the following instructions carefully and make sure you understand well before actual flight.
Install the propellers
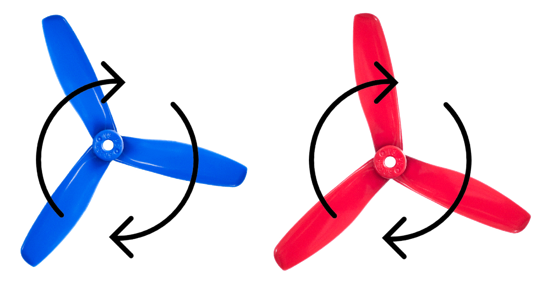
Step 1:Distinguish the rotational direction of the propellers. See the clockwise (CW) rotating propellers as below.
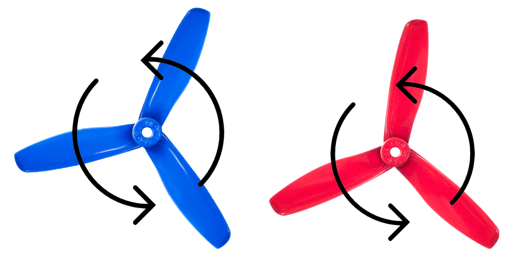
The counterclockwise (CCW) propeller rotates like this:
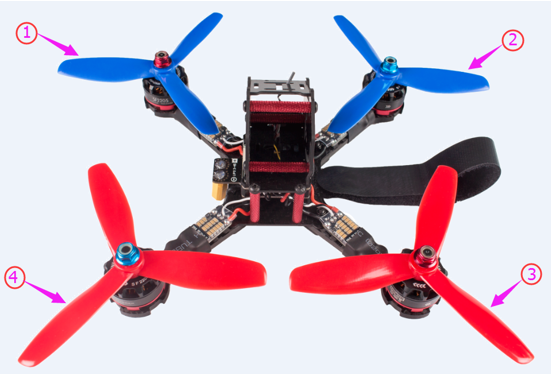
Step 2:Disassemble the motor cap nut. The propeller and the motor assembled should rotate in the same direction. Therefore, install a CW rotating propeller onto the No.1 and No.3 motor as shown in the figure below. Likewise, install two CCW propellers onto the No.2 and No.4 motor. For aesthetic reasons, usually the propellers of the same color are at one side, either front or back. Screw the motor caps back.
Install the battery
1 Install the battery protection board first.
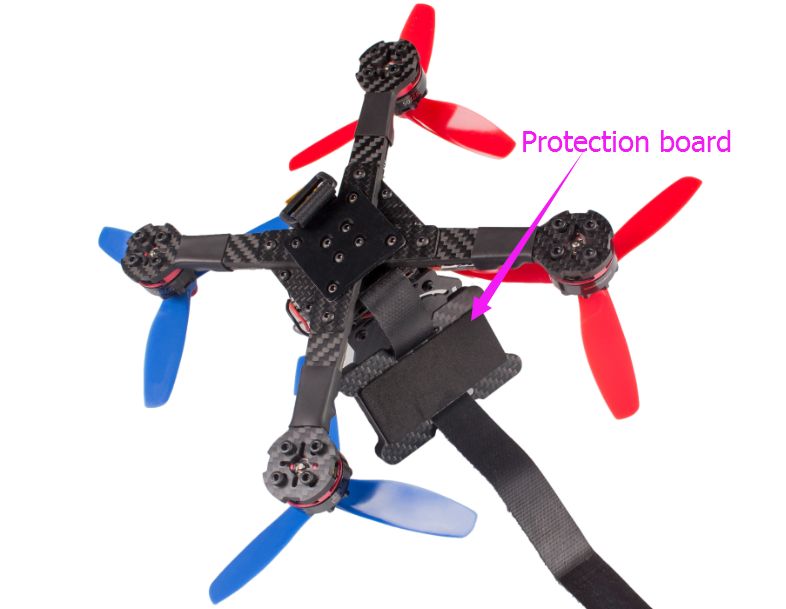
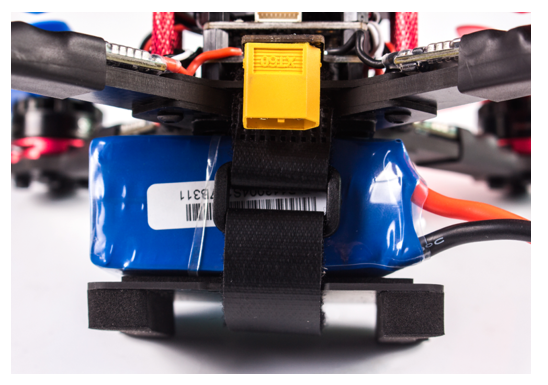
2 Install the battery under the plane and bind it to the upper board with the battery strap. (Please ensure the battery is fully charged before assembly in case of unexpected issues.)
The assembly of the quadcopter is completed.
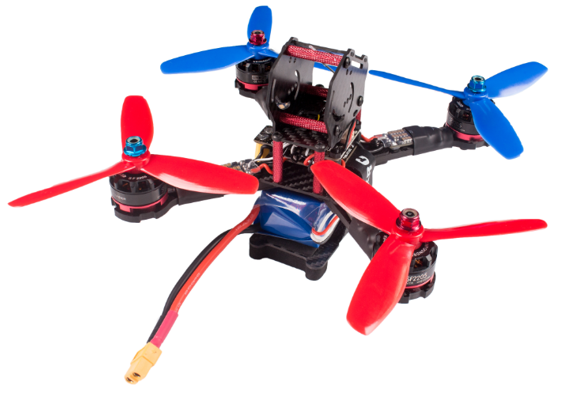
Install the battery to the radio transmitter
1. Install the battery onto the radio transmitter.
2. Plug the power cord of the battery in the plane and the power indicator LED will light up.
Unlock the plane
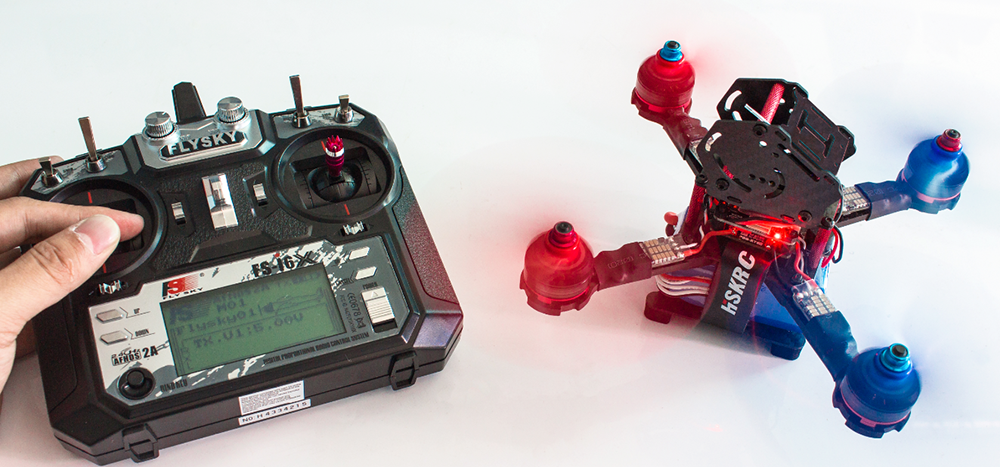
Step 1: Turn on the radio transmitter. If the channels have not been reset, the buzzer onside will keep beeping to warn you. You can reset all the channels to the initial position and start to use.
Step 2: Put the plane on a flat surface, and you can see the status LED (red) in the flight controller is off. But if you've placed it on a bumpy surface and it cannot keep level, the red LED will blink and the plane is unable to unlock.
Step 3: Since we have set the auxiliary channel AUX2 (SWA) to unlock the plane, please open AUX2 (SWA) and you will see the status LED keeps constantly brightening, which indicates a successful unlocking.
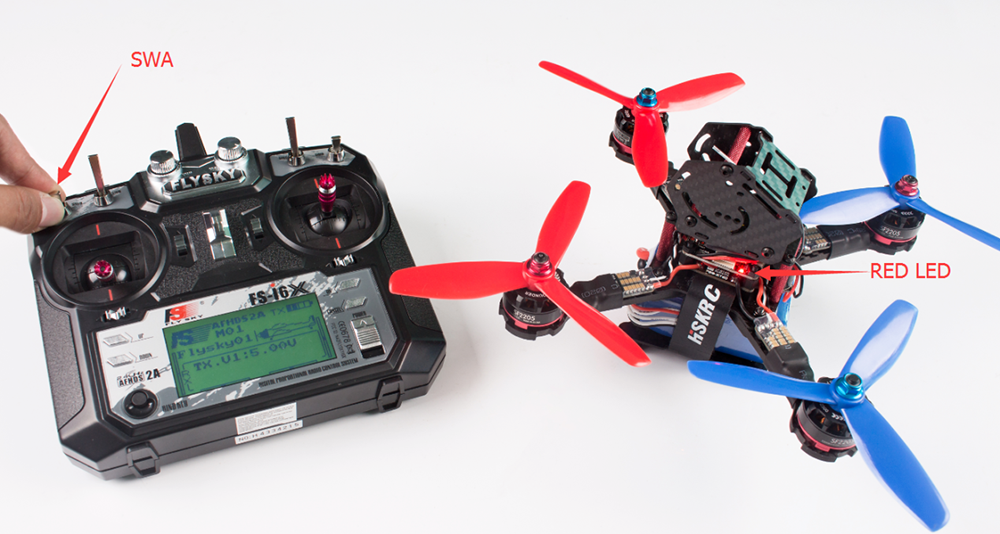
Step 4: At this time, slightly push the throttle rocker upwards and the motor will start to rotate. For the safety reason, prior to pushing the rocker, make sure the propellers are installed firmly and will not fall out, and that no one is near them and gets hurt.
Lock the plane
Close AUX2 (SWA switch), and the status LED (red) goes out and the plane is locked.
Calibration after flight
In the flight previously, you may encounter some problems. For example, the plane keeps tilting toward a certain direction. It may be changed parameter for the plane during the shipment. Take the following steps to calibrate.
1) Calibrate the radio transmitter
Remove the propellers from the aircraft, connect the flight controller to the computer with a USB cable. Open the betaflight/cleanflight and click receiver.
Pull the trimmer toggle for Pitch, Yaw, and Roll, as shown below.
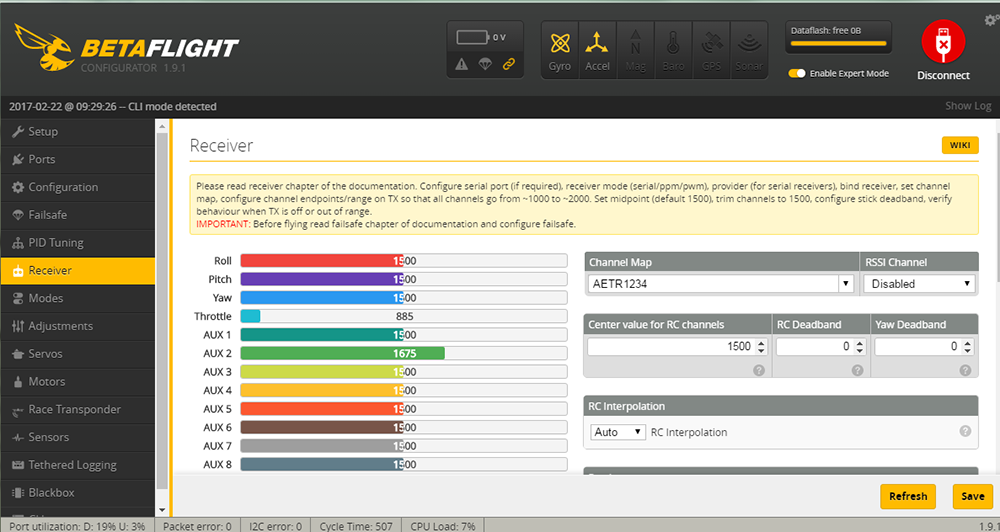
Adjust them until the median is about 1500, click Save.
2) Ensure the setting of the flight mode is OK, then use AUX1 (SWC switch) to switch the flight mode.
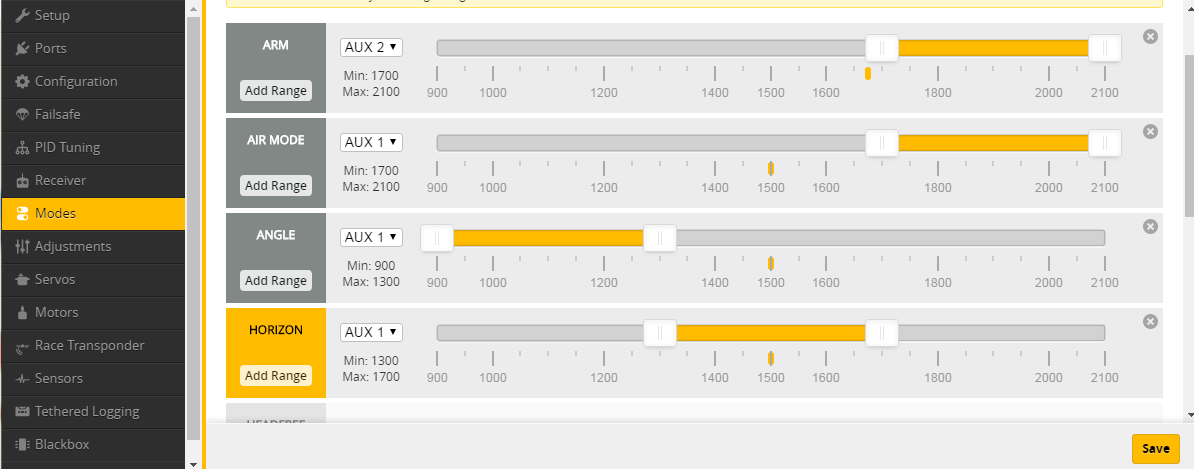
ANGLE MODE:then Roll, Pitch and Yaw are all under the self-stabilization mode.
HORIZON MODE:Roll and Pitch are self-stabilization when Yaw is still manual.
AIR MODE:Roll, Pitch and Yaw are all under the manual mode.
For beginners, you are suggested to use ANGLE MODE to fly the plane more easily.
3) Calibrate the accelerometer:
Place the plane on a smooth surface and click Calibrate Accelerometer, wait till the calibration completes.
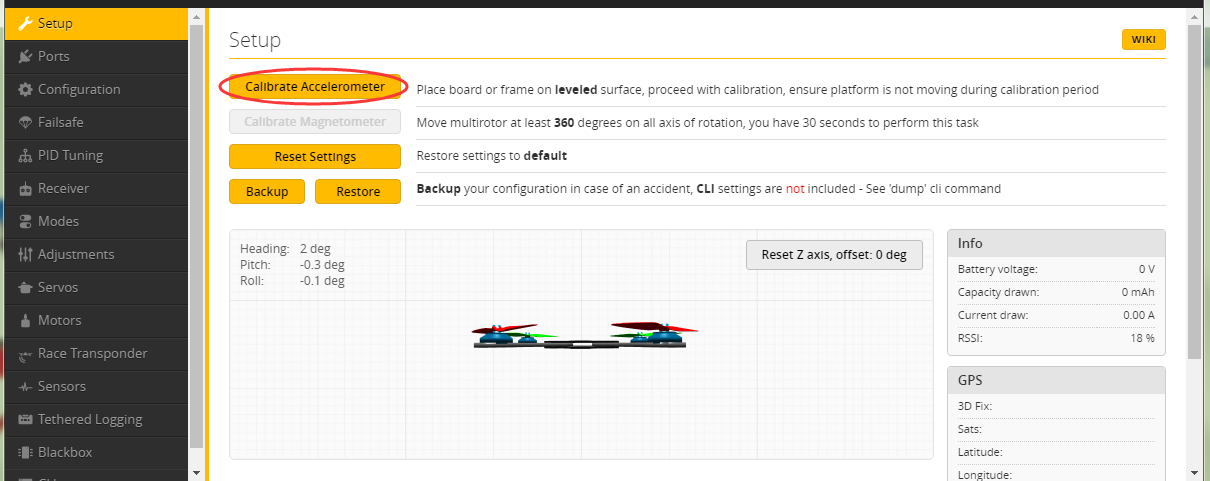
So you've finished the debugging. Now assemble back the propellers to the plane, unlock it, and check whether the drone can fly steadily now.
Note: During the flight, if a crash happens unluckily, the parameters for the plane may change. DO calibrate it again based on the instructions above.
Recommended accessories:
1. For the remote control, you are recommended to refer to this link:
https://www.sunfounder.com/rc.html
https://www.sunfounder.com/drone/remote-controllers/flysky/flysky-fs-i6x-radio-system-transmitter.html
2. The SFX190 quadcopter kit uses the 5045 propellers blades. you can also choose other 50x propellers blades :
https://www.sunfounder.com/drone/propellers/5030propeller.html
https://www.sunfounder.com/drone/propellers/5045propeller.html
https://www.sunfounder.com/drone/propellers/3-blade.html
3. For the camera kit, you are recommended to refer to this link:
https://www.sunfounder.com/drone/flight-camera/minicamera.html
4. For the FPV Image Transceiver Kit, you are recommended to refer to this link:
https://www.sunfounder.com/drone/fpv-image-transceiver-kit-with-700tvl-hd-camera-mini-ts5823-32-channel-av-transmitter-5-8g-mushroom-antenna-for-quadcopter-multirotor-aircraft.html
5. Racing F3 Flight Controller Board
https://www.sunfounder.com/drone/flight-controllers/f3/racing-f3-controller.html