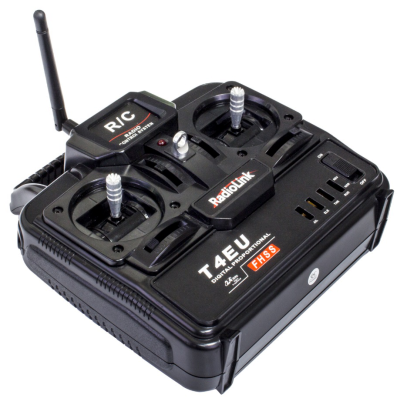
RadioLink T4EU Remote Control Transmitter
Introduction
This RadioLink Transmitter adopts the 2.4GHz FHSS 4-channel technology, supporting the helicopter mode and fixed wing mode. The transmitter and the receiver apply the 2.4G remote control technology, do not use transistor for signal, and the advanced code matching mechanism can most possibly avoid the mutual interference. These all make the transmitter a best choice for you to control your aircraft model.
Features
- Supports automatic frequency modulation after power on, and quick searching for and matching with the receiver
- Adopts the FHSS modulation, enabling a stable control distance of 300m
- Once the transmitter and the receiver are matched wirelessly, they will never lose control due to the excellent anti-interference performance even against devices in the same channel.
- With 2 sticks, a 4-channel system, and 4 switches for channel reversing
- Receiver: Dimension: 31.5 x 16.5 x 10.7 mm (1.24 x 0.65 x 0.42 inch); Weight: 3.5g
Transmission Frequency: 2.4GHz Modulation: FHSS Power Supply: 9.6V Ni-Cd battery or 12V alkaline battery Operating Current: <80mA Four channels: 1. Aileron 2. Elevator 3. Throttle 4. Rudder
Firmware Upgrade of the Previous T8FB (No USB Port)
1. Extract the T8FB_USING_INTRUCION file and you can see 4 folders inside:
2. Open the 1.drive install folder, unzip the file inside that fits your operation system
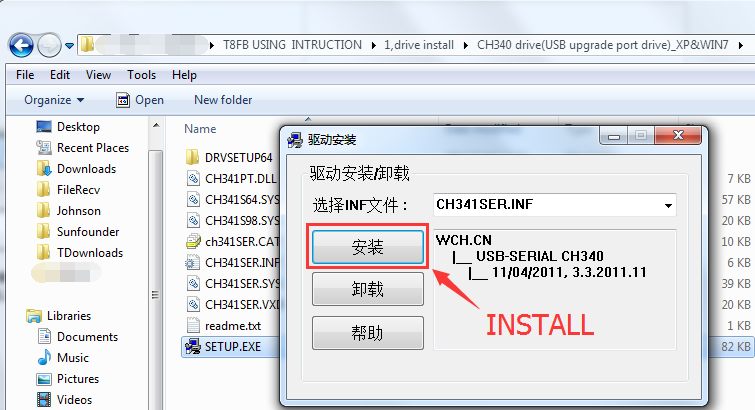
E.g, if your computer runs on WIN7, unzip the first file CH340 drive, open the folder extracted, and double click to open the installation file SETUP.EXE and click Install.
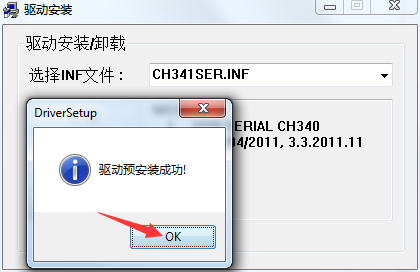
After a few seconds, a window will pop up to prompt you the drive pre-installation is done.
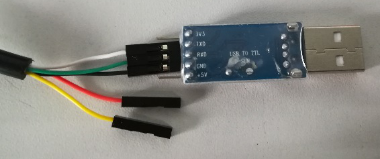
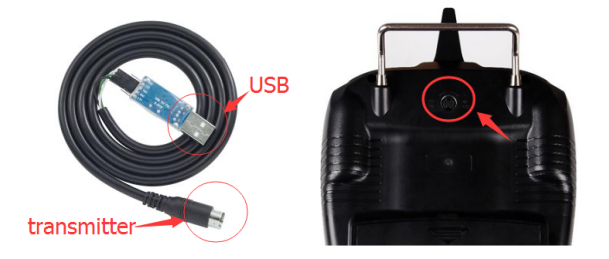
3. Connect the Radiolink T8FB USB cable: TXD to the white wire, RXD to the green and GND to the black one.
4. Insert the round plug of the cable into the round port on the back of the T8FB, and plug the USB port into the PC.
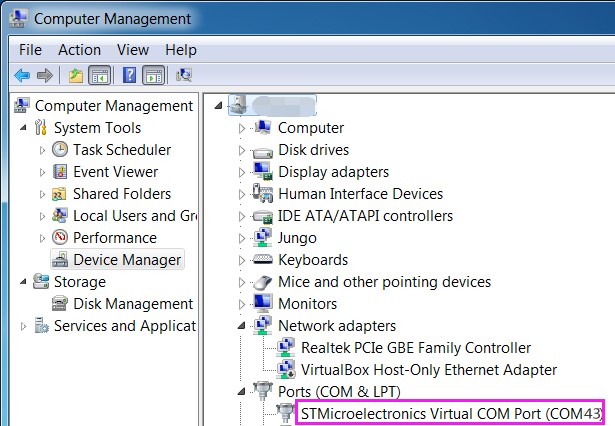
5. Then on the PC a message will pop up to prompt you the drive installation is done. Go to Device Manager -> Ports and you can see the COMxx port appear.
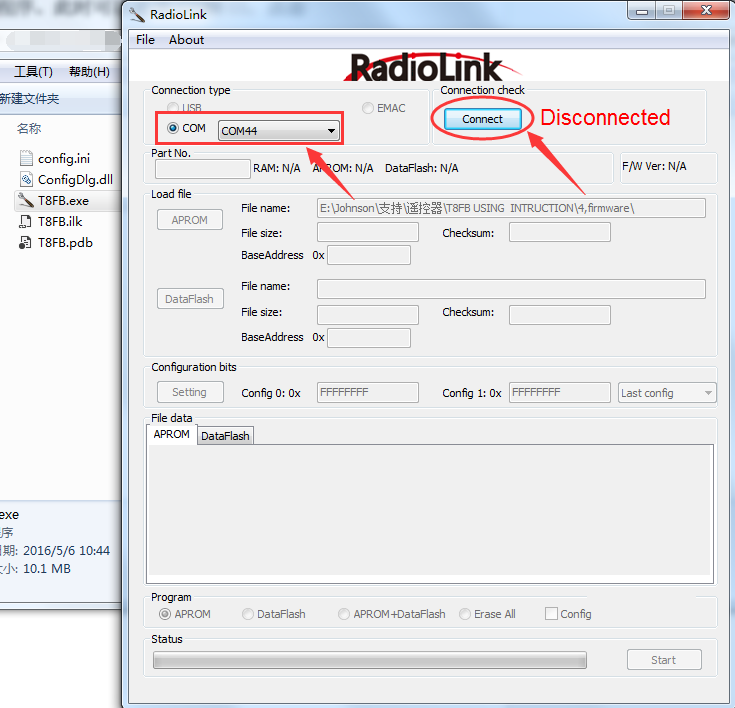
6. Open 3,firmware upgrade, unzip T8FB APP.zip. And open T8FB APP, double click to open T8FB.exe. Then the RadioLink program will pop up a window. On it you can see the COM port, click Connect and switch on the radio transmitter in 2 seconds!
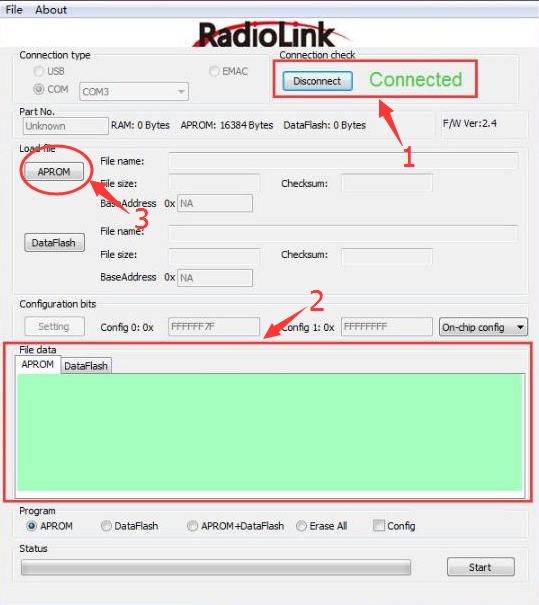
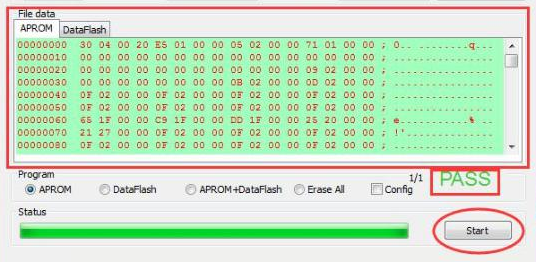
7. When the red Disconnect changes into green Connected, it means the connection succeeds. At the same time, the text box of APROM under File data will also turn into green. Click APROM as shown in 3 in the figure below.
8. Open another folder 4,firmware, click to open the second hexfile (V117, 20170308). Note: With the V117 firmware upgraded, the transmitter can only work with the new R8EF and R8FM receivers. If you want to use the previous R8EH receiver, you need to flash the older version (V113) of the firmware correspondingly.
9. Click Start and the progress bar will start going. After it goes to the end all in green, and PASS appears, it indicates the firmware upgrade or change is successful.
10. Now you can click Disconnect to break the connection.
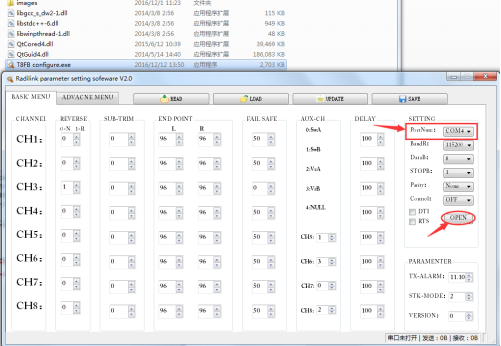
11. Open the folder 2,set parameter install and use, extract the file Radilink parameter setting sofeware V2.0.rar. Open the folder, double click to open T8FB configure.exe. Now you can see the COM port in PortNum, select it and click OPEN.
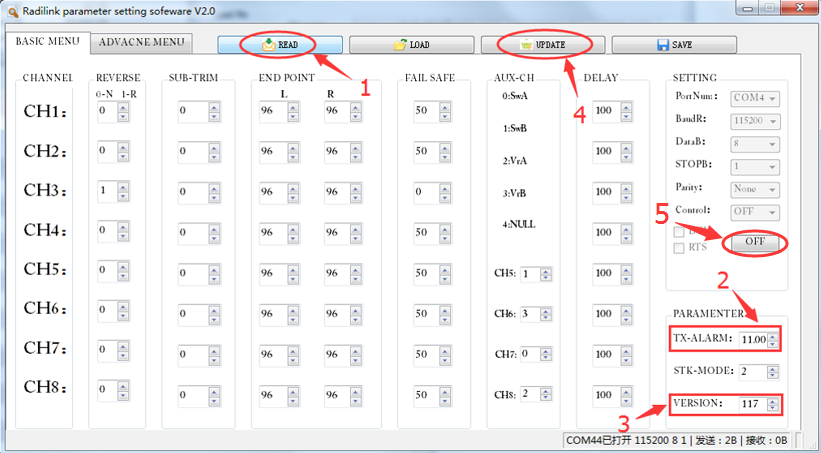
12. Click READ and the transmitter will beep twice. You can see the battery alarm voltage value TX-ALARM is 11.00V, which is the default value set by the manufacture. You can change it based on actual needs, and click UPDATE after modification. The transmitter will beep once, indicating the data has been changed and updated to the device. VERSION: 117 means the version of the firmware. Click OFF (5 in the figure) to disconnect the transmitter and the PC.
After all operations above are done, unplug the T8FB USB cable. Keep the transmitter switched on, press and hold the RESET button of the R8EF or R8FM receiver, and release it when the indicator of the receiver blinks. Wait for 5s, and the indicator will change to steady lighting, which means the re-pairing of the transmitter and receiver succeeds. At last, please calibrate the transmitter based on the manual CC3D Software Debugging, and check whether the unlocking method is good. If yes, save it and disconnect. Now you can try to fly the plane.
