How to use YwRobot Power Supply Properly
Many users were not clear how to use the YwRobot power module in SunFounder 1602 Starter Kit for Raspberry Pi. To make it easier for you to understand, we wrote this guide.
Take the following view:
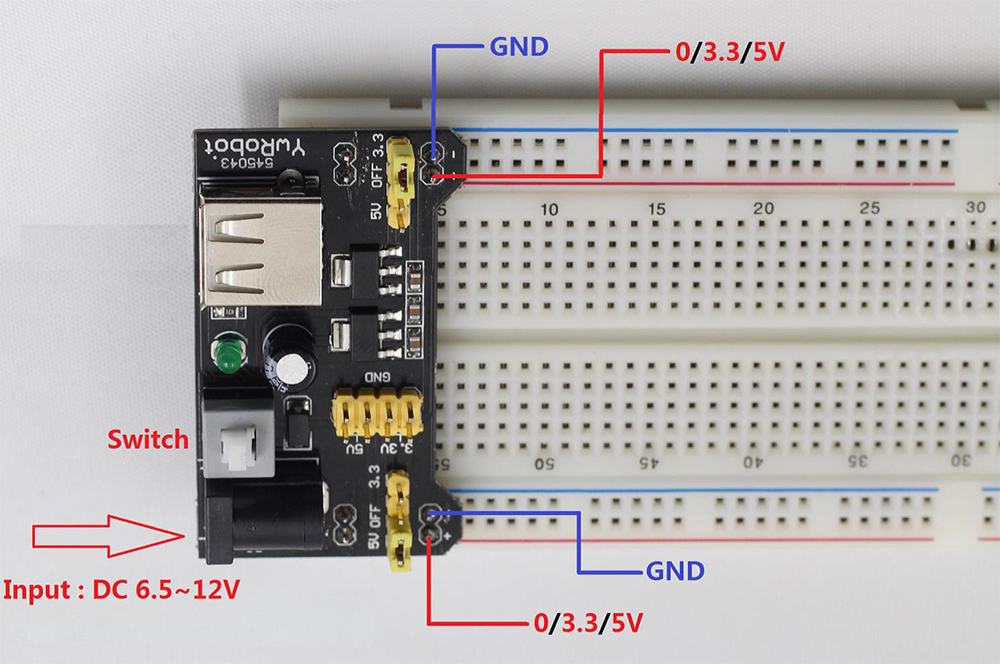

There are two power supply ports on the left side, a DC port and a USB port.
On the right side, there are two ports of power output. You can switch the power voltage of both ports between 3.3V and 5V by the jumper cap.
The USB port can supply only 5V. So if you use the USB port as power supply, the jumper cap of the output port, MUST be at 5V; or else, there will be no power supply.
The DC input port uses a 5.5mm/2.1mm plug, with a voltage ranging from 6.5V~12V. With a DC input, the output ports could switch between 3.3V and 5V.
Note: 12V is the voltage limit. If you use an AD-DC adapter, you're recommended to use 9V in case of unsteady voltage which may burn the board.
- You can buy an AC-DC adapter with a 5.5mm/2.1mm plug and 9V or 12V power supply.
- Or, a 9V battery holder or battery clip with a 5.5mm/2.1mm plug.
Also, you can DIY the battery holder yourself: buy a 5.5mm/2.1mm plug, and connect it with any battery holder providing a voltage from 6.5 to 12V (e.g. 5 to 8 AA batteries.)


That’s how to use the YwRobot power supply! Enjoy!