7-Color Auto-flash LED Module
Contents
[hide]7-Color Auto-flash LED
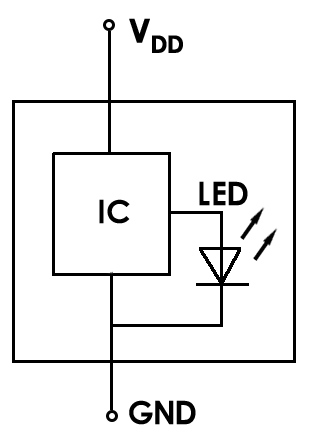
Auto-flash LED looks just like common LEDs (see Figure (a) for its schematic diagram). It is composed of a CMOS integrated circuit (IC) and an LED, as shown in Figure (b).
Principle, Connection & Applications
When using the diode, pay attention to its pole and not to connect it inversely. Generally the longer pin is anode (connected to anode of the power source), though the case can be different. So please be careful when using it.
With a simple structure and small size, auto-flash LEDs are widely used in toys and alarm or warning circuits.
7-Color Auto-flash LED Module
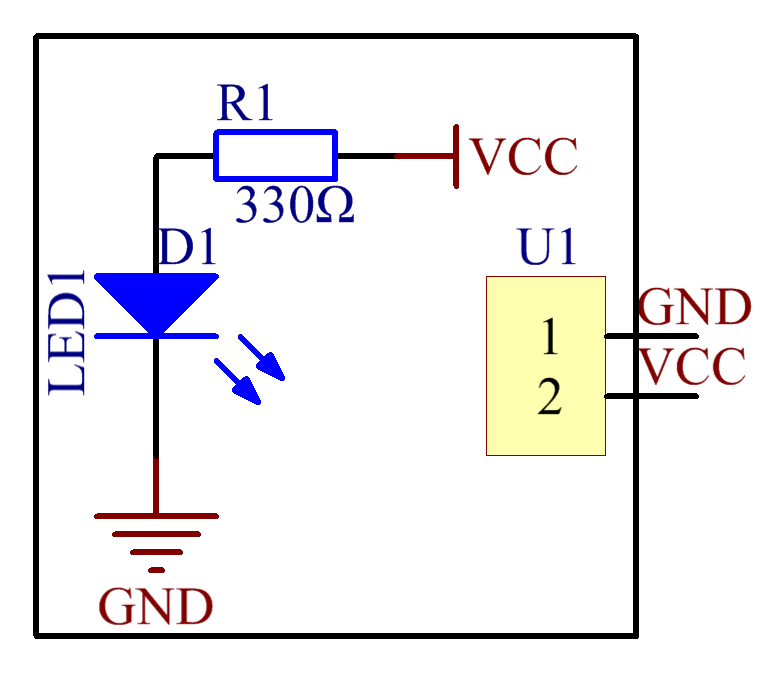
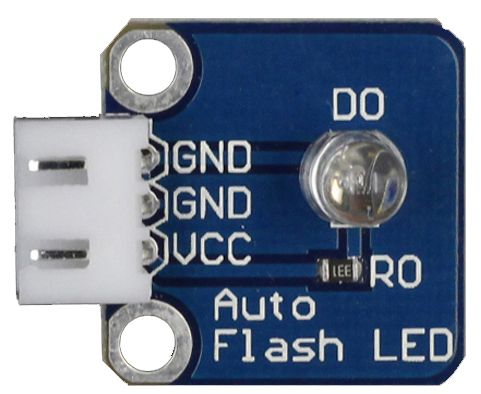
Build the module with a 7-Color Auto-flash LED and a 330 Ohm resistor, as shown below.
It contains a three-pin anti-reverse header (a 3-pin anti-reverse cable is provided) labeled with GND, GND, and VCC beside. Connect 5V or 3.3V to the VCC (the higher voltage you use, the LED will be brighter), then either of the GND to GND of the power. Now you can see the LED flashing and changing colors.
Schematic Diagram
The schematic diagram:

The schematic is simple – just connect a 330 Ohm resistor to protect the LED from being burnt.
When it is power on, the 7-color LED will flash the built-in colors.
Features
1) A module with an auto-flash LED that can flash up to 7 colors.
2) No programming needed. Just connect it with power supply and it'll work.
3) 3-Pin anti-reverse cable included.
4) Working voltage: 3.0~5V
5) PCB size: 2.0 x 2.0 cm
6) Model: YB-3120B4PnYG-PM
7) 5mm round head LED
8) Light color: Pink, yellow, green (highlight), etc.
9) Lens type: white fog
Resource
Test Experiment for Arduino![]()
Test Experiment for Raspberry Pi![]()


