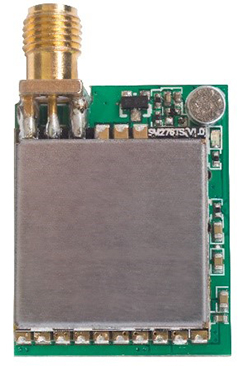
SF-A01 Video Transmission Module
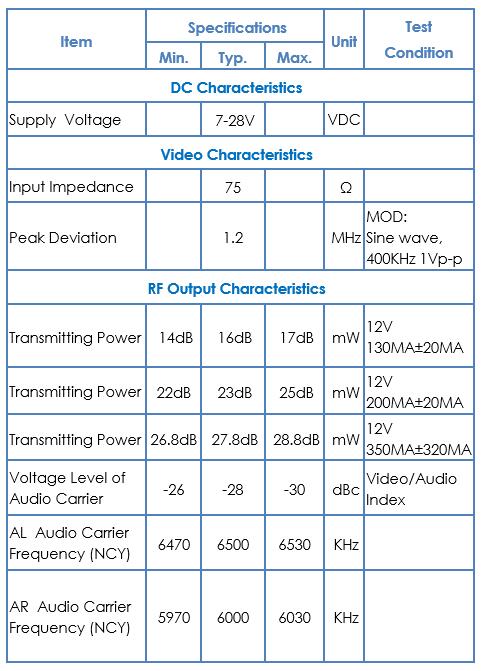
Technical Specifications
Features
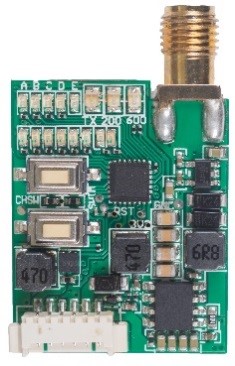
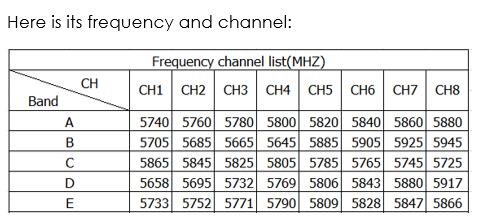
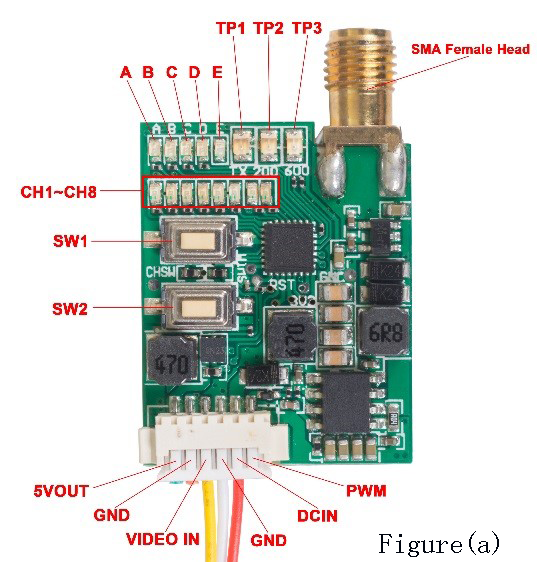
The blue LED indicates the frequency group. If the indicator A lights up, it indicates that the current frequency group is A group.
The green LED indicates the channel. If the indicator CH1 lights up, it indicates that the current channel is CH1.
Dimensions: 28.5 x 22.4 x 7.7 mm
Model: SF-A01 (5.8G, 40ch); Weight: 6.9g
Button Function
Button SW1:
Double-press SW1 to switch on or off the TP1 LED. The module starts transmitting signals when the indicator TP1 lights up. The LED will be off when the module doesn’t transmit signals.
When connecting to the power supply for the first time, its power is as low as 14dBm. Since it has memory function, when it's power on again, the power remains the same as when it's power off last time.
TP1, TP2 and TP3 are three different indicators which represent three different powers. When only TP1 indicator lights up, the power is 25mW; When both the TP1 and TP2 light up, the power is 200mW. Its power reaches 600mW when all the three indicators light up.
Press and hold SW1 for 3s for power increase each time. The power increases progressively according to the following order: 25mW ->200mW -> 600mW.
Button SW2:
Press and hold SW2 for 2s to choose the frequency. There are A, B, C, D, and E, in total 5 groups of frequency to choose. Press for 2s for frequency group change each time. The frequency will increase progressively in a circle: A->B->C->D->E->A……
