Raspberry Pi Camera Board - Night Vision "IR-CUT" (5MP)
Introduction
DIY your own Raspberry Pi Night Vision Camera. Go night treasure hunting with friends, create a personal security system for your house, spy on the rodents eating away your plants at night. Whatever might be your big idea, our small yet powerful extension is here to serve all your needs.
The Raspberry Pi Night Vision Camera uses the Fisheye ( Wide Angle ) 175 degree lens to take a wide angle picture or video. It's equipped with photosensitive resistance and built in IR-CUT, which enables the camera to automatically detects and recognizes light and to automatically switch between the night-vision and day-time shoot mode. The advantage is that the photographs taken will not be reddish in the daytime, which also eliminates the need for manual switching. In addition, it features two high intensity Infrared LED spotlights for night time recording! So basically, we have got you covered for your 24 x 7 needs.
Also, this Raspberry Pi night vision camera uses the same OV5647 sensor as the standard Raspberry Pi camera And it's therefore able to deliver a crystal clear 5MP resolution image, or 1080p HD video recording at 30fps! The camera also has 2.0 Aperture (F) & 1.7 mm focal length making it perfect for surveillance.
Manual settings are not required. Simply plug directly into the CSI connector on the Raspberry Pi, and get on with it. The camera is compatible with RPi 4B/3B+/3B/2B
Features
- Pixels: 5 Megapixels
- Photosensitive chip: OV5647
- Focal Length: 1.7 mm
- Aperture (F): 2.0
- FOV (Diagonal): 175 degrees
- Sensor Optimum Resolution: 1080p
- Size: 11.7*6.6*3.6 cm
- Product Weight: 0.028kg
Preparation
Product List
- 1 x Raspberry Pi Camera Board
- 2 x Infrared LED Board
- 1 x 50cm FFC Cable for Raspberry Pi 4B/3/2/1B+
- 1 x Small Screwdriver
- Mounting screws
Required Preparation
- Raspberry Pi 2B/3A+/3B/3B+/4B/zero/zero w
- Raspberry Pi power adaptor
- Network Cable (it's for RPi system installation and you can ignore it if you have finished.)
- Card Reader: (it's for RPi system installation and you can ignore it if you have finished.)
- SD card (a recommended 8g and higher one) (it's for RPi system installation and you can ignore it if you have finished.)
Hardware Operation
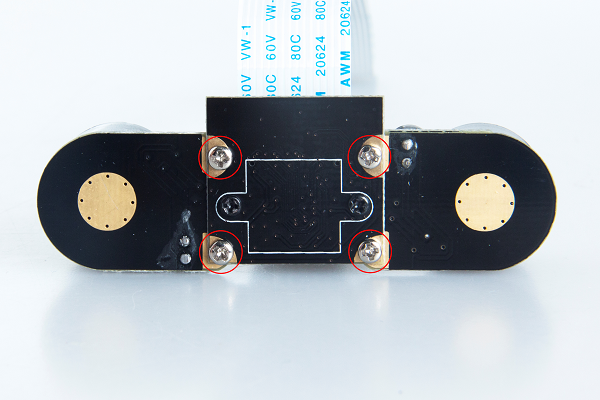
- Insert 4 screws into the 4 holes of camera, place the module as shown and assign the holes of the 2 night visual lights with the 4 screws to stack those parts on the camera plate.
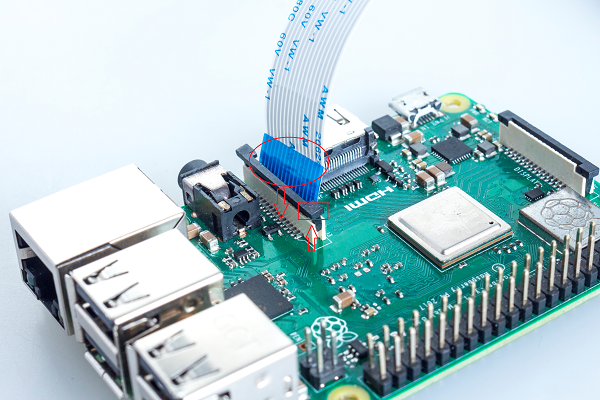
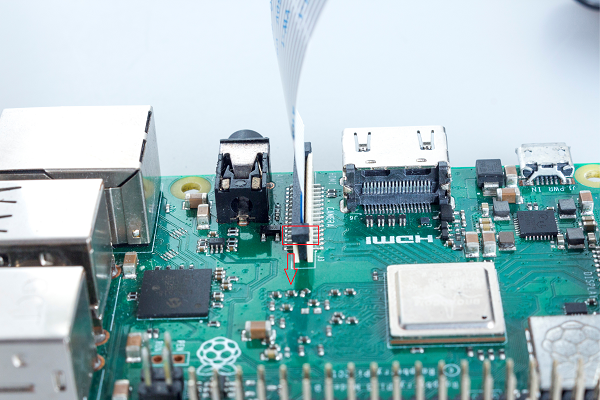
- Get the other side of the pin header connected with ports of RPi camera. To do this, you need first to pull up the black switch near the slot, and then to insert the FFC in the slot with the blue side facing the RPi USB port.
- Insert FFC firmly until it hits the deepest part of the FFC entry and push down the black switch.
Software Operation
Step1: Download RPi system
1. Click in to access the Raspberry Pi official website https://www.raspberrypi.org/downloads/,and then select to download the image you need according to your compute types (windows/MAC/Ubuntu).
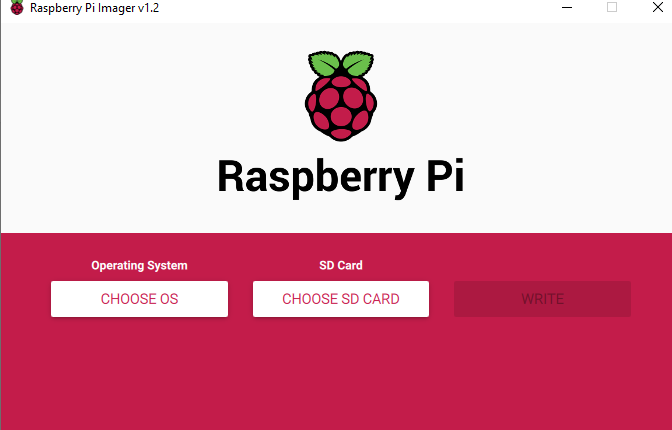
2. After downloading, click to start the installation of imager.exe. The RPi Imager page appears when the installation is done. You need to click CHOOSE OS then on the new page,select the first one.
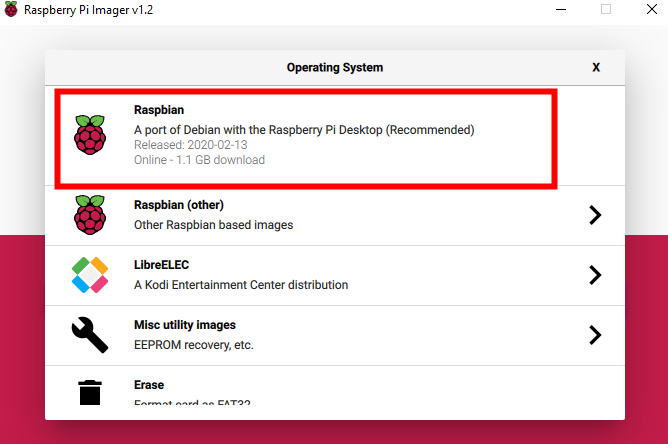
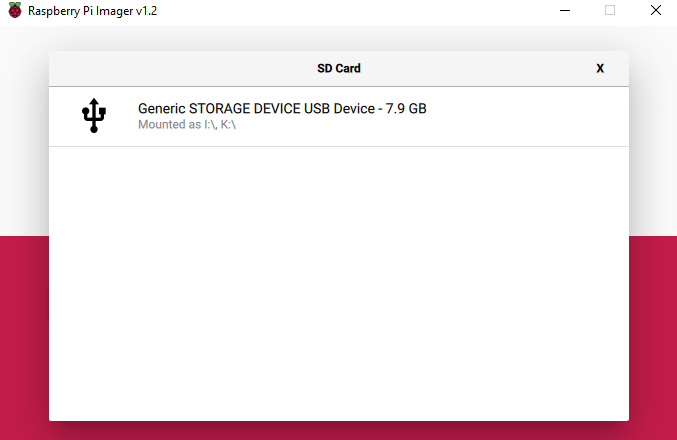
3. Insert the SD card in the card reader then plug the card reader into the computer. You should click CHOOSE SD CARD to let the following SD Card page appear. Now, select the SD card information bar. Back to the RPi page and click WRITE to download and flash the RPi system.
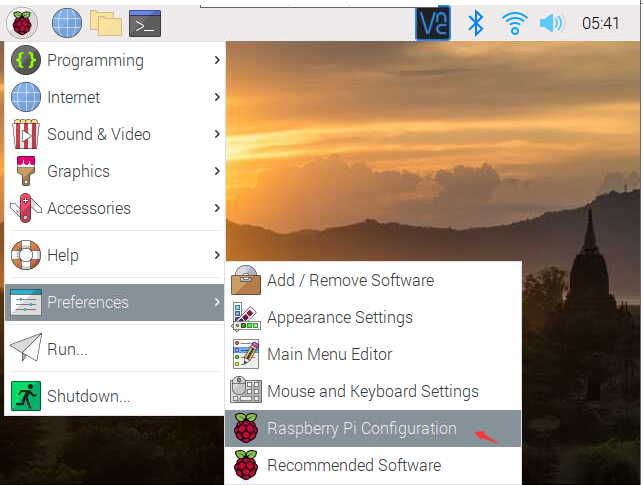
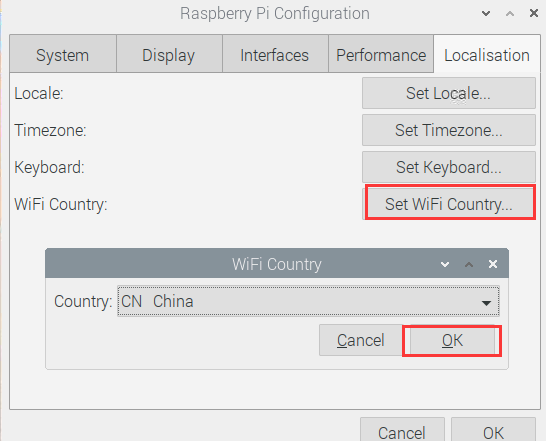
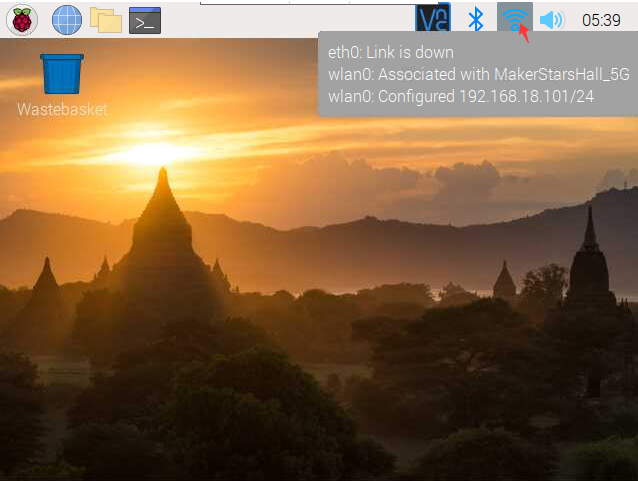
Step 2: Connect the RPi to the screen, configure RPi wifi & password, choose country & language, and click the icon to check the RPi ip.
-
Got the ip, you can use putty tool to control RPi remotely via ssh remote connection.
- putty download link: https://www.chiark.greenend.org.uk/~sgtatham/putty/latest.html
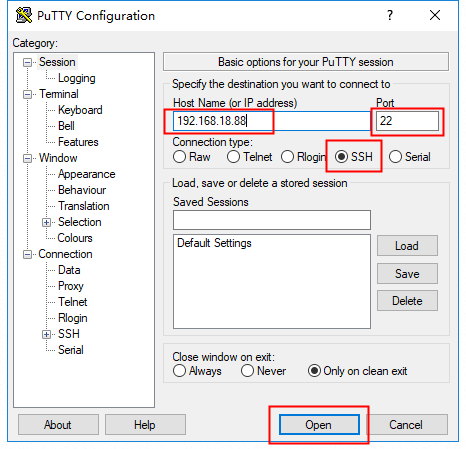
- Download finished, putty page is as shown. You need to input RPi ip, and type in 22 in the port box. Check ssh and click open to connect with RPi.
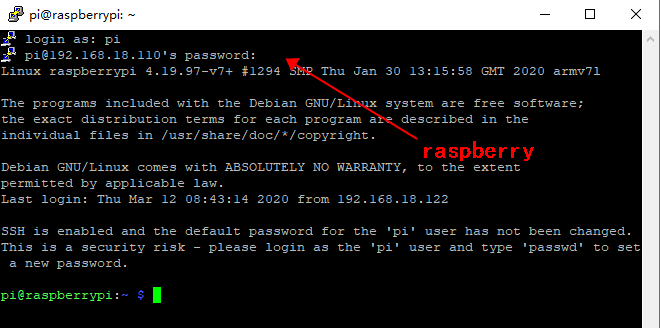
- The terminal page appears once you click open. By default, the ID is "pi" and the password is "raspberry". Note the alphabetic case.
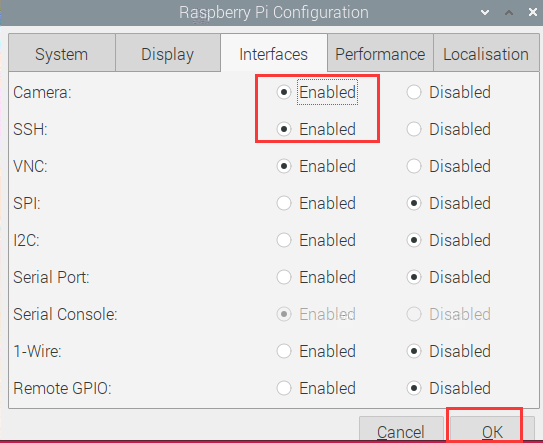
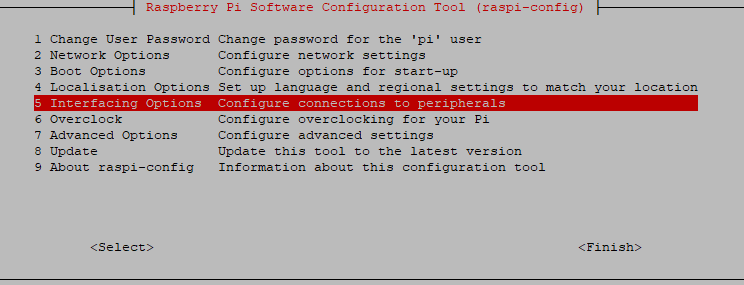
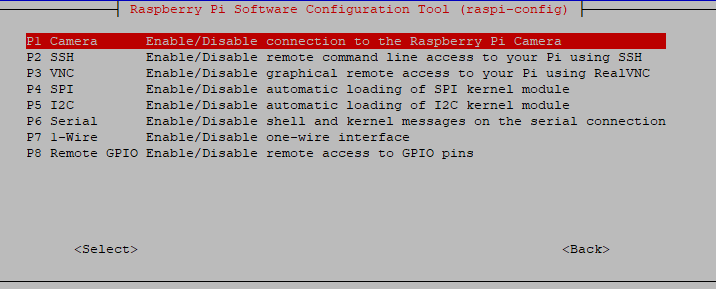
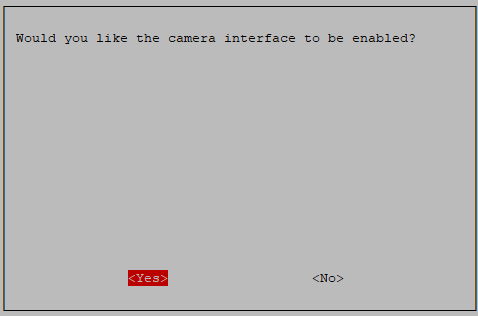
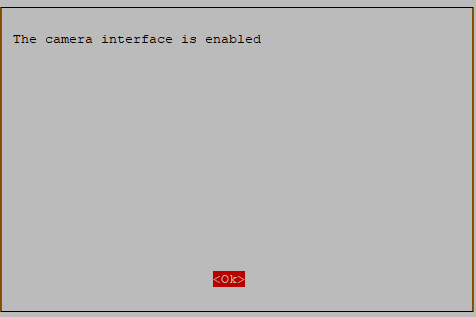
- Type in the command "sudo raspi-config" on putty, and the following page will appear. What you need to do is to select Interfacing Options, press Enter --> click Camera, press Enter --> select "YES", and press Enter -->select "OK" and then press Enter.
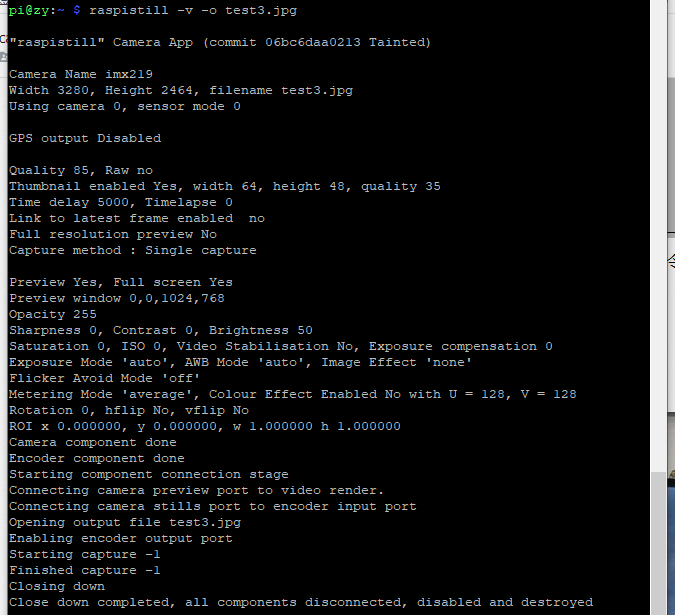
- On putty, type "raspistill -v -o test.jpg " in the command line, and the information runs successfully.
Note: The password characters are hidden when you are entering.
Step 3: Configure the camera
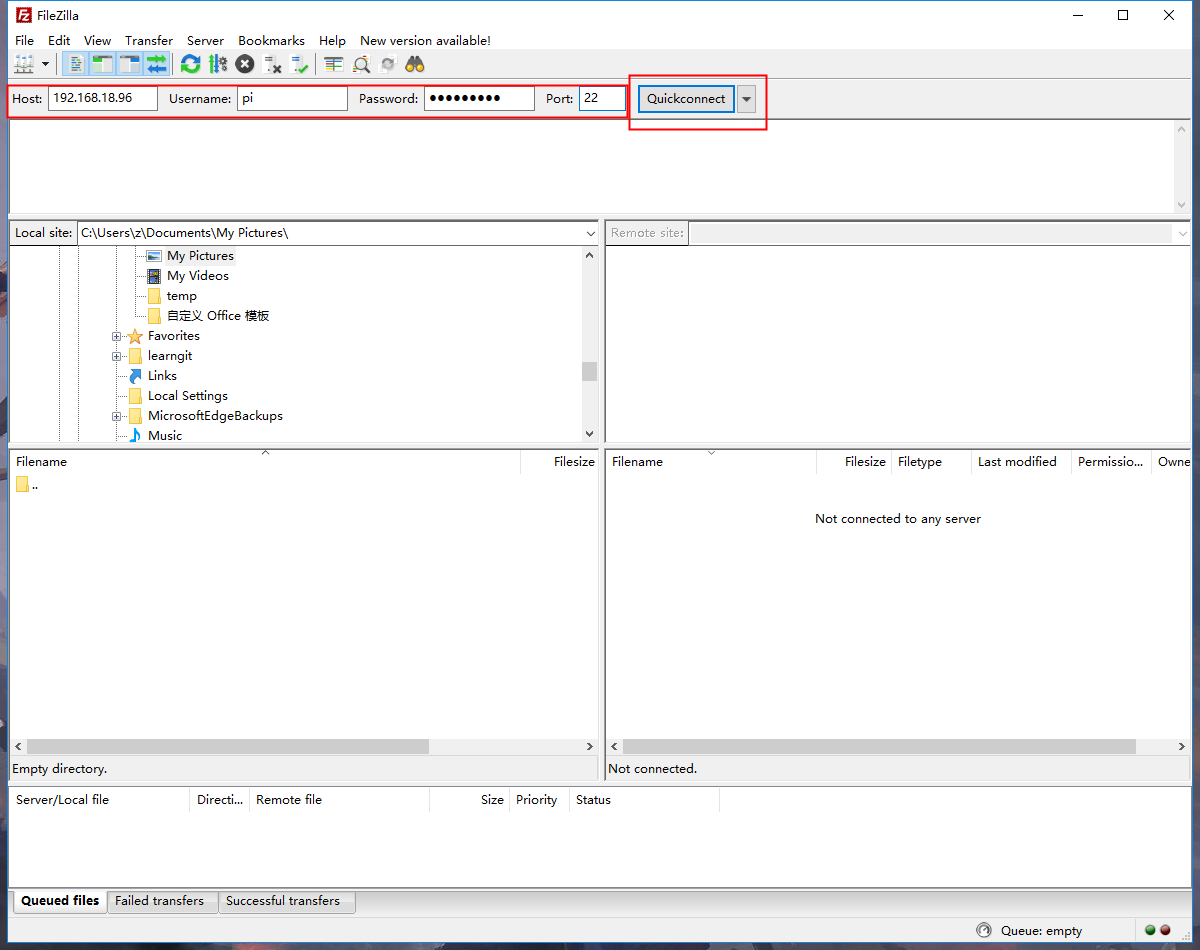
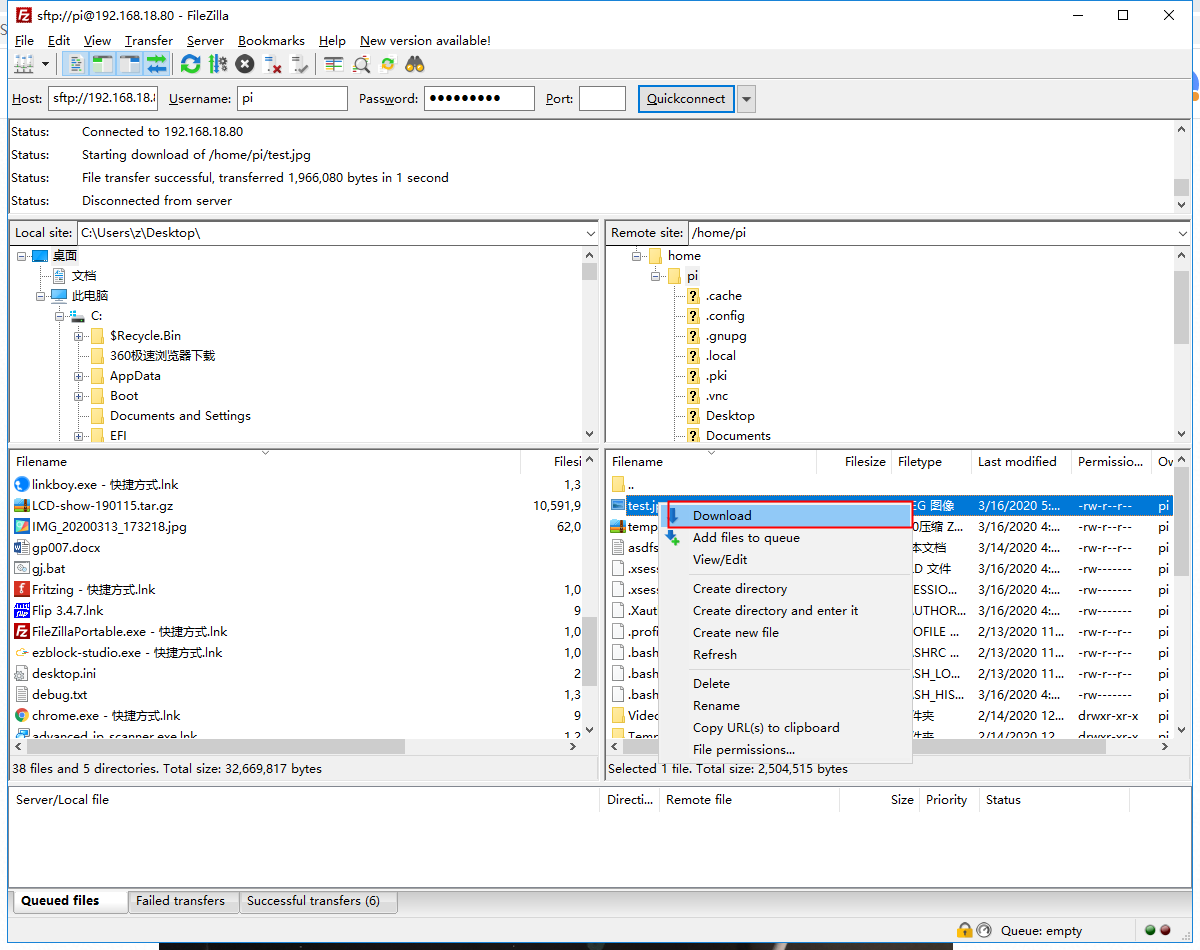
The shot picture can be checked in the pi files directory. If you have no display, you can transfer the pictures to your window computer via sftp.
- ftp link: https://filezilla-project.org/
- Back to the main page after finishing your installation. Fill the relevant box and finally click quickconnect to connect to RPi.
