Difference between revisions of "ENC8J60"
(→Resources) |
(→Procedures) |
||
| Line 40: | Line 40: | ||
1.Connect the net cable to ENC28J60 module, and connect the Arduino to computer. Connect the ENC28J60 and the Arduino as shown in the form: | 1.Connect the net cable to ENC28J60 module, and connect the Arduino to computer. Connect the ENC28J60 and the Arduino as shown in the form: | ||
| − | + | ::::::::::ENC28J60 ———————————— Arduino UNO | |
| − | + | ||
| + | :::::::::: (SCK) ———————————— 13 | ||
(MOSI) | (MOSI) | ||
(MISO) | (MISO) | ||
(CS) | (CS) | ||
| − | (GND) GND | + | (GND) GND |
| − | (VCC) 3.3V | + | (VCC) 3.3V |
2.Find the ethercard-master in the Appendix(at the bottom of the page), and copy it into the libraries folder of Arduino UNO. | 2.Find the ethercard-master in the Appendix(at the bottom of the page), and copy it into the libraries folder of Arduino UNO. | ||
Revision as of 08:25, 13 October 2016
Contents
Features
- ENC28J60 is a stand-alone Ethernet controller with an industry standard Serial Peripheral Interface (SPI™)
- Control chip:ENC28J60-I/SO; built-in 25MHz clock; Supports full and half-duplex modes
- contains an SPI port with a maximum speed of 10Mb/s
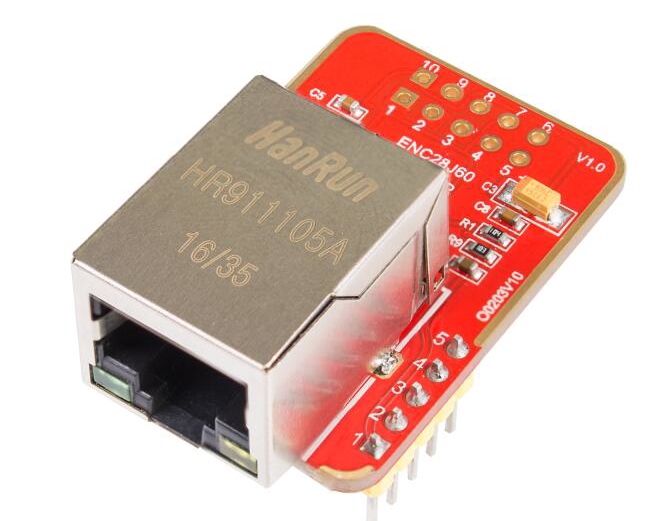
- Uses the HR911105A as the board for network interface
- Working voltage:3.3V; Board size: 56 x 34 mm(2.20inch x 1.34inch
Introduction
The ENC28J60 is a stand-alone Ethernet controller with an industry standard Serial Peripheral Interface (SPI™). It meets all of the IEEE 802.3 specifications. The controller is designed to serve as an Ethernet network interface for any controller equipped with SPI and the chip of an embedded system to connect to the Ethernet. Featured with a built-in 25MHz clock, it also supports full and half-duplex modes and contains an SPI port with a maximum speed of 10Mb/s. The chip integrates the physical layer inside, so the 8K dual-port RAM in the chip is capable of free allocation.
In application, the ENC28J60 module is suitable for small-sized embedded system due to its simple connection, easy development and low cost. Apart from the basic functions of MAC management and drive, it also boasts being perfectly suitable for MCU-based embedded application with its small package, low power consumption and SPI bus. Also the module outperforms other devices in web servers such as communication convertor and instrument, transaction terminal, IP telephone, and other Ethernet applications.
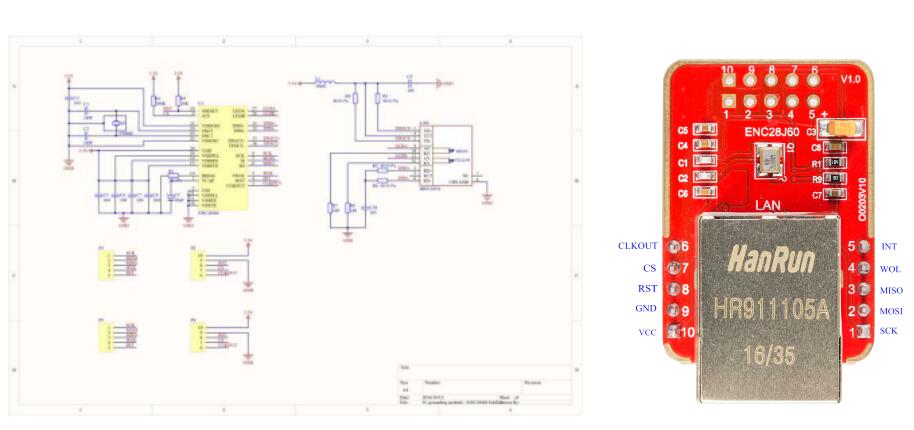
Schematic Diagram
Test
We will do a simple test to check the function of ENC28J60 module.
Accessories
1.Arduino UNO
2.Accessible net cable with crystal head
3.Computer
4.ENC28J60 module
Procedures
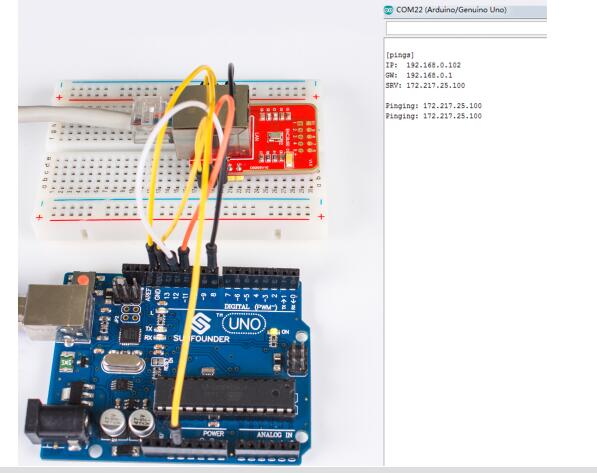
1.Connect the net cable to ENC28J60 module, and connect the Arduino to computer. Connect the ENC28J60 and the Arduino as shown in the form:
- ENC28J60 ———————————— Arduino UNO
- (SCK) ———————————— 13
(MOSI)
(MISO)
(CS)
(GND)	                                            GND
(VCC)	                                    3.3V
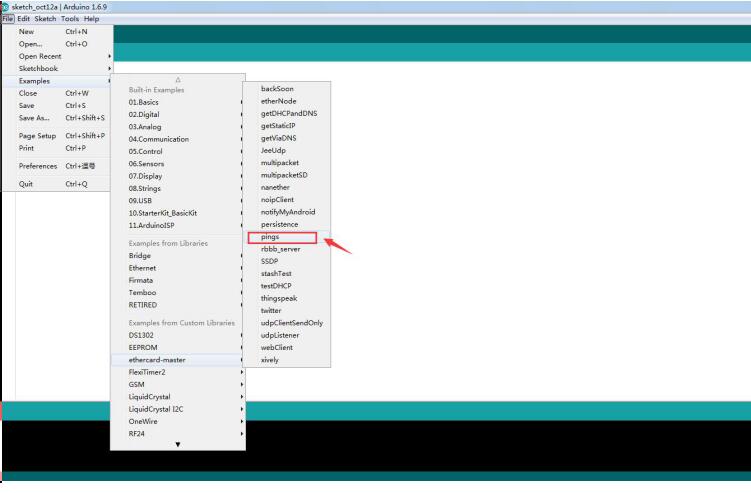
2.Find the ethercard-master in the Appendix(at the bottom of the page), and copy it into the libraries folder of Arduino UNO.
3.Start the Arduino software, and find the ethercard-master in sample directory. Run the pings program as shown below:
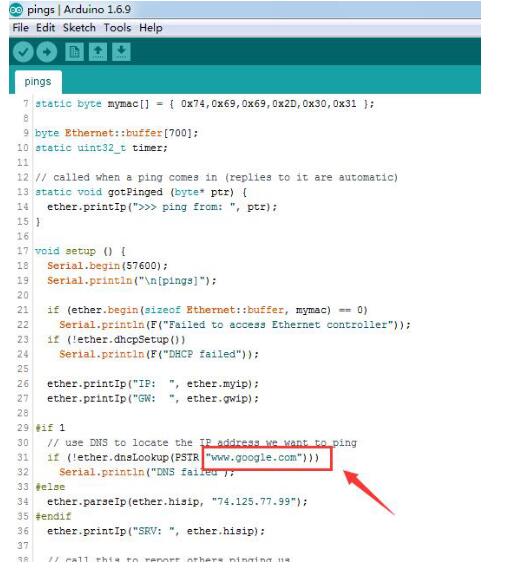
4.Open the sample pings.ino file, use DNS to locate the IP address of the website.
Download the sample code to Arduino UNO board. Open the serial monitor, set the baud rate to 57600, and it will show the practical IP address whose SRV is google’s IP, like the picture below:
Then the test is OK.
