Difference between revisions of "3.5 Inch LCD Touch Screen Monitor for Raspberry Pi"
(Created page with "<!DOCTYPE html> <html> <head> <title>3.5 Inch LCD Touch Screen en md wiki</title> <meta http-equiv="Content-Type" content="text/html; charset=utf-8" /> <style type="text/css">...") |
|||
| (39 intermediate revisions by the same user not shown) | |||
| Line 1: | Line 1: | ||
| − | |||
| − | |||
| − | |||
| − | |||
| − | |||
| − | |||
| − | |||
| − | |||
| − | |||
| − | |||
| − | + | ===Introduction=== | |
| − | ====== | + | [[File:LCD1.jpg]]<br> |
| + | This monitor is specially designed for Raspberry Pi. You're recommended to download and install the image we provide. It is written based on the Raspbian Jessie 2016-5-27 version and we've pre-installed the driver and pre-set the calibration program. So you can just burn it on your card for use. If you want to change the calibration, you can just find the program and alter it. <br> | ||
| + | Download the image at the bottom of the page, unzip the package downloaded and you'll see a .img file. Burn it to your TF card by win32imager.<br> | ||
| + | Next, connect the monitor to the Raspberry Pi, and the HDMI board. plug in the TF card with the image file burnt. Connect the power and you can start the use. | ||
| + | Or, you may install the driver based on the instructions we provide in the package. <br> | ||
| − | + | If you have any problem, please feel free to contact us, by email to service@sunfounder.com or posts on our FORUM. We'll reply you ASAP. Thanks for support!<br> | |
| − | + | ||
| − | + | ||
| − | + | ||
| − | + | ||
| − | + | <font color="red"> | |
| − | + | Note:<br> | |
| + | 1) If you're doing this on an HDMI display, you're suggested to plug in the 3.5inch display into the Raspberry Pi. After the driver is installed and the Raspberry Pi is rebooted, you can see the 3.5'' screen shows the desktop of the Raspberry Pi, while the HDMI displays the CLI (command line interface).<br> | ||
| − | |||
| − | |||
| − | |||
| − | |||
| − | |||
| − | |||
| − | |||
| − | |||
| − | |||
| − | |||
| − | + | ===Pin Description=== | |
| − | + | [[File:3.5inchdisplay.jpg]] | |
| − | + | ===Application=== | |
| − | + | This 3.5 Inch LCD touch screen monitor can be applied to Raspberry Pi 1 model B and B+, 2 model B and 3 model B. | |
| − | + | ||
| − | + | ||
| − | + | ===Operation Procedures=== | |
| − | ====== | + | [[File:LCD2.jpg]] |
| − | + | '''Download''' the simplified installation package below (or [http://wiki.sunfounder.cc/images/7/73/LCD-show.tar.gz here]). Transfer it to the Raspberry Pi. | |
| − | + | ||
| − | + | ||
| − | + | Finish the installation with '''Installation Guide''' which comes along with the product. | |
| − | + | ||
| − | + | ===Touch Screen Calibration=== | |
| − | + | ||
| − | + | ||
| − | + | ||
| − | + | ||
| − | + | ||
| − | + | 1.If there's any deviations of the touch screen, you need to calibrate it. On the touch screen, use a mouse, to click '''Menu''' -> '''Preference''' -> '''Calibrate Touchscreen'''. | |
| − | + | ||
| − | + | ||
| − | + | [[File:LCD3.jpg]] | |
| − | + | ||
| − | + | ||
| − | + | ||
| − | + | 2.Then the screen will show 4 points. You need to tap them one by one to calibrate. | |
| − | + | ||
| − | + | ||
| − | + | ||
| − | + | ||
| − | + | [[File:LCD4.jpg]] | |
| − | + | ||
| − | + | ||
| − | + | 3.After calibration, you will get the following. Copy the contents in the red box. | |
| − | + | ||
| − | + | ||
| − | + | [[File:LCD5.jpg]] | |
| − | + | ||
| − | + | ||
| − | + | 4.In the terminal, type in | |
| − | + | ||
| − | + | ||
| − | + | ||
| − | + | sudo nano /etc/X11/xorg.conf.d/99-calibration.conf | |
| − | + | ||
| − | + | ||
| − | + | ||
| − | + | Paste what you have copied just now to the file | |
| − | + | ||
| − | + | ||
| − | + | ||
| − | + | Press '''Ctrl + X''', select '''Y''', and then press '''Enter''' to save the file | |
| − | + | ||
| − | + | ||
| − | + | 5.In the terminal, type in | |
| − | + | ||
| − | + | sudo reboot | |
| − | + | After rebooting, the calibration will be done. | |
| − | + | ||
| − | + | ||
| − | + | ==Attention== | |
| − | + | <font color="red">Warning:</font>sometimes the driver installation may fail to be completed, and will further cause data missing, so you will need to reburn the system. You should clear about the risk.<br> | |
| − | + | <font color="green">Suggestion:</font>Copy the important information on SD card to another one before driver installation.<br> | |
| + | <font color="blue">Here is how:</font>Connect the Raspberry Pi to the display, click '''menu -> Accessories -> SD Card Copier''', and select the proper device to start.<br> | ||
| + | [[File:SD-1.png]]<br> | ||
| + | [[File:SD-2.png]]<br> | ||
| − | + | =='''Resource'''== | |
| − | ==== | + | [https://s3.amazonaws.com/sunfounder/Raspberry/images/3.5LCD-Show/3.5-inch-LCD-2016-09-23-raspbian-jessie.zip 3.5-inch-LCD-2016-09-23-raspbian-jessie][[File:ZIP.jpg]]<br> |
| − | + | [https://s3.amazonaws.com/sunfounder/Raspberry/images/LCD-show.tar.gz LCD-show][[File:ZIP.jpg]] | |
| − | + | ||
| − | + | ||
| − | + | ||
| − | + | ||
| − | + | ||
| − | + | ||
| − | + | ||
| − | + | ||
| − | + | ||
| − | + | ||
| − | + | ||
| − | + | ||
| − | + | ||
| − | + | ||
| − | + | ||
| − | + | ||
| − | + | ||
| − | + | ||
| − | + | ||
| − | + | ||
| − | + | ||
| − | + | ||
| − | + | ||
| − | + | ||
| − | + | ||
| − | + | ||
| − | + | ||
| − | + | ||
| − | + | ||
| − | + | ||
| − | + | ||
| − | + | ||
| − | + | ||
| − | + | ||
| − | + | ||
| − | + | ||
| − | + | ||
| − | + | ||
| − | + | ||
| − | + | ||
| − | + | ||
| − | + | ||
| − | + | ||
| − | + | ||
| − | + | ||
| − | + | ||
| − | + | ||
| − | + | ||
| − | + | ||
| − | + | ||
| − | + | ||
| − | + | ||
| − | + | ||
| − | / | + | |
| − | + | ||
| − | + | ||
| − | + | ||
| − | + | ||
| − | + | ||
| − | + | ||
| − | + | ||
| − | + | ||
| − | + | ||
| − | + | ||
| − | + | ||
| − | + | ||
| − | + | ||
| − | + | ||
| − | + | ||
| − | + | ||
| − | + | ||
| − | + | ||
| − | + | ||
| − | + | ||
| − | + | ||
| − | + | ||
| − | + | ||
| − | + | ||
| − | + | ||
| − | + | ||
| − | + | ||
| − | + | ||
| − | + | ||
| − | + | ||
| − | + | ||
| − | + | ||
| − | + | ||
| − | + | ||
| − | + | ||
| − | + | ||
| − | + | ||
| − | + | ||
| − | + | ||
| − | + | ||
| − | + | ||
| − | + | ||
| − | + | ||
| − | + | ||
| − | + | ||
| − | + | ||
| − | + | ||
| − | + | ||
| − | + | ||
| − | + | ||
| − | + | ||
| − | + | ||
| − | + | ||
| − | + | ||
| − | + | ||
| − | + | ||
| − | + | ||
| − | + | ||
| − | + | ||
| − | + | ||
| − | + | ||
| − | + | ||
| − | + | ||
| − | + | ||
| − | + | ||
| − | + | ||
| − | + | ||
| − | + | ||
| − | + | ||
| − | + | ||
| − | + | ||
| − | + | ||
| − | + | ||
| − | + | ||
| − | + | ||
| − | + | ||
| − | + | ||
| − | + | ||
| − | + | ||
| − | + | ||
| − | + | ||
| − | + | ||
| − | + | ||
| − | + | ||
| − | + | ||
| − | + | ||
| − | + | ||
| − | + | ||
| − | + | ||
| − | + | ||
| − | + | ||
| − | + | ||
| − | + | ||
| − | + | ||
| − | + | ||
| − | + | ||
| − | + | ||
| − | + | ||
| − | + | ||
| − | + | ||
| − | + | ||
| − | + | ||
| − | + | ||
| − | + | ||
| − | + | ||
| − | + | ||
| − | + | ||
| − | + | ||
| − | + | ||
| − | + | ||
| − | + | ||
| − | + | ||
| − | + | ||
| − | + | ||
| − | + | ||
| − | + | ||
| − | + | ||
| − | + | ||
| − | + | ||
| − | + | ||
| − | + | ||
| − | + | ||
| − | + | ||
| − | + | ||
| − | + | ||
| − | + | ||
| − | + | ||
| − | + | ||
| − | + | ||
| − | + | ||
| − | + | ||
| − | + | ||
| − | + | ||
| − | + | ||
| − | + | ||
| − | + | ||
| − | + | ||
| − | + | ||
| − | + | ||
| − | + | ||
| − | + | ||
| − | + | ||
| − | + | ||
| − | + | ||
| − | + | ||
| − | + | ||
| − | + | ||
| − | + | ||
| − | + | ||
| − | + | ||
| − | + | ||
| − | + | ||
| − | + | ||
| − | + | ||
Latest revision as of 06:33, 8 August 2017
Contents
Introduction
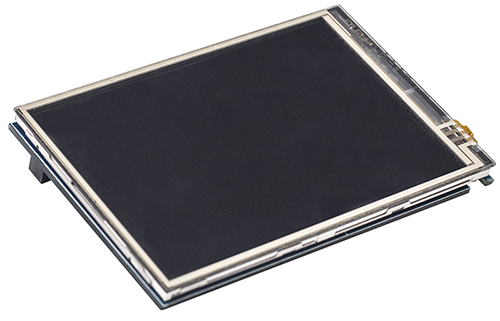
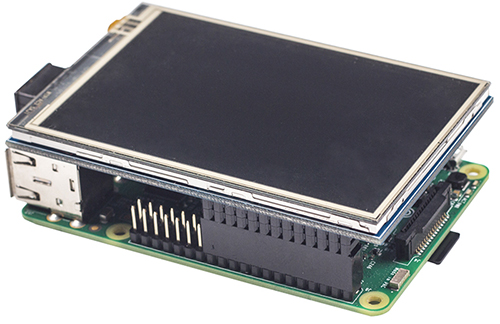
This monitor is specially designed for Raspberry Pi. You're recommended to download and install the image we provide. It is written based on the Raspbian Jessie 2016-5-27 version and we've pre-installed the driver and pre-set the calibration program. So you can just burn it on your card for use. If you want to change the calibration, you can just find the program and alter it.
Download the image at the bottom of the page, unzip the package downloaded and you'll see a .img file. Burn it to your TF card by win32imager.
Next, connect the monitor to the Raspberry Pi, and the HDMI board. plug in the TF card with the image file burnt. Connect the power and you can start the use.
Or, you may install the driver based on the instructions we provide in the package.
If you have any problem, please feel free to contact us, by email to service@sunfounder.com or posts on our FORUM. We'll reply you ASAP. Thanks for support!
Note:
1) If you're doing this on an HDMI display, you're suggested to plug in the 3.5inch display into the Raspberry Pi. After the driver is installed and the Raspberry Pi is rebooted, you can see the 3.5 screen shows the desktop of the Raspberry Pi, while the HDMI displays the CLI (command line interface).
Pin Description
Application
This 3.5 Inch LCD touch screen monitor can be applied to Raspberry Pi 1 model B and B+, 2 model B and 3 model B.
Operation Procedures
Download the simplified installation package below (or here). Transfer it to the Raspberry Pi.
Finish the installation with Installation Guide which comes along with the product.
Touch Screen Calibration
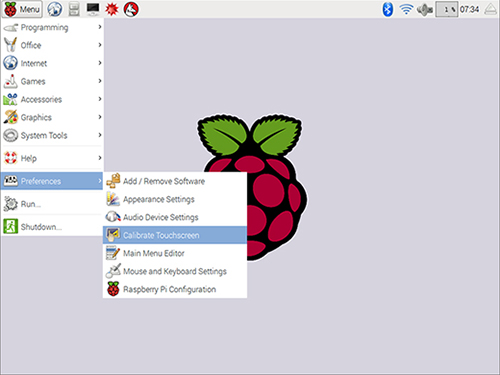
1.If there's any deviations of the touch screen, you need to calibrate it. On the touch screen, use a mouse, to click Menu -> Preference -> Calibrate Touchscreen.
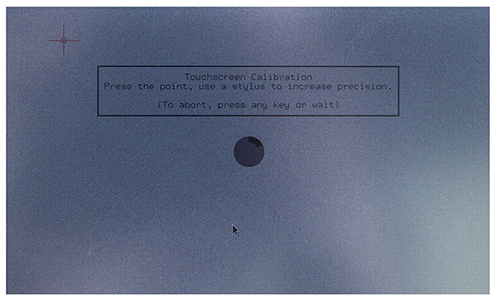
2.Then the screen will show 4 points. You need to tap them one by one to calibrate.
3.After calibration, you will get the following. Copy the contents in the red box.
4.In the terminal, type in
sudo nano /etc/X11/xorg.conf.d/99-calibration.conf
Paste what you have copied just now to the file
Press Ctrl + X, select Y, and then press Enter to save the file
5.In the terminal, type in
sudo reboot
After rebooting, the calibration will be done.
Attention
Warning:sometimes the driver installation may fail to be completed, and will further cause data missing, so you will need to reburn the system. You should clear about the risk.
Suggestion:Copy the important information on SD card to another one before driver installation.
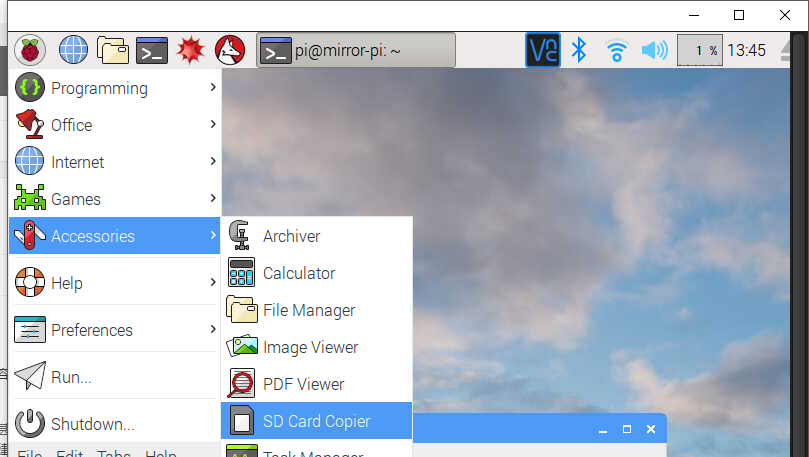
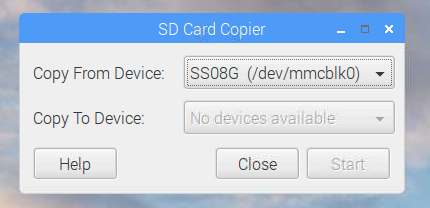
Here is how:Connect the Raspberry Pi to the display, click menu -> Accessories -> SD Card Copier, and select the proper device to start.
