QMC5883L
Introduction
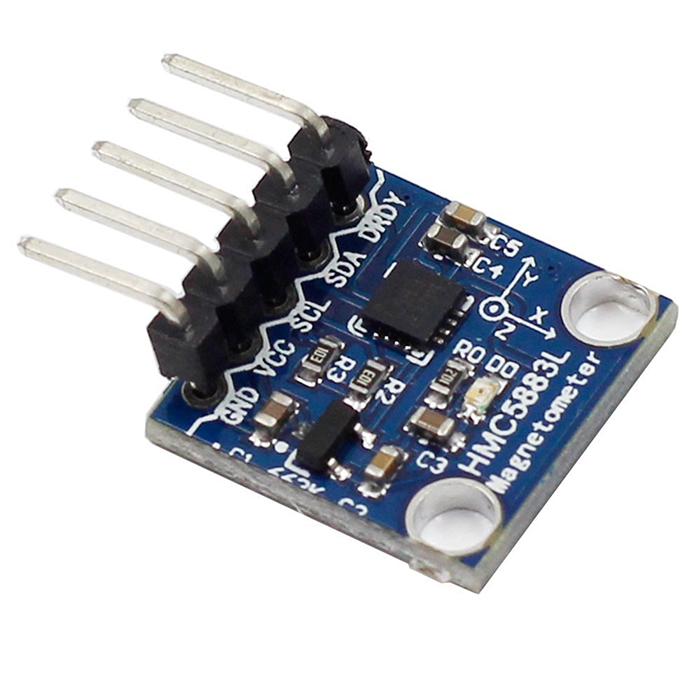
The module includes a state-of-the-art, high-resolution QMC5883X series magneto-resistive sensor, plus an ASIC containing amplification, automatic degaussing strap drivers, offset cancellation, and a 12-bit ADC that enables 1° to 2° compass heading accuracy. The I2C serial bus allows for easy interface.
Features
(1)The Honeywell QMC5883L is a surface-mount, multi-chip module designed for low-field magnetic sensing with a digital interface for applications such as low cost compassing and magnetometry
(2)The 12-Bit ADC coupled with low noise AMR sensors achieves 5 milli-gauss field resolution in ±8 gauss fields
(3)Low voltage operations and low power consumption; supports built-in self-test
(4)Built-in strap drive circuits, I2C digital interface, wide magnetic field range (+/-8 oe)
(5)Working voltage: 3.3v-5v; PCB size: 1.3 x 2.3 cm (QMC5883L size: 3.0 x 3.0 x 0.9 mm), with a16-pin leadless chip carrier (LCC)
Schematic
Pin Function
- VCC+5V - power pin, give it 3.3v-5VDC. For Arduino,recommand 5v
- GND - ground pin
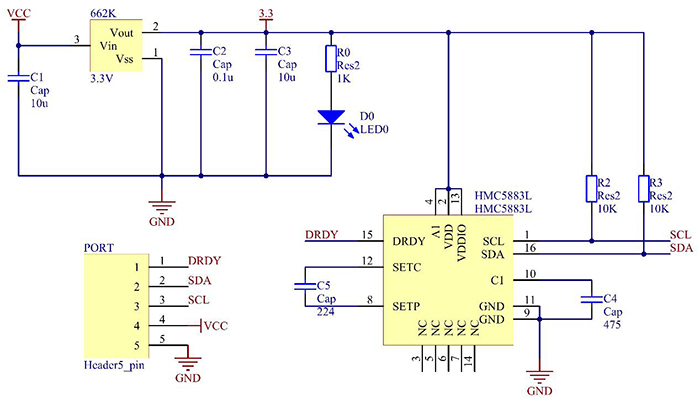
- SDA and SCL - these are the I2C data and clock pins used to send and receive data from the module to your microcontroller. There are 10K pullups on these pins to the 3.3v pin. You can connect these pins to 5V I2C lines, there are level shifters on board to safely bring the pins down to 3V
- DRDY - this it the 'data ready' pin output. If you want to stream data at high speed (higher than 100 times a second) you may want to listen to this pin for when data is ready to be read. Check the datasheet for more details about using the DRDY pin, we don't use it because we don't read that fast!
Test Experiment
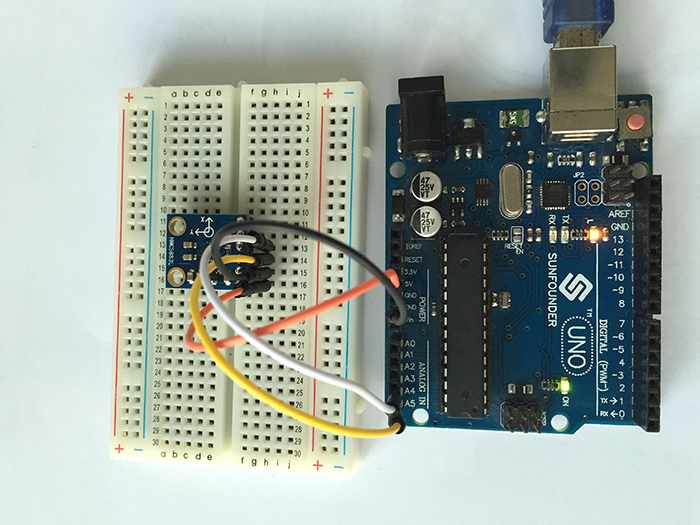
1.Build the circuit
- QMC5883L--------------- Uno/Mega2560
- VCC------------------- 5V
- GND------------------- GND
- SCL------------------- A5/ pin21 mega2560
- SDA------------------- A4/pin20 mega2560
- DRDY------------------ N/C
- QMC5883L--------------- Uno/Mega2560
2.Upload the code
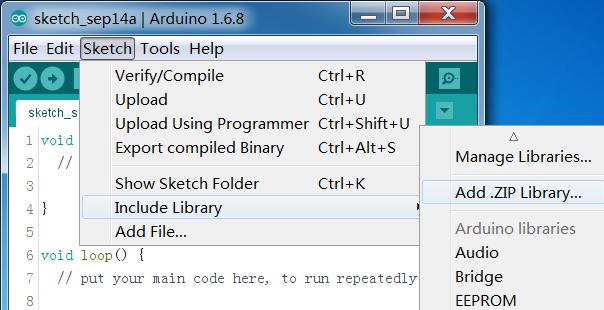
1)Before you Upload the code ,you need to add the two library to the Arduino\libraries, Open IDE,click to Sketech -> Include library -> Add .ZIP Library
2)Find the QMC5883L.zip library, click to Open.
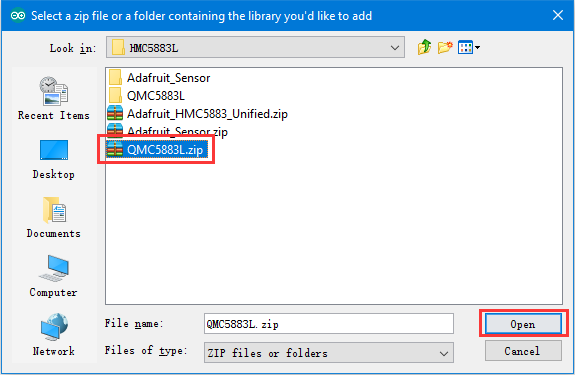
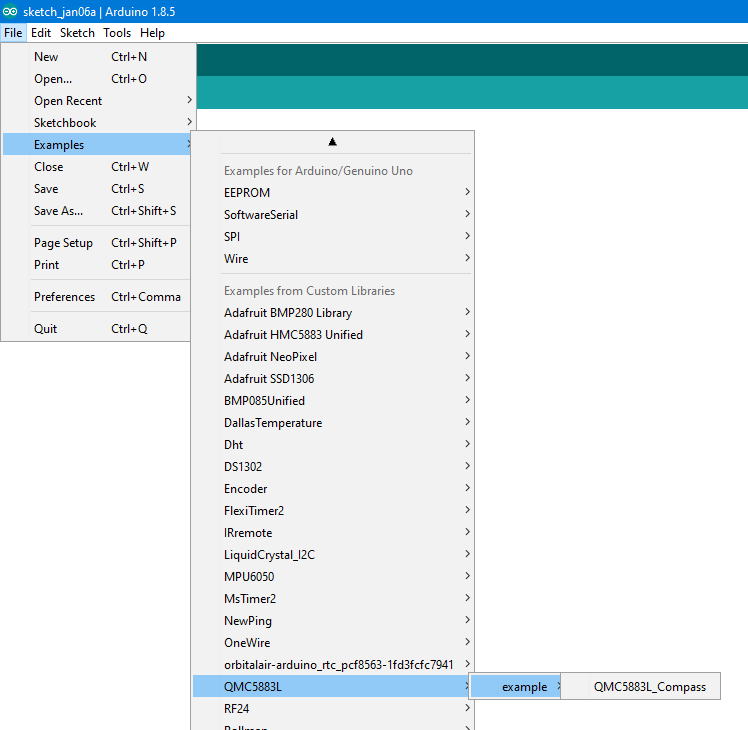
3)Click to File -> Examples -> QMC5883L -> example -> QMC5883L_Compass
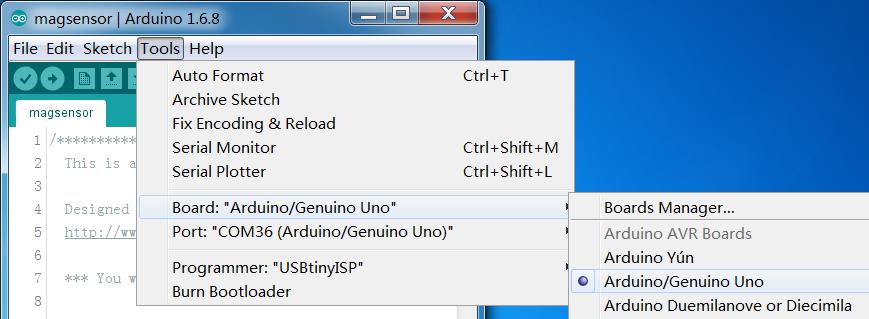
4)Select correct Board
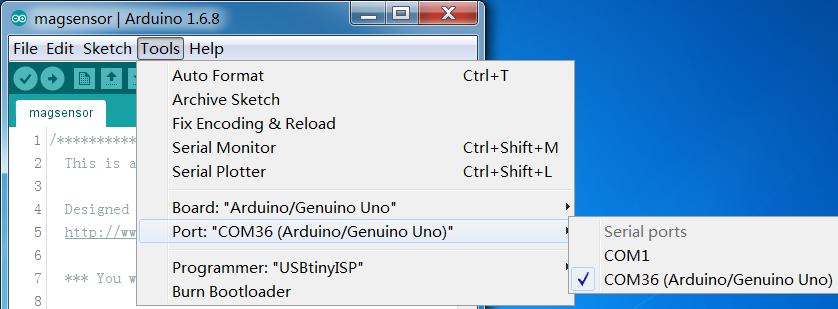
And then correct Port
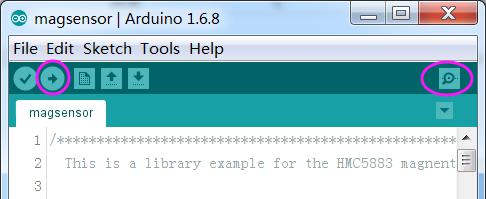
5)click the Upload icon to upload the code to the control board
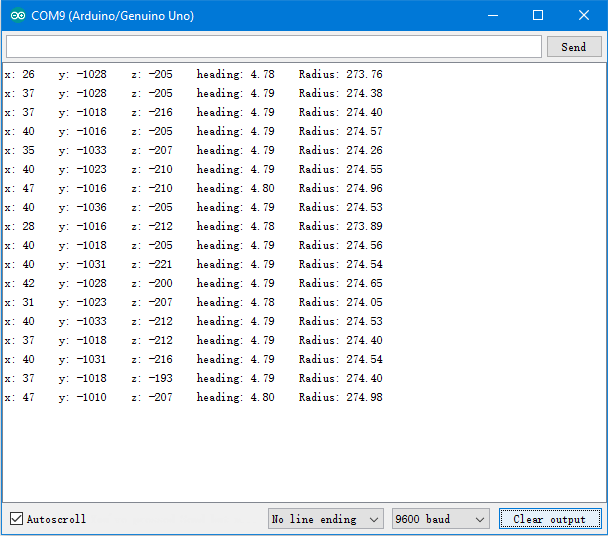
6)Open the serial monitor, You will see stream of data with X Y Z magnetometer data in uTeslas,radians and degrees. If you hold the module so that it is parallel with the ground then it will point you in the direction of North!
