Breadboard Basics – Types
Contents
[hide]Introduction
A breadboard is a construction base for prototyping of electronics. It is used to build and test circuits quickly before finalizing any circuit design. And it has many holes into which circuit components like ICs and resistors can be inserted. The breadboard allows you to easily plug in and remove components and so if there are going to be many changes or if you just want to make a circuit quickly, it will be much quicker than soldering up your circuit.
Therefore in lots of experiments, it is often used as a hub to connect two or more devices. By internal structure, it can be divided into two types with some variations.
1. Full+
1) Holes in the top and bottom 4 rows
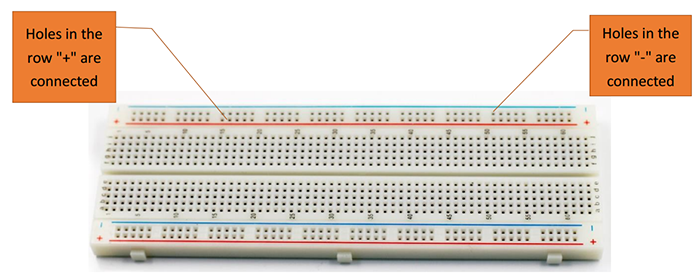
The breadboard has strips of metal which run underneath the board and connect the holes on the top of the board. The metal strips are laid out as shown below. Note that the top and bottom 4 rows of holes in total are connected horizontally, marked with "+" and "-", while the remaining holes are connected vertically.
 ]]File:Breadboard.png]];;
 ;;[[File:Led.png
File:Gfgf.png;;File:Fsahd.png;;File:Mianbap.png;;
 ;;
;;
 ;;File:Tiny.png ;;
 ;;
;;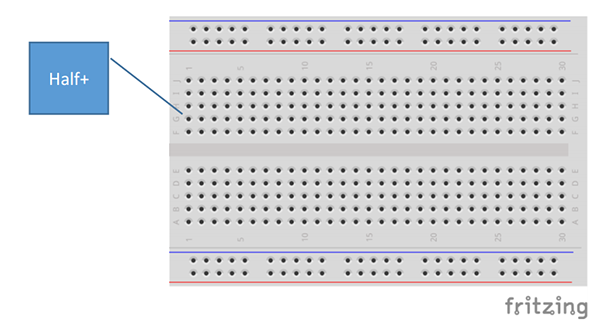
Figure 1
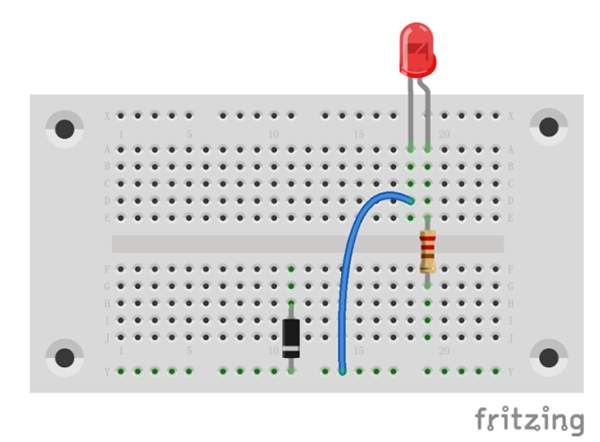
Take this: in Figure 2, the cathode of the LED and that of the diode is connected.
Figure 2
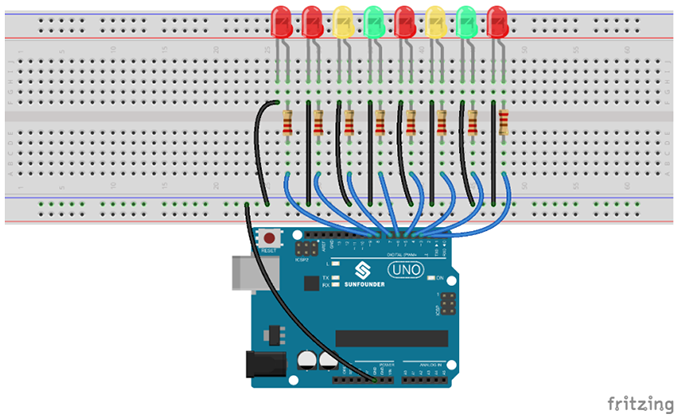
Thus, you can see the holes in the same row at the top and bottom are connected. The metal strips beneath connects VCC and GND. In a circuit, when you need to connect GND of all the devices, you'll need them. As shown below, the cathode of all the LEDs are connected, and then hooked up to GND of the SunFounder Uno board.
Figure 3
2) Holes in the center section
Figure 4
Figure 5
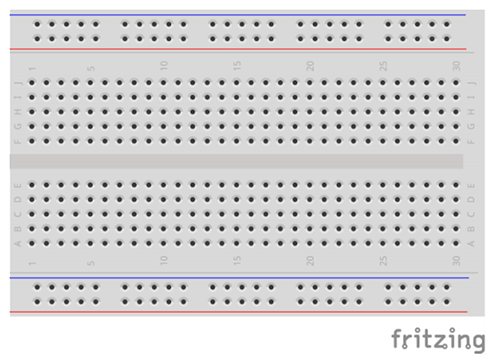
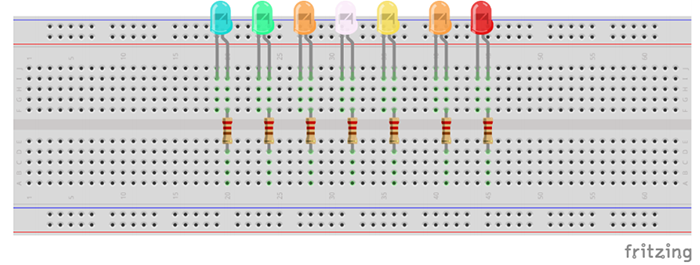
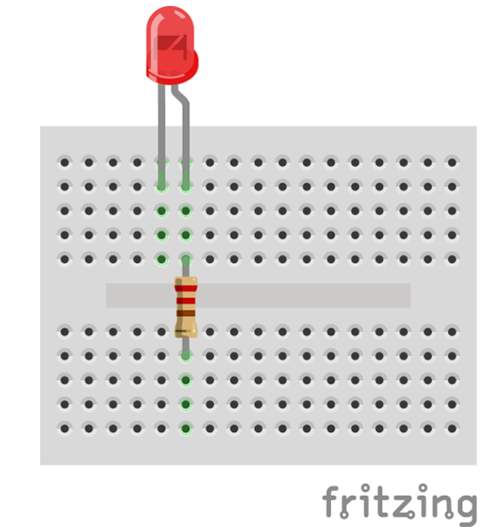
As we can see in Figure 5, groups of holes (terminals) vertically numbered from 1 to 60 (3 more after 60) are connected respectively. For example, in Figure 6, the anode of each LED is connected with a 220ohm resistor. Then the other pin of the resistor is hooked up to the control board.
Figure 6
To conclude, there are 126 groups of 5 connected terminals on a breadboard. Usually connect the components and parts via the groups of terminals. In an experiment, when many components are used, you may hook them to a breadboard, thus making the wiring easy, simple and clear.
Note: The internal structure of a full+ sized breadboard and a half+ one is the same; the only difference lies in the length. As the name suggests, the half+ is half as long as the full+.
Figure 7
2. Full
A full sized breadboard is a little bit different from a full+ sized one. Plug a diode on the breadboard. You can see in Figure 8, the groups of terminals in the left half of the long row are green; there is a division vertical line in the middle, and groups on its right side are grey. Therefore, each of the 4 long rows is segmented into two.
Figure 8
For example, in Figure 9, the cathode of the diode and that of the LED is not connected.
Figure 9
This is the only difference between a full sized breadboard and a full+ sized one. On a full sized breadboard, the holes of each group in the center sections are also connected vertically.
3. Half & Half+
The internal structure of a half sized breadboard is the same as that of a half+ sized one. The difference lies in their appearance: there are two red and blue lines on a half+ sized breadboard, which a half sized one does not have.
Figure 10
Figure 11
As mentioned before, the internal structure of a half (half +) sized breadboard is the same as a full (full+) sized one. So also holes of the top and bottom 4 long rows on a half or half+ sized breadboard is connected.
4. Mini
The internal structure of a mini sized breadboard is almost the same as a half sized one. Only it does not have the top and bottom 4 long rows. All it contains is the groups of terminals, which are also less than those on a half sized one. So naturally it is much smaller sized – so it is called "mini".
Figure 12
5. Tiny
The internal structure of a tiny sized breadboard is the same as a mini sized one. But tiny sized one is slightly longer; also there are numbers and letters on it. As mentioned before, the 5 terminals of each group named from 1 to 20 are connected vertically. And horizontally, A to E and F to J represents holes on one line – they are not connected.
Figure 13
6. BB-301
This kind of breadboard is a little different from the previous ones in appearance. There are one hole at each of its four corners – by which you can fix it. As for the internal structure, it's almost the same as a half sized one. But on a BB-301 breadboard there are only two long rows at the top and bottom.
Figure 14
In Figure 14, the cathode of the LED is hooked up with that of the diode, and its anode to a 220ohm resistor.