Difference between revisions of "Raspberry Pi Camera Module"
(Created page with "= Introduction = <br> File:Cam003-1.png<br> This 5 megapixels sensor with OV5647 camera module is capable of 1080p video and still images that connect directly to your Ras...") |
(No difference)
|
Revision as of 10:22, 9 April 2020
Introduction
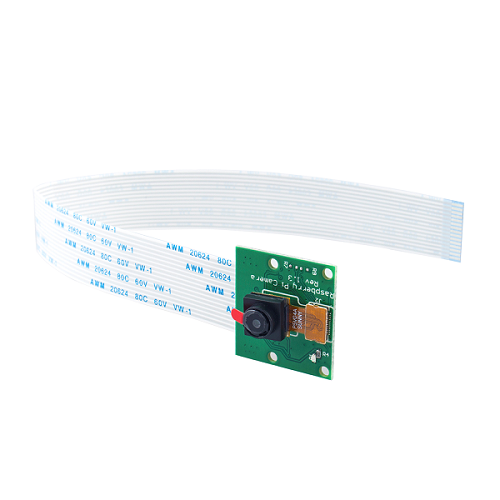
This 5 megapixels sensor with OV5647 camera module is capable of 1080p video and still images that connect directly to your Raspberry Pi. This is the plug-and-play-compatible latest version of the Raspbian operating system, making it perfect for time-lapse photography, recording video, motion detection and security applications. Connect the included ribbon cable to the CSI (Camera Serial Interface) port on your Raspberry Pi, and you are good to go!
The board itself is tiny, at around 25mm x 23mm x 9mm and weighing in at just over 3g, making it perfect for mobile or other applications where size and weight are important. The sensor has a native resolution of 5 megapixel, and has a fixed focus lens on board. In terms of still images, the camera is capable of 2592 x 1944 pixel static images, and also supports 1080p30, 720p60 and 640x480p90 video.
Note: This module is only capable of taking pictures and video, not sound.
Features
- Compatible with Raspberry Pi 4 Model B/3B+/3B/2B/Zero Wireless
- 5 Megapixel OV5647 Camera
- Camera specifications
- Static Images Resolution: 2592×1944
- Supported Video Resolution: 1080p/30 fps, 720p/ 60fps and 640 x480p 60/90 video recording
- Aperture (F): 1.8
- Visual Angle: 65 degree
- Dimension: 24mmx23.5mmx8mm
- Weight: 3g
- Interface: CSI connector
- Supported OS: Raspbian (latest version recommended)
Preparation
Product List
- 1 x Camera Module
- 1 x 15cm FFC Cable for Raspberry Pi 4B/3B/2B/1B+
Required Preparation
- Raspberry Pi 2B/3A+/3B/3B+/4B/zero/zero w
- Raspberry Pi power adaptor
- Network Cable (it's for RPi system installation and you can ignore it if you have finished.)
- Card Reader: (it's for RPi system installation and you can ignore it if you have finished.)
- SD card (a recommended 8g and higher one) (it's for RPi system installation and you can ignore it if you have finished.)
Hardware Operation
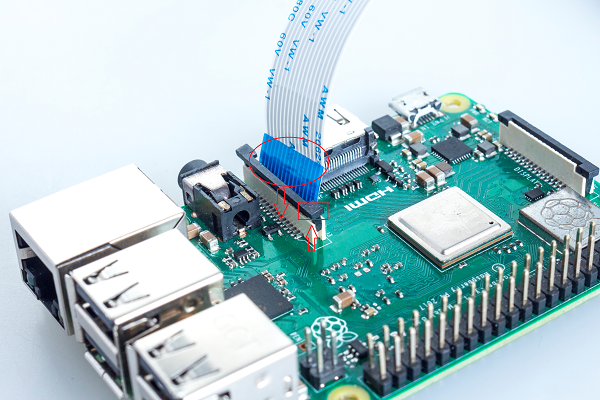
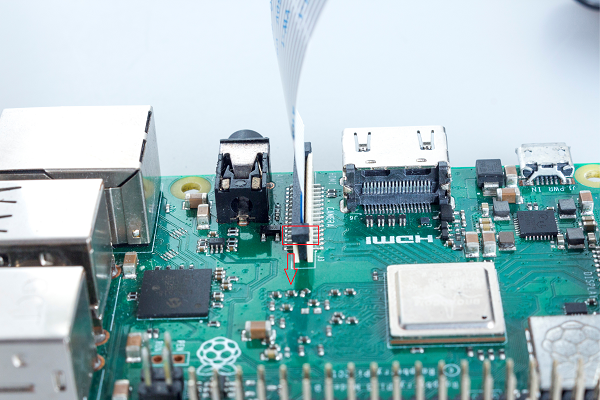
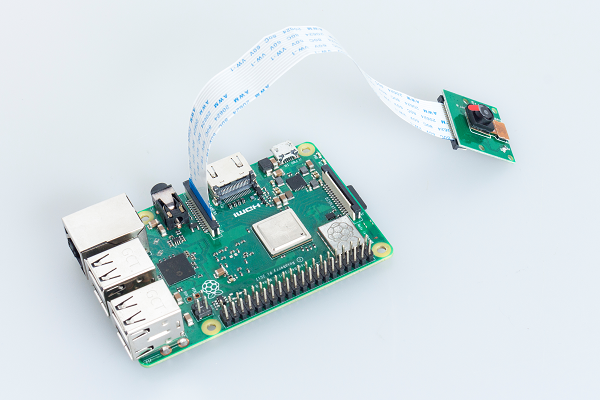
- Get the other side of the pin header connected with ports of RPi camera. To do this, you need first to pull up the black switch near the slot, and then to insert the FFC in the slot with the blue side facing the RPi USB port.
- Insert FFC firmly until it hits the deepest part of the FFC entry and push down the black switch.
- inished the above connection, you can plug the RPi adapter.
Software Operation
Step1: Download RPi system
1. Click in to access the Raspberry Pi official website https://www.raspberrypi.org/downloads/,and then select to download the image you need according to your compute types (windows/MAC/Ubuntu).
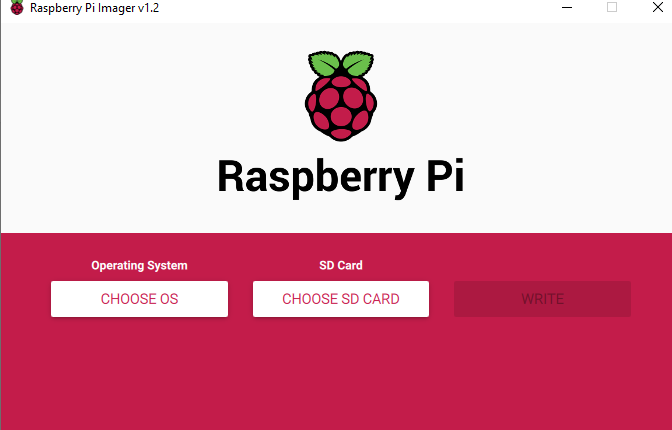
2. After downloading, click to start the installation of imager.exe. The RPi Imager page appears when the installation is done. You need to click CHOOSE OS then on the new page,select the first one.
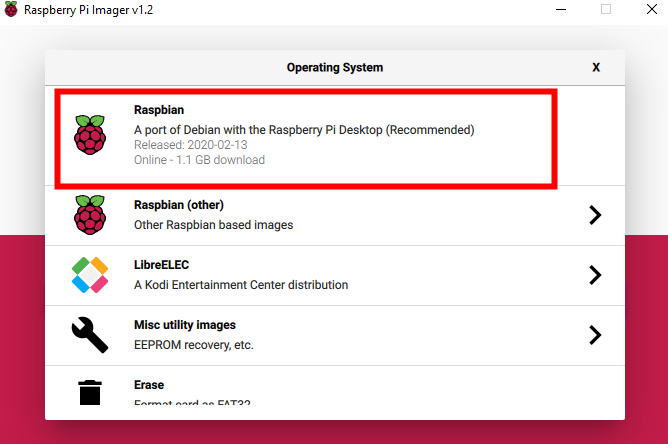
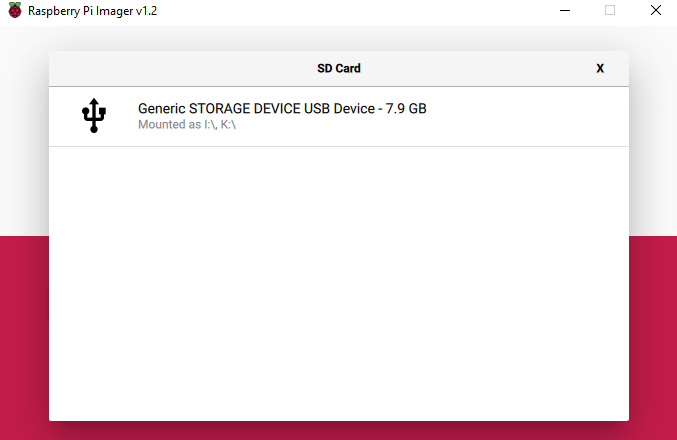
3. Insert the SD card in the card reader then plug the card reader into the computer. You should click CHOOSE SD CARD to let the following SD Card page appear. Now, select the SD card information bar. Back to the RPi page and click WRITE to download and flash the RPi system.
4. Replug the card reader once the flash is finished and create a file named ssh without suffix name in / boot directory.
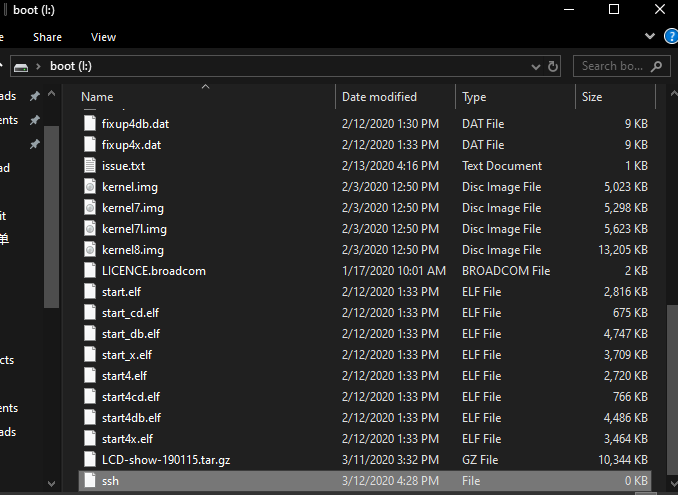
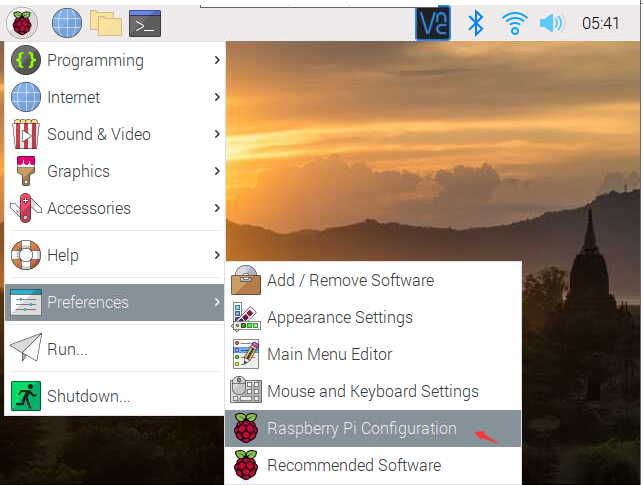
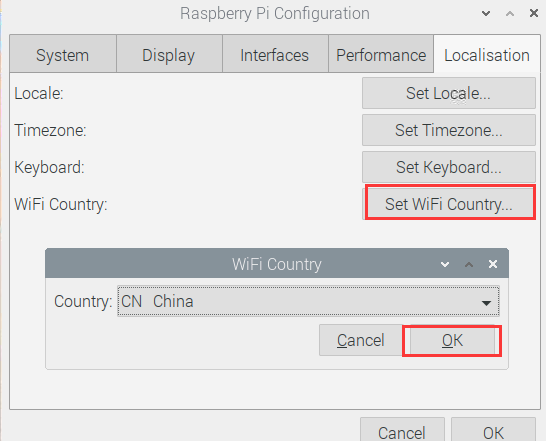
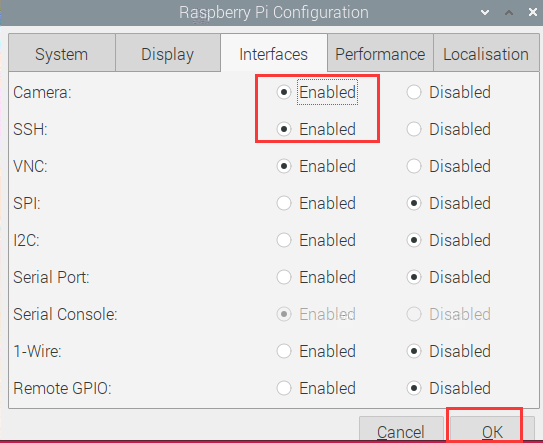
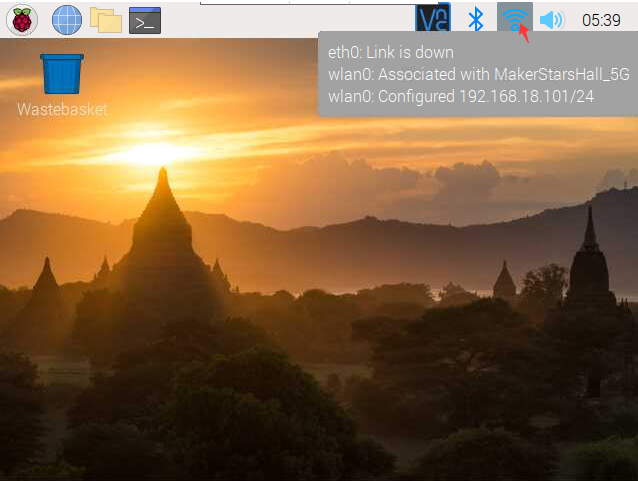
Step 2: Connect the RPi to the screen, configure RPi wifi & password, choose country & language, and click the icon to check the RPi ip.
-
Got the ip, you can use putty tool to control RPi remotely via ssh remote connection.
- putty download link: https://www.chiark.greenend.org.uk/~sgtatham/putty/latest.html
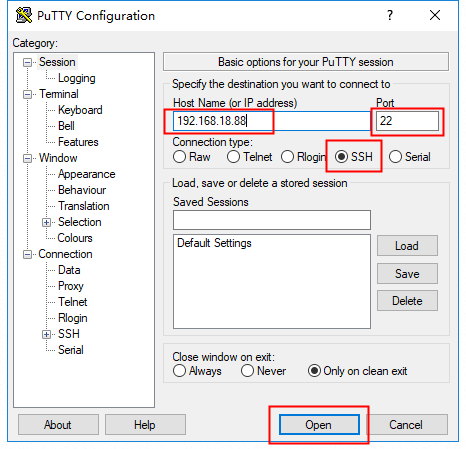
- Download finished, putty page is as shown. You need to input RPi ip, and type in 22 in the port box. Check ssh and click open to connect with RPi.
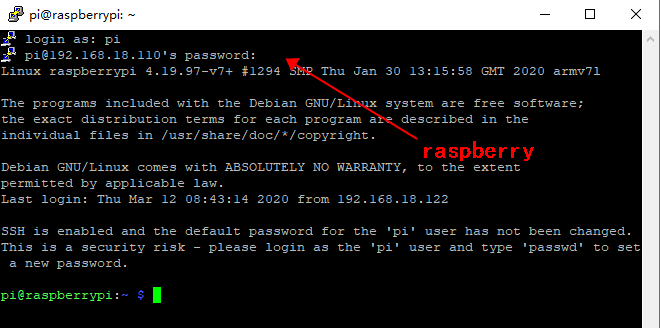
- The terminal page appears once you click open. By default, the ID is "pi" and the password is "raspberry". Note the alphabetic case.
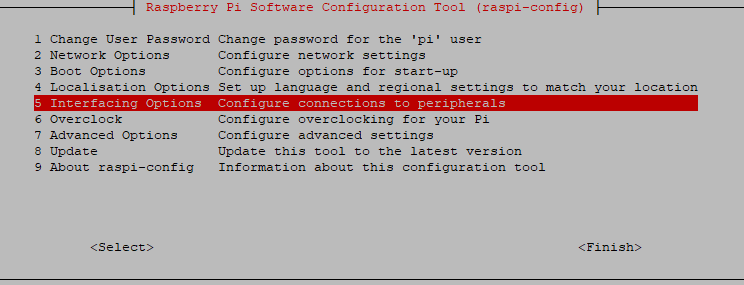
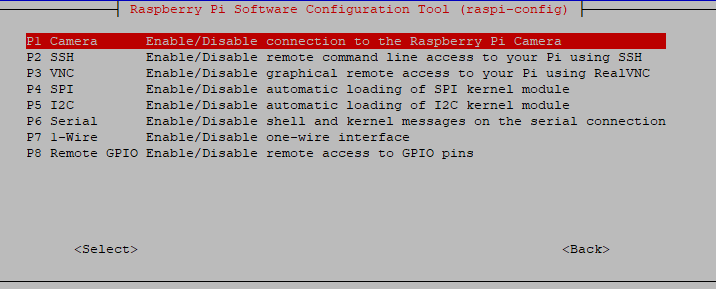
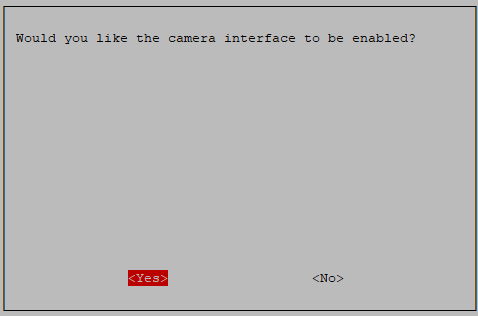
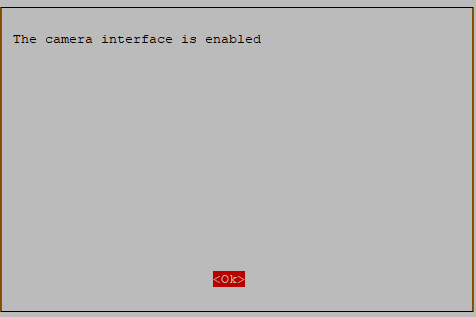
- Type in the command "sudo raspi-config" on putty, and the following page will appear. What you need to do is to select Interfacing Options, press Enter --> click Camera, press Enter --> select "YES", and press Enter -->select "OK" and then press Enter.
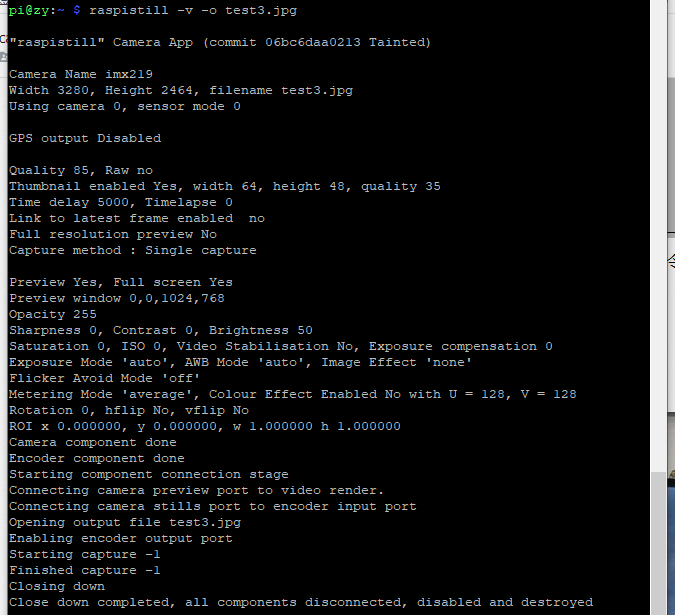
- On putty, type "raspistill -v -o test.jpg " in the command line, and the information runs successfully.
Note: The password characters are hidden when you are entering.
Step 3: Configure the camera
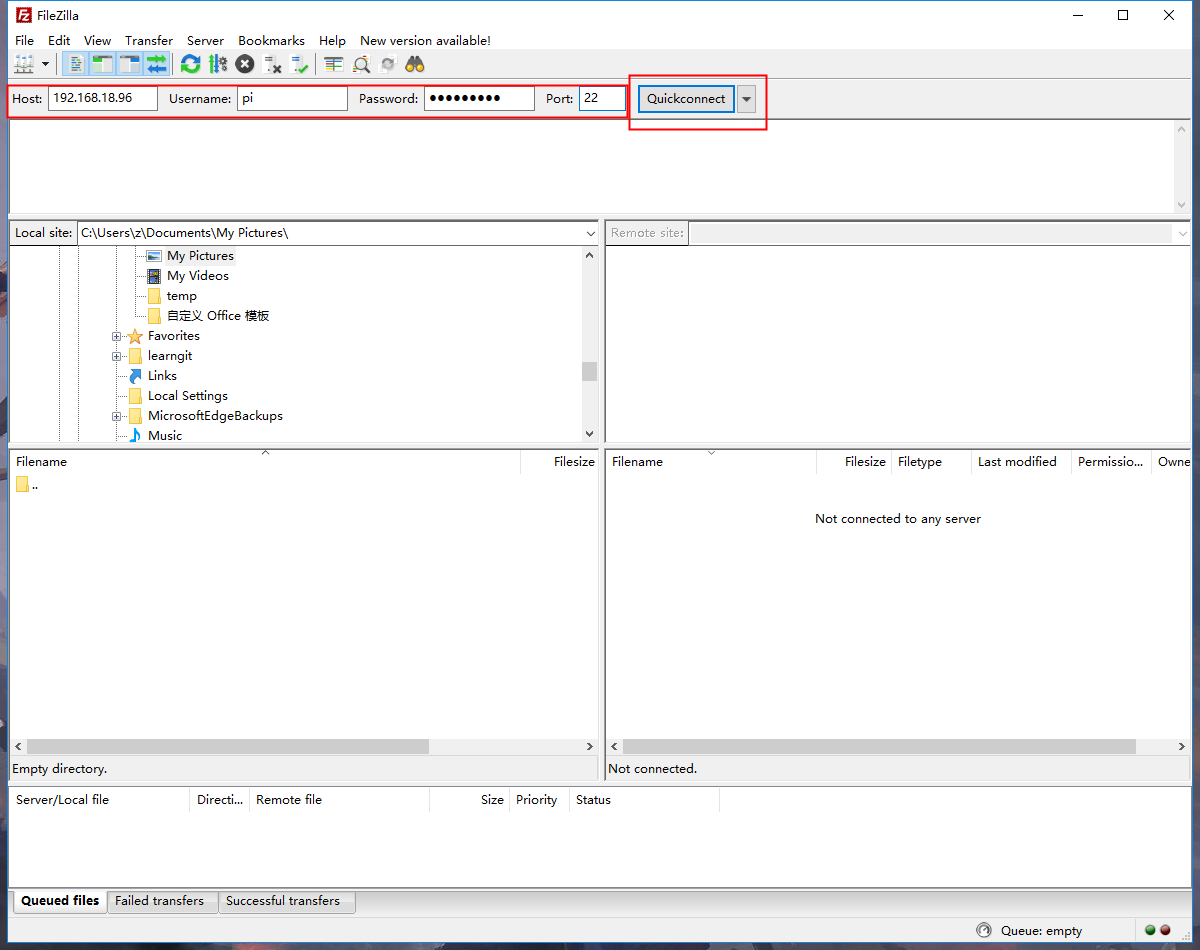
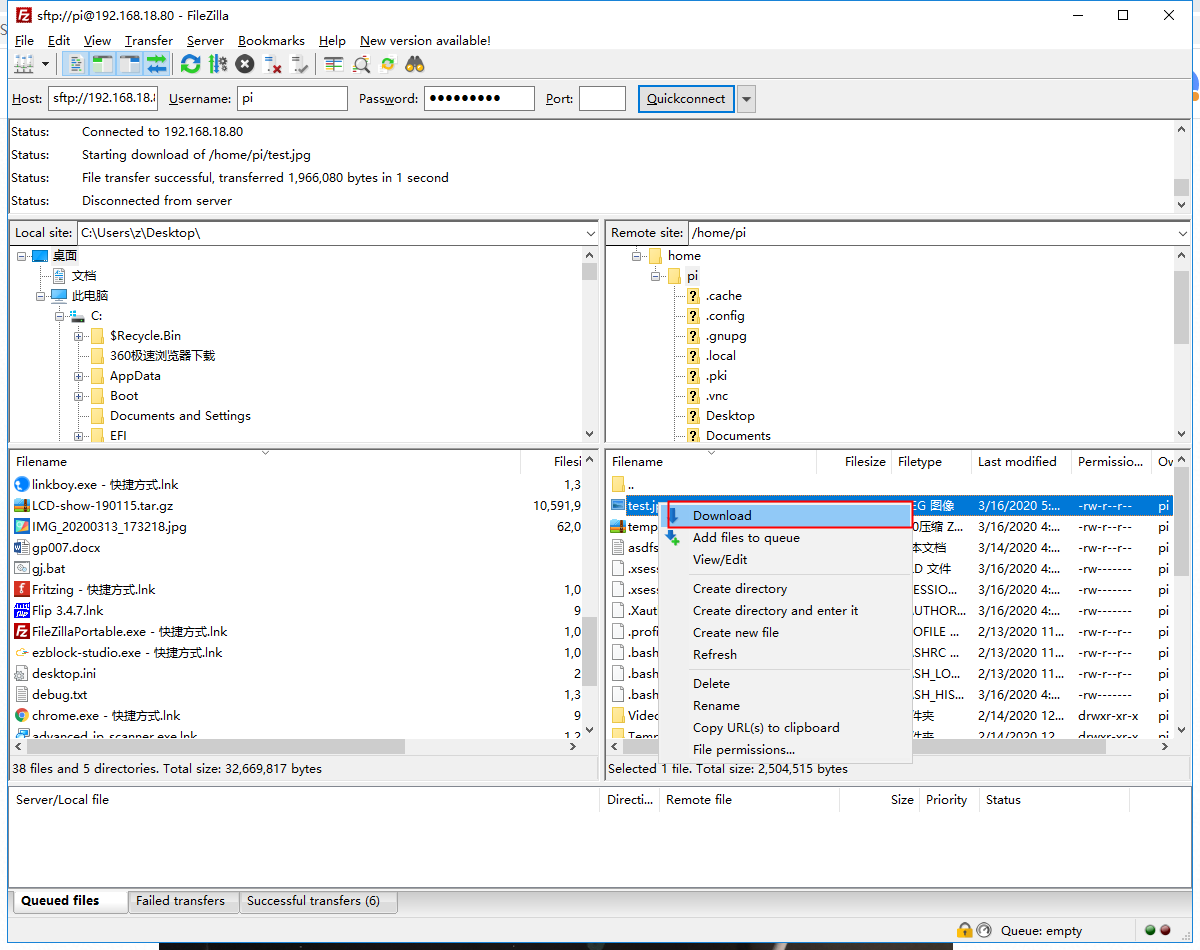
The shot picture can be checked in the pi files directory. If you have no display, you can transfer the pictures to your window computer via sftp.
- ftp link: https://filezilla-project.org/
- Back to the main page after finishing your installation. Fill the relevant box and finally click quickconnect to connect to RPi.
