Difference between revisions of "4 Inch Touch Screen Monitor for Raspberry Pi"
(→Introduction) |
(→Introduction) |
||
| Line 5: | Line 5: | ||
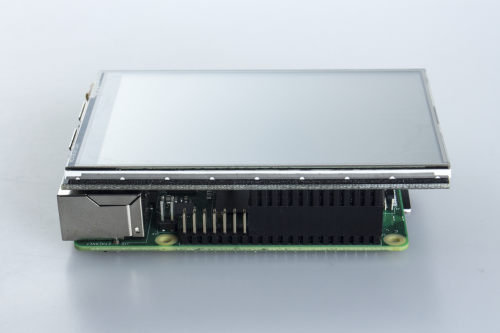
This 4 inch LCD Touchscreen fits snuggly on top of the Raspberry Pi, a little wider than Raspberry Pi, but totally beneficial to take your projects from good to great. The resistive touchscreen provides you with an easy way to display information coming off of the Raspberry Pi and the OS currently running on it.<br><br> | This 4 inch LCD Touchscreen fits snuggly on top of the Raspberry Pi, a little wider than Raspberry Pi, but totally beneficial to take your projects from good to great. The resistive touchscreen provides you with an easy way to display information coming off of the Raspberry Pi and the OS currently running on it.<br><br> | ||
| − | The | + | The 4 touch screen with resolution 480*320 and has a high refreshing rate, nearly 50-60 frames per second, thus giving you the best fantastic game-play and vedio-watching experience. The back light switch of this LCD touch screen HAT can be turned off to lower power consumption. Simply plug the 13x2 GPIO header into your desired Raspberry Pi and you'll be able to start using your new resistive touch screen!<br><br> |
Note: The screen is not driver-free, you will need to install a driver to play.<br> | Note: The screen is not driver-free, you will need to install a driver to play.<br> | ||
Latest revision as of 03:31, 8 April 2020
Introduction
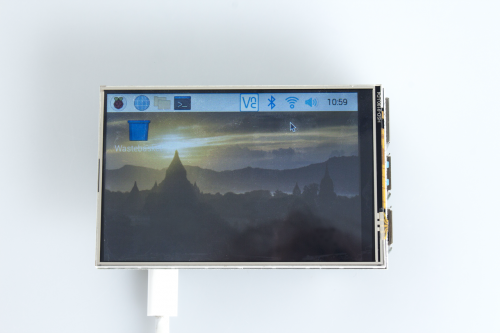
This 4 inch LCD Touchscreen fits snuggly on top of the Raspberry Pi, a little wider than Raspberry Pi, but totally beneficial to take your projects from good to great. The resistive touchscreen provides you with an easy way to display information coming off of the Raspberry Pi and the OS currently running on it.
The 4 touch screen with resolution 480*320 and has a high refreshing rate, nearly 50-60 frames per second, thus giving you the best fantastic game-play and vedio-watching experience. The back light switch of this LCD touch screen HAT can be turned off to lower power consumption. Simply plug the 13x2 GPIO header into your desired Raspberry Pi and you'll be able to start using your new resistive touch screen!
Note: The screen is not driver-free, you will need to install a driver to play.
Features
- Screen Size: 4inch
- Type: TFT, Resistive Touch
- Interface: SPI/GPIO
- SPI Driver Speed: 125mHZ
- Resolution: 480x320(pixel)
- Backlight switch: turn on/off the backlight to save power
- Dimension: 95.5×61mm
- Power Consumption: 5V 0.16A
Package Including
- 1 x 4inch Touch Screen
- 1 x Touch Pen
Step1
Download the image you need by accessing the Raspberry Pi official tool
https://www.raspberrypi.org/downloads/
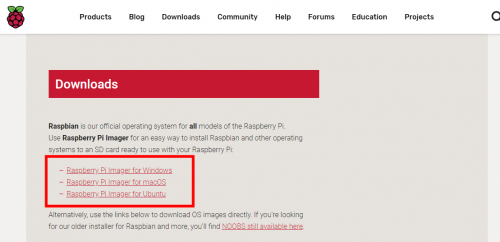
The following page pops up after the tool installation.
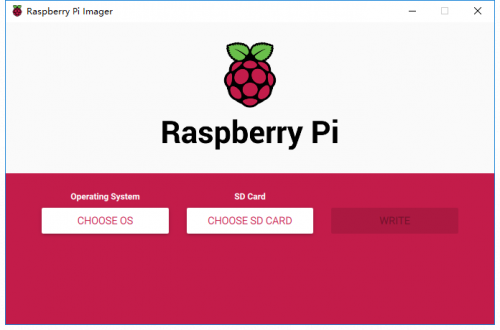
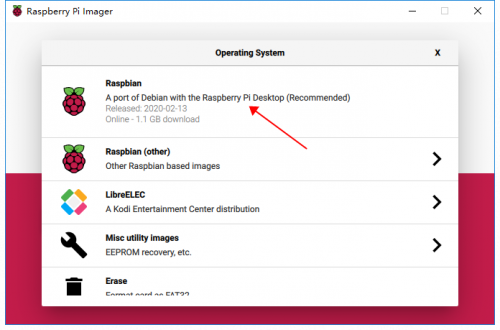
Click "CHOOSE OS" to choose the control system.
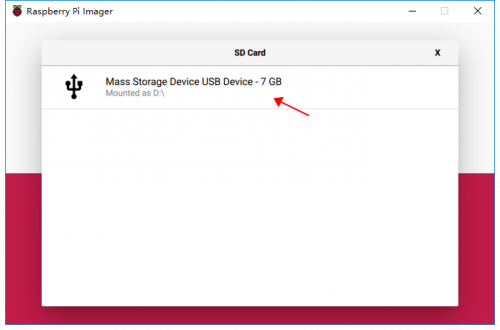
Click "CHOOSE SD CARD".
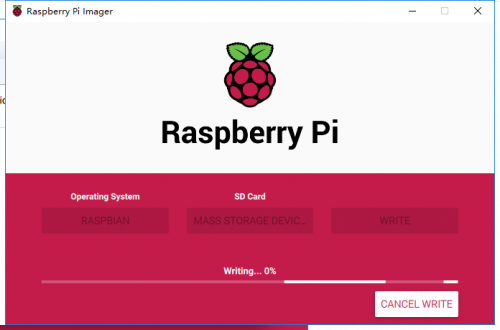
Click "WRITE" to start writing in the system. Please wait for a moment.
Step2
- The good use of the screen requires you to install a driver and you can do it by connecting to RPi via ssh.
- Connect the RPi & the screen as shown. Align the pin header on the RPi with that on the screen.
- Insert the SD card into the SD slot on RPi. Then plug the RPi power adapter and network cable.
- The RPi starts as soon as it's connected to the power supply. Next, you can find your RPi ip.
- Check the RPi ip via Advanced IP Scanner.
- Advanced IP Scanner download link: https://filehippo.com/download_advanced_ip_scanner/
- Got the ip, you can use putty tool to control RPi remotely via ssh remote connection.
- putty download link: https://www.chiark.greenend.org.uk/~sgtatham/putty/latest.html
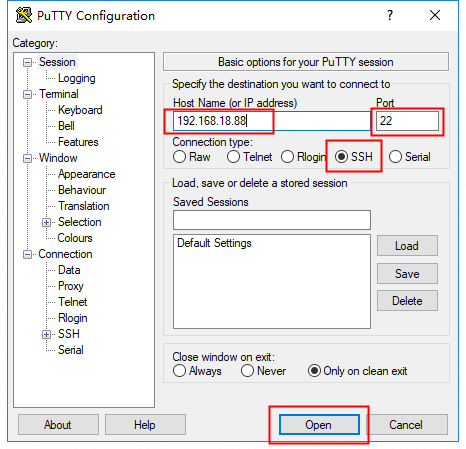
- Download finished, putty page is as shown. You need to input RPi ip, and type in 22 in the port box. Check ssh and click open to connect with RPi.
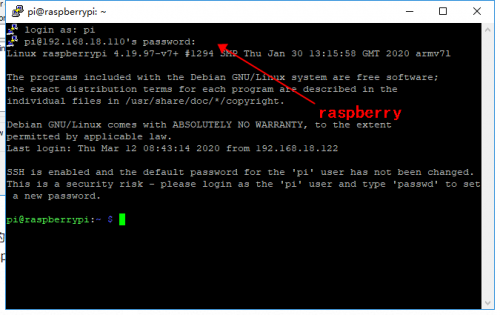
- The terminal page appears once you click open. By default, the ID is "pi" and the password is "raspberry". Note the alphabetic case.
- Type in the following commands in order. Press "Enter" once each time you've finished one line.
- sudo rm -rf LCD-show
- git clone https://github.com/goodtft/LCD-show.git
- chmod -R 755 LCD-show
- cd LCD-show/
- sudo ./MHS40-show
Note: The password characters are hidden when you are entering.
The above commands executed, the system restarts automatically for display and touch in good condition.
