Difference between revisions of "Replace HDMI cable tutorial"
From Wiki
| Line 1: | Line 1: | ||
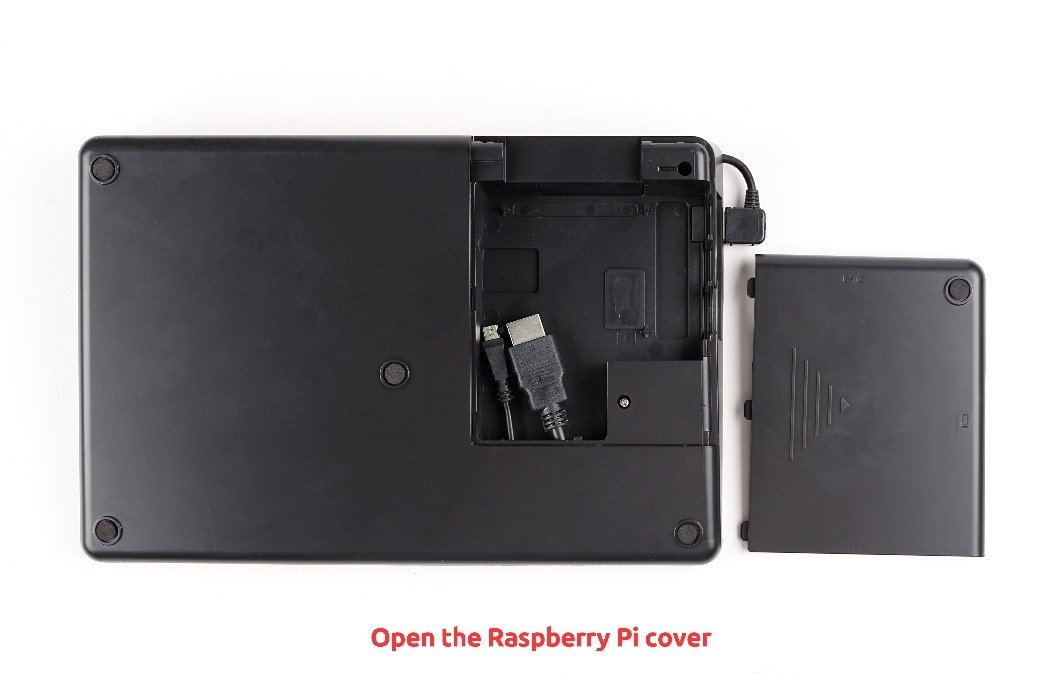
# Place the Raspad on the reverse side and Open the Raspberry Pi cover | # Place the Raspad on the reverse side and Open the Raspberry Pi cover | ||
[[File:HDMI1.jpg]]<br> | [[File:HDMI1.jpg]]<br> | ||
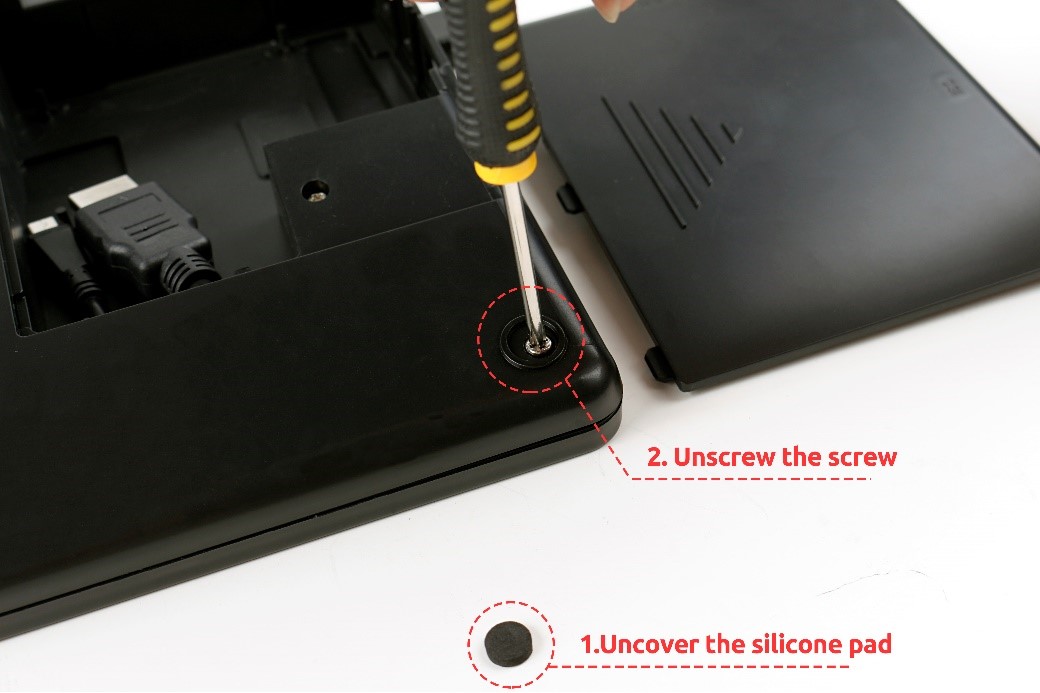
| − | #Uncover the silicone pad and unscrew the screw | + | # Uncover the silicone pad and unscrew the screw |
[[File:HDMI2.jpg]]<br> | [[File:HDMI2.jpg]]<br> | ||
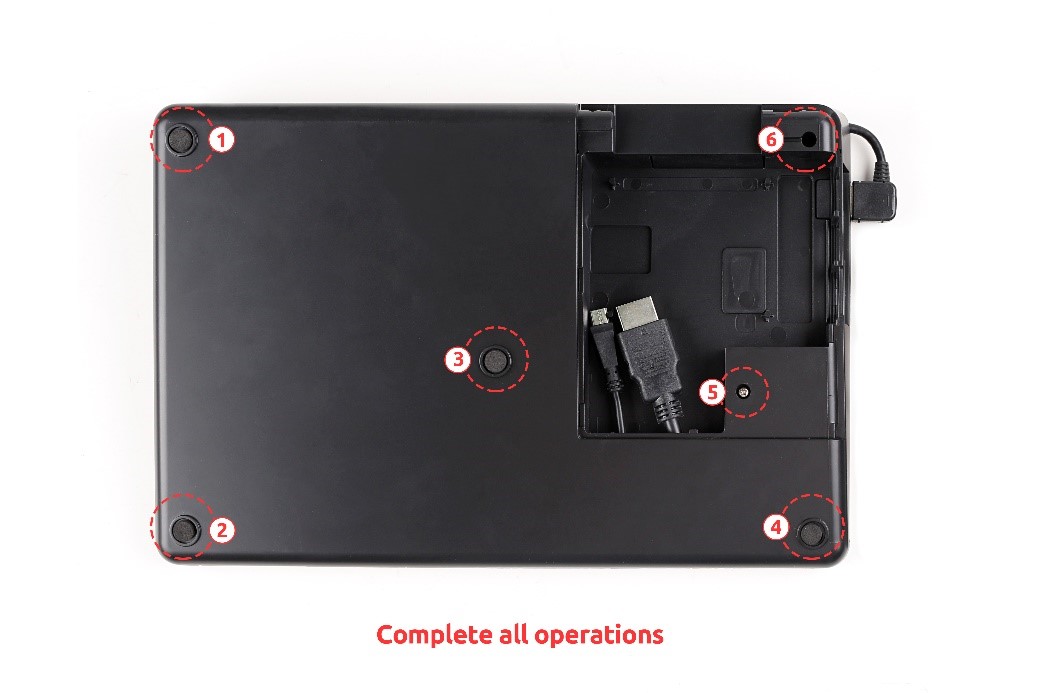
| − | #Repeat step 2 until all is complete | + | # Repeat step 2 until all is complete |
[[File:HDMI3.jpg]]<br> | [[File:HDMI3.jpg]]<br> | ||
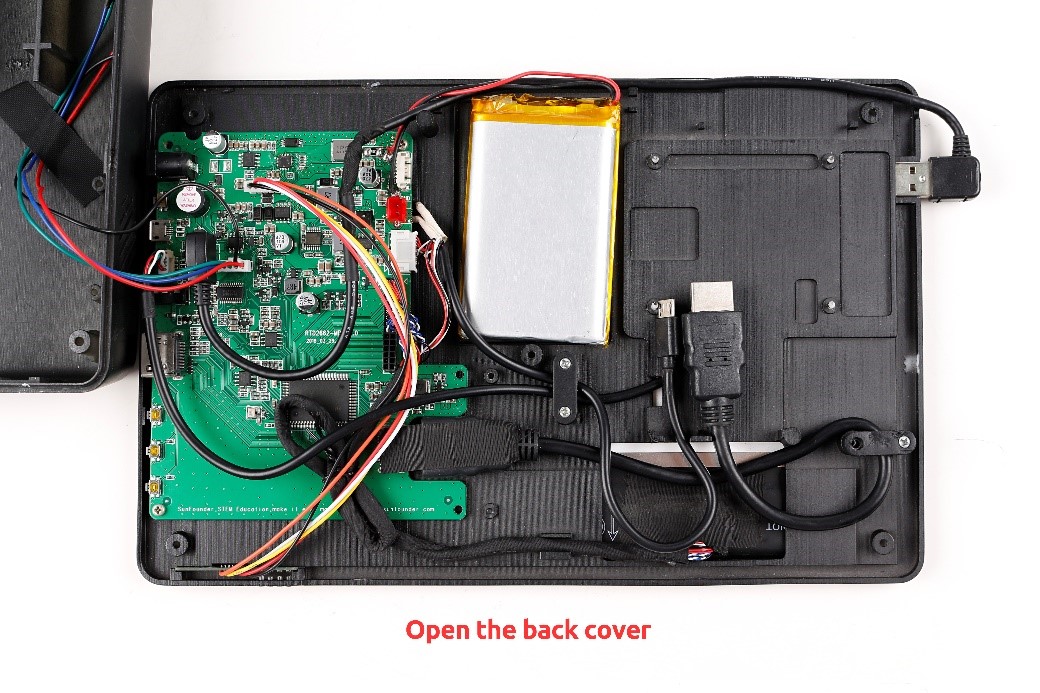
| − | #Open the back cover | + | # Open the back cover |
[[File:HDMI4.jpg]]<br> | [[File:HDMI4.jpg]]<br> | ||
| − | #Uncover the tape | + | # Uncover the tape |
[[File:HDMI5.jpg]]<br> | [[File:HDMI5.jpg]]<br> | ||
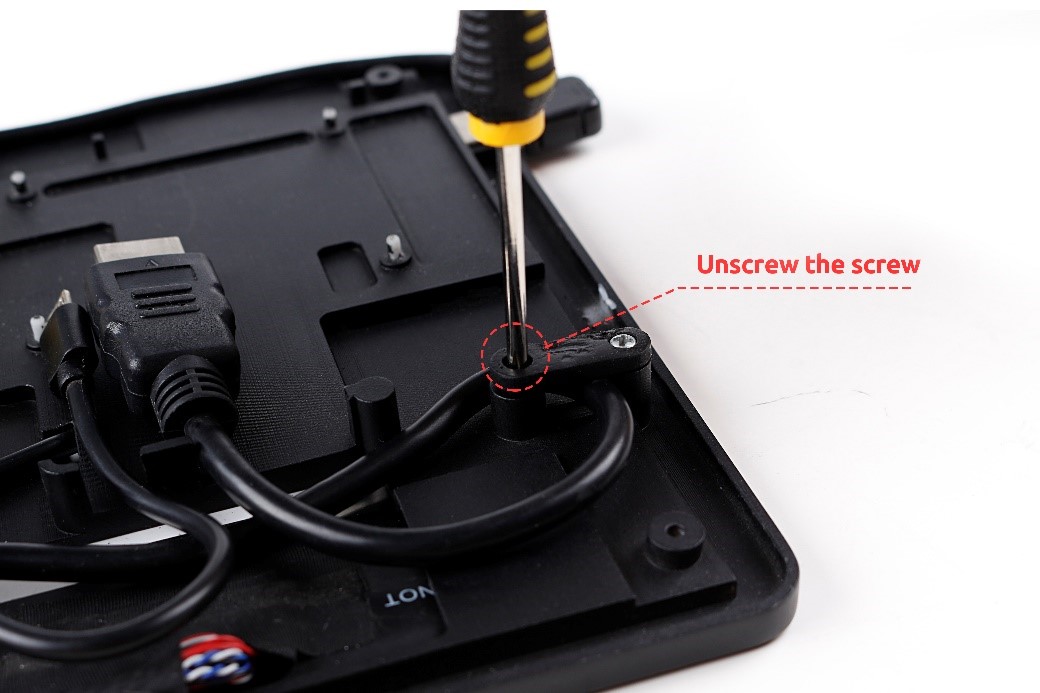
#Unscrew the screw | #Unscrew the screw | ||
Revision as of 05:46, 15 August 2018
- Place the Raspad on the reverse side and Open the Raspberry Pi cover
- Uncover the silicone pad and unscrew the screw
- Repeat step 2 until all is complete
- Open the back cover
- Uncover the tape
- Unscrew the screw
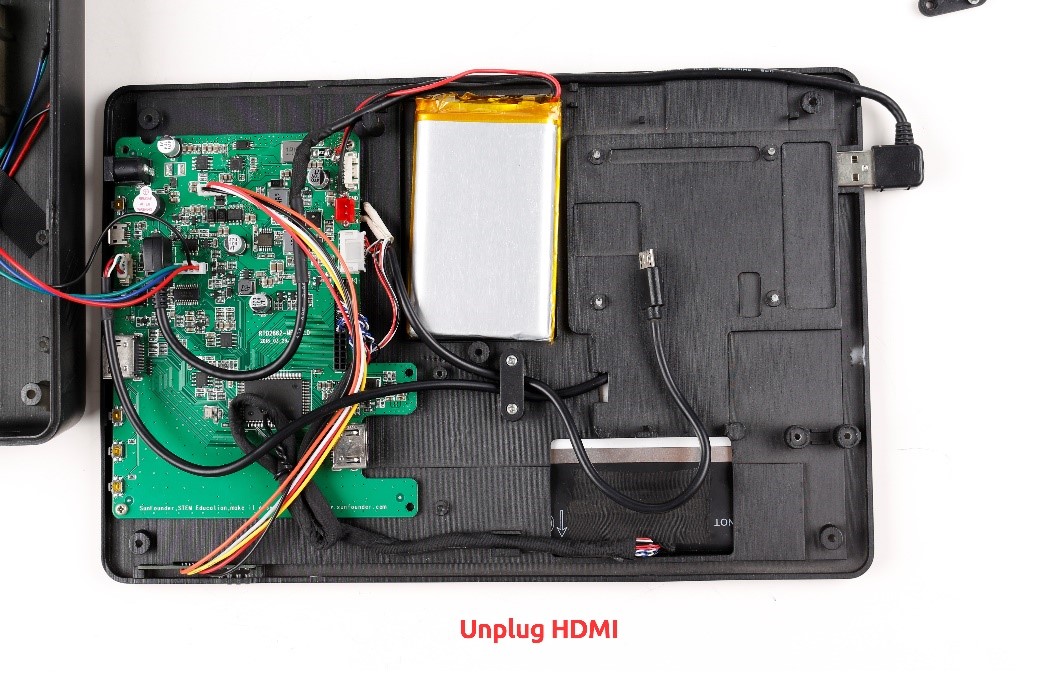
- Unplug HDMI
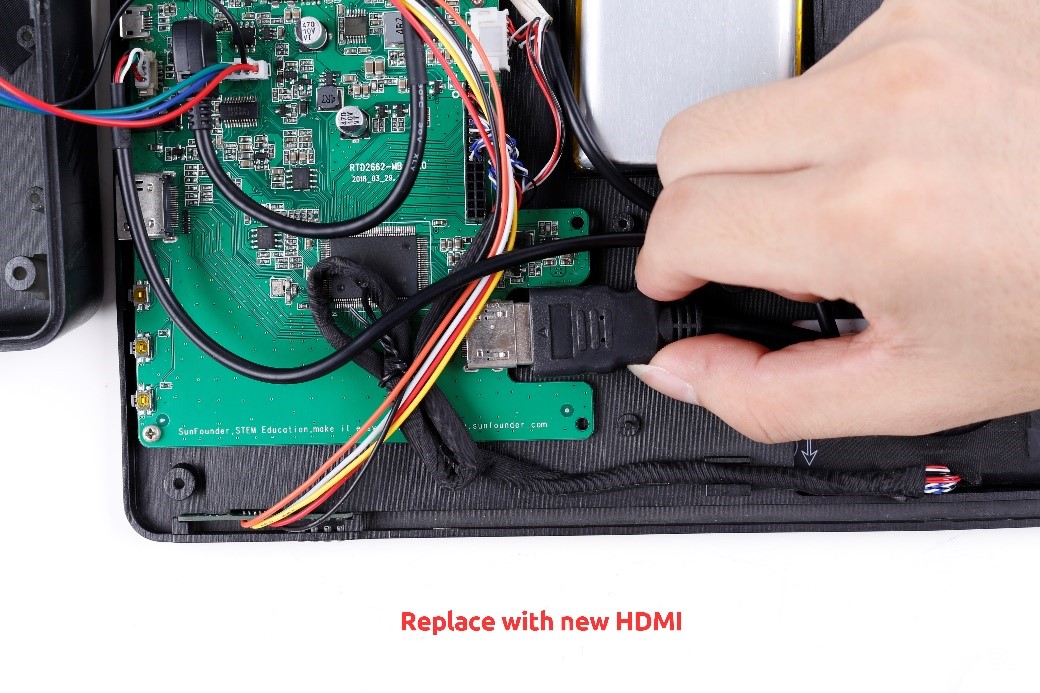
- Replace with new HDMI
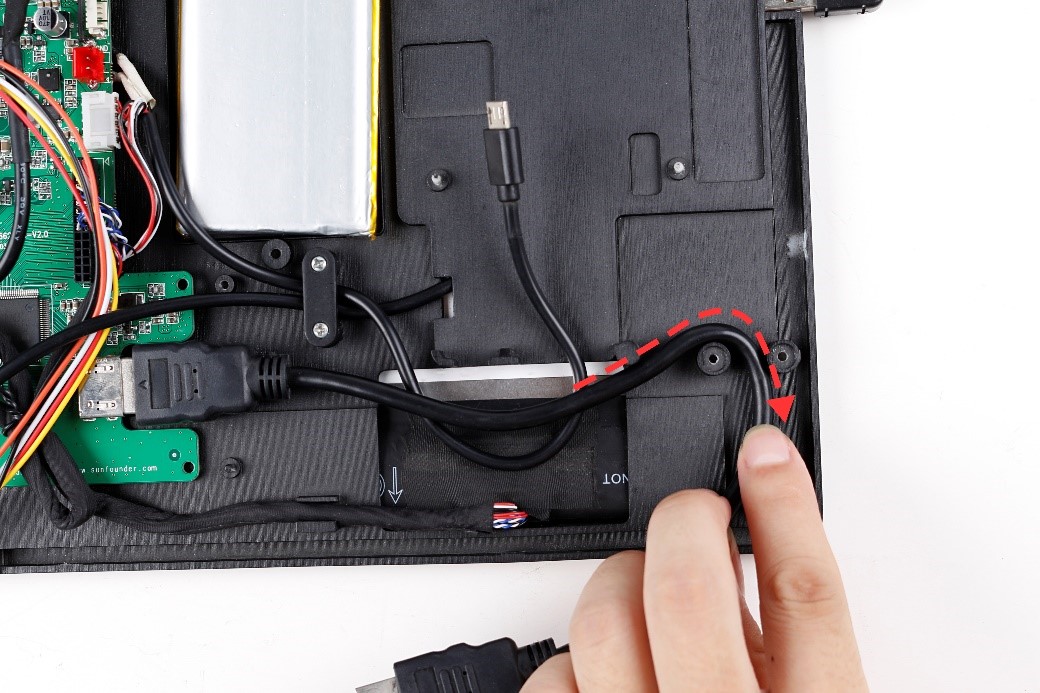
- Note the HDMI placement path
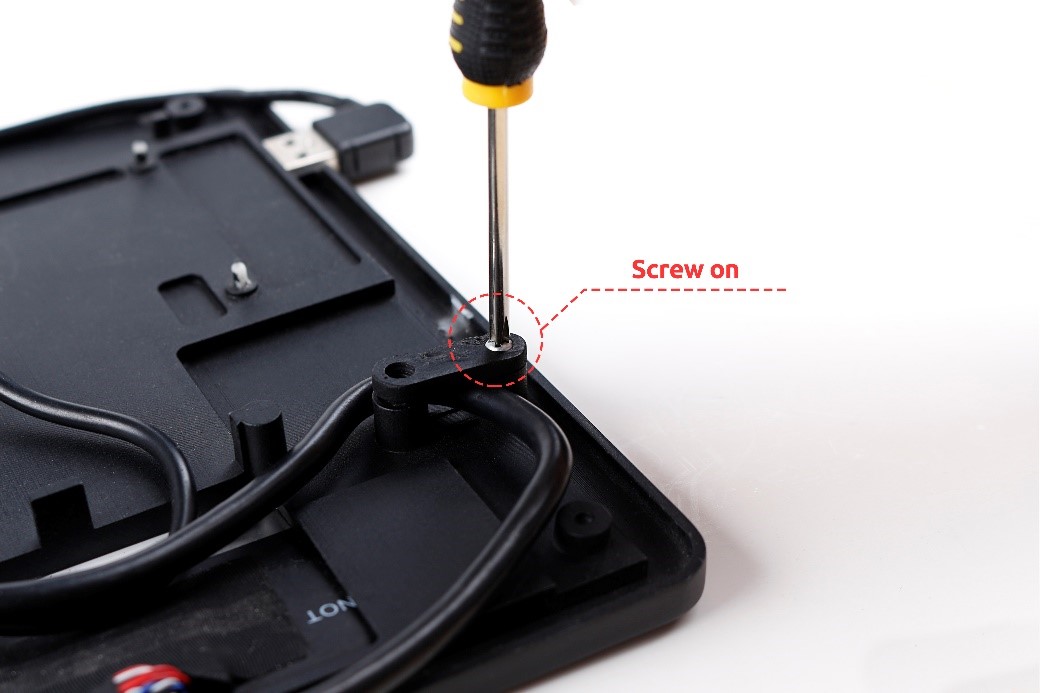
- Screw on
- Place HDMI in the correct position
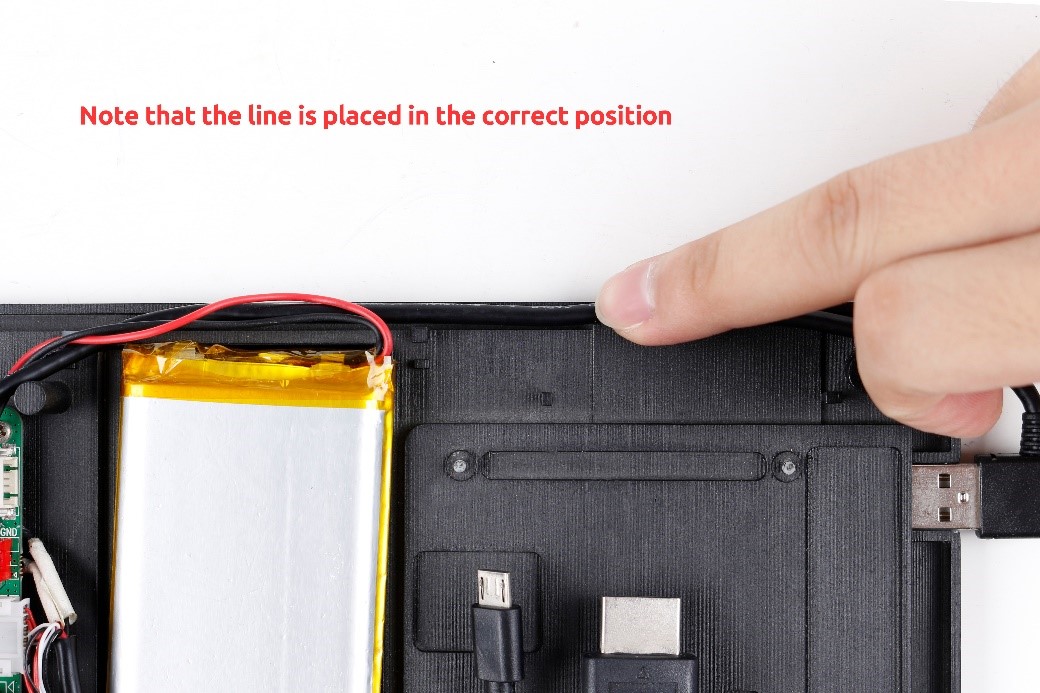
- Note that the line is placed in the correct position
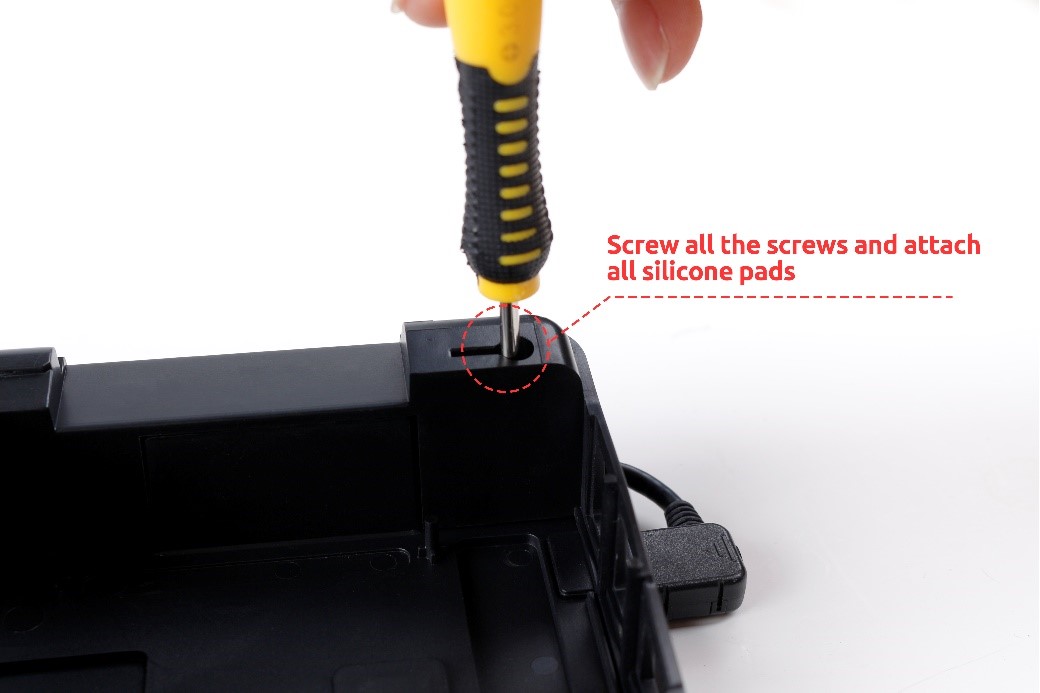
- Screw all the screws and attach all silicone pads
- Complete HDMI replacement
