Difference between revisions of "Replace HDMI cable tutorial"
From Wiki
| (One intermediate revision by the same user not shown) | |||
| Line 1: | Line 1: | ||
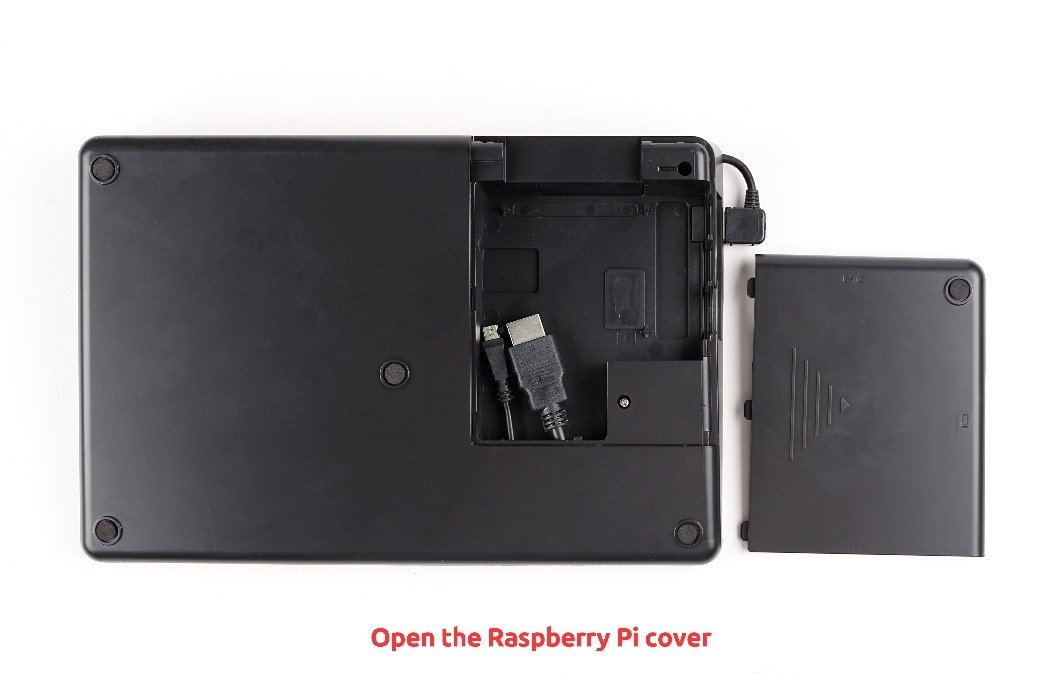
| − | + | 1. Place the Raspad on the reverse side and Open the Raspberry Pi cover | |
[[File:HDMI1.jpg]]<br> | [[File:HDMI1.jpg]]<br> | ||
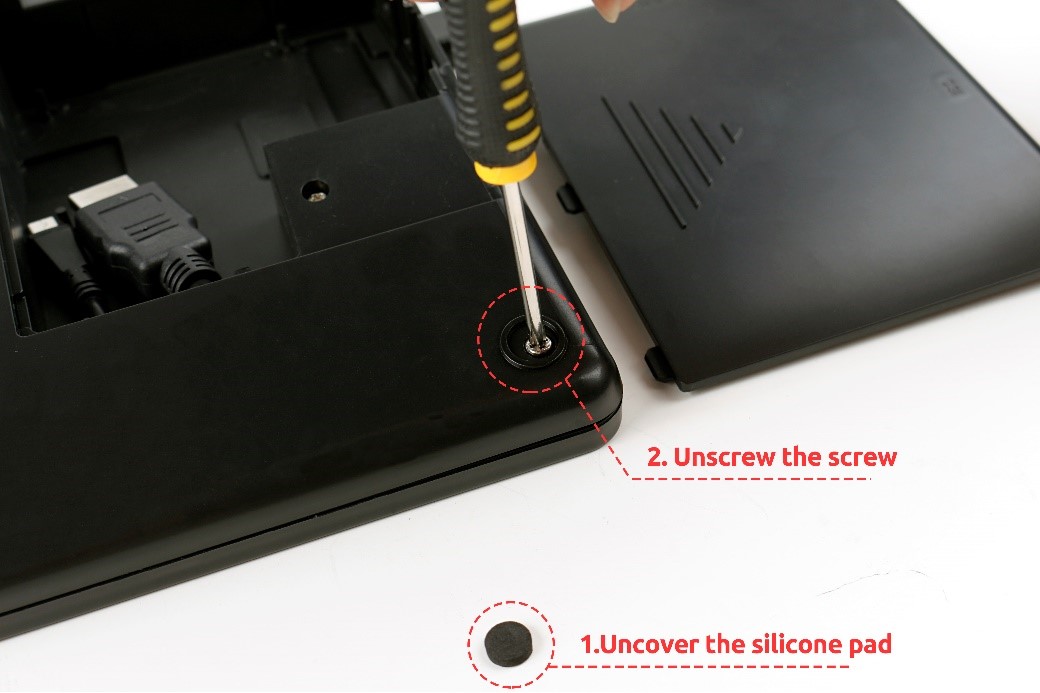
| − | + | 2. Uncover the silicone pad and unscrew the screw | |
[[File:HDMI2.jpg]]<br> | [[File:HDMI2.jpg]]<br> | ||
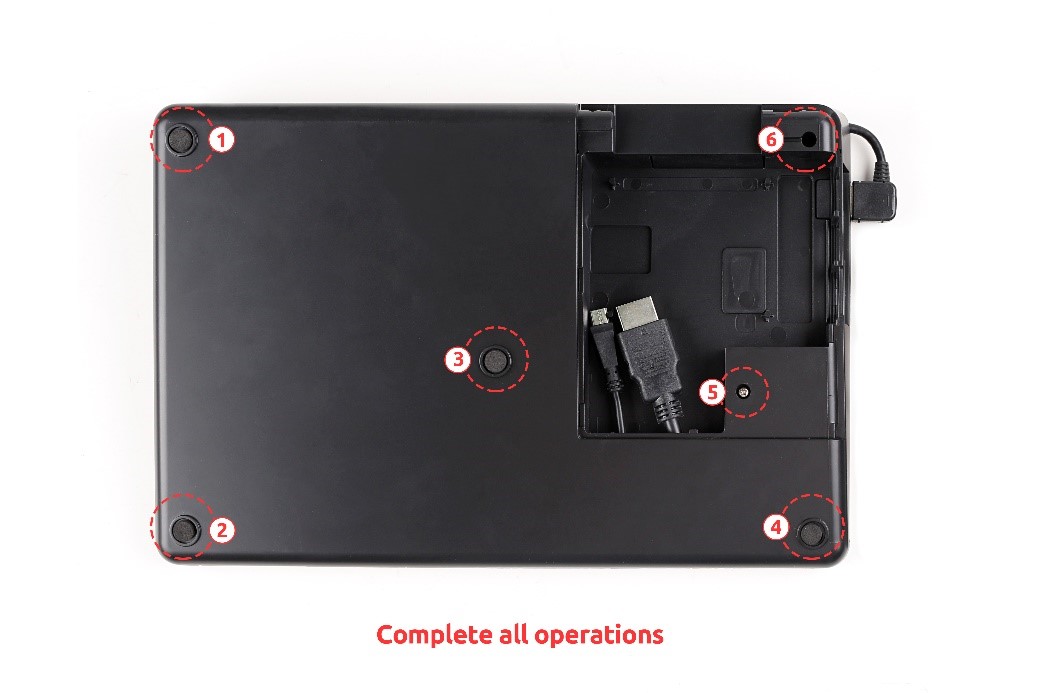
| − | + | 3. Repeat step 2 until all is complete | |
[[File:HDMI3.jpg]]<br> | [[File:HDMI3.jpg]]<br> | ||
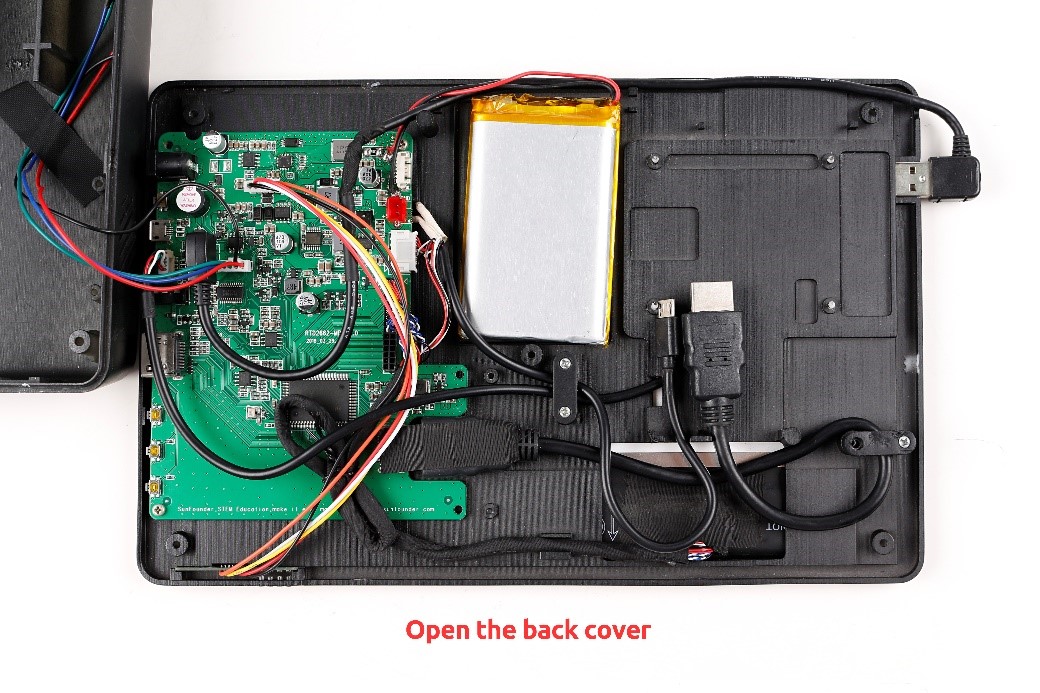
| − | + | 4. Open the back cover | |
[[File:HDMI4.jpg]]<br> | [[File:HDMI4.jpg]]<br> | ||
| − | + | 5. Uncover the tape | |
| − | [[File:HDMI5.jpg]]<br> | + | [[File:HDMI5.jpg]]<br> |
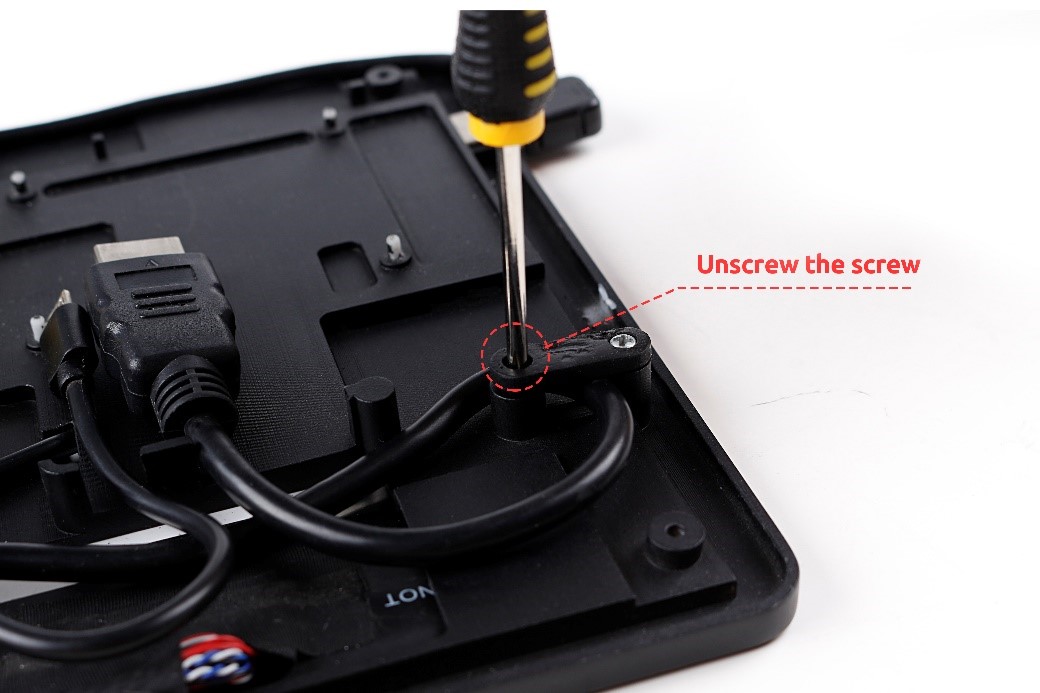
| − | + | 6. Unscrew the screw | |
| − | [[File:HDMI6.jpg]]<br> | + | [[File:HDMI6.jpg]]<br> |
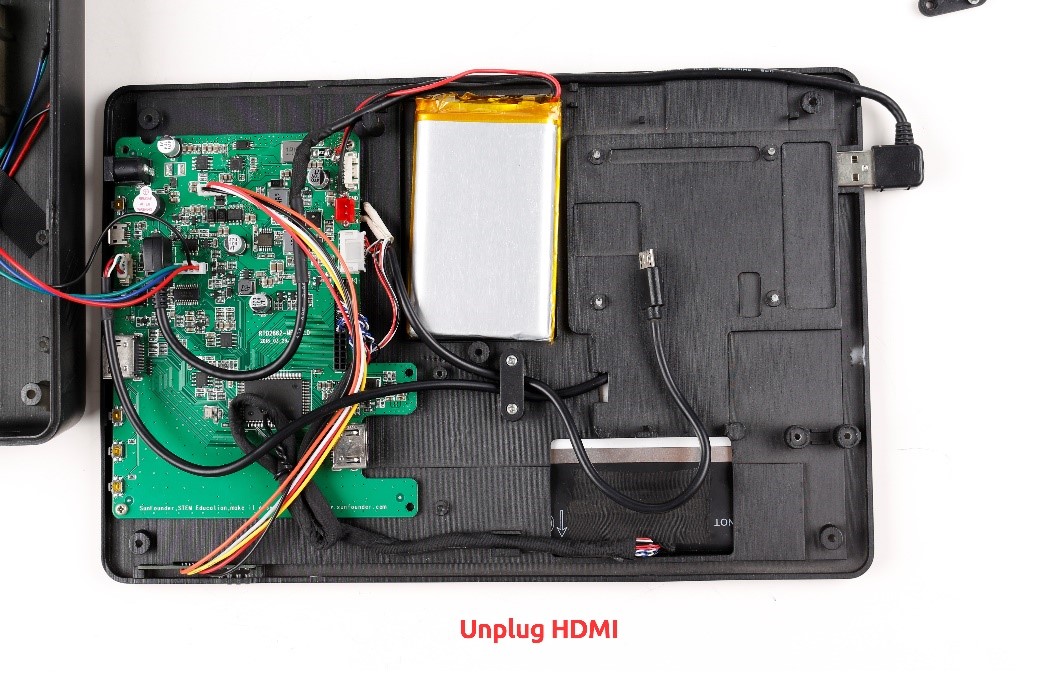
| − | + | 7. Unplug HDMI | |
| − | [[File:HDMI7.jpg]]<br> | + | [[File:HDMI7.jpg]]<br> |
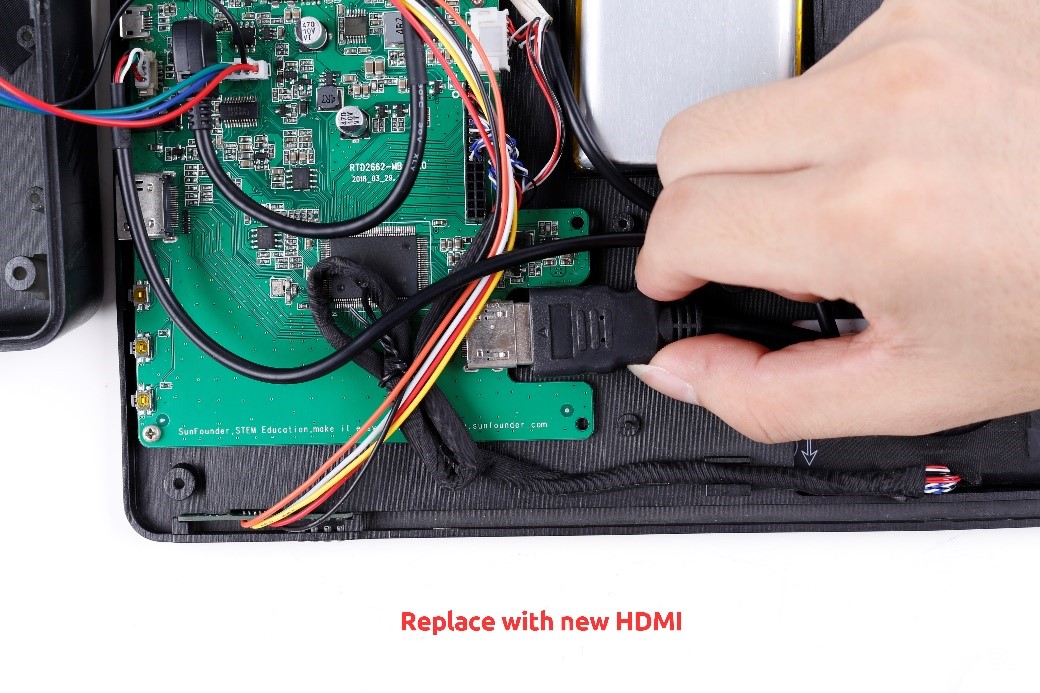
| − | + | 8. Replace with new HDMI | |
| − | [[File:HDMI8.jpg]]<br> | + | [[File:HDMI8.jpg]]<br> |
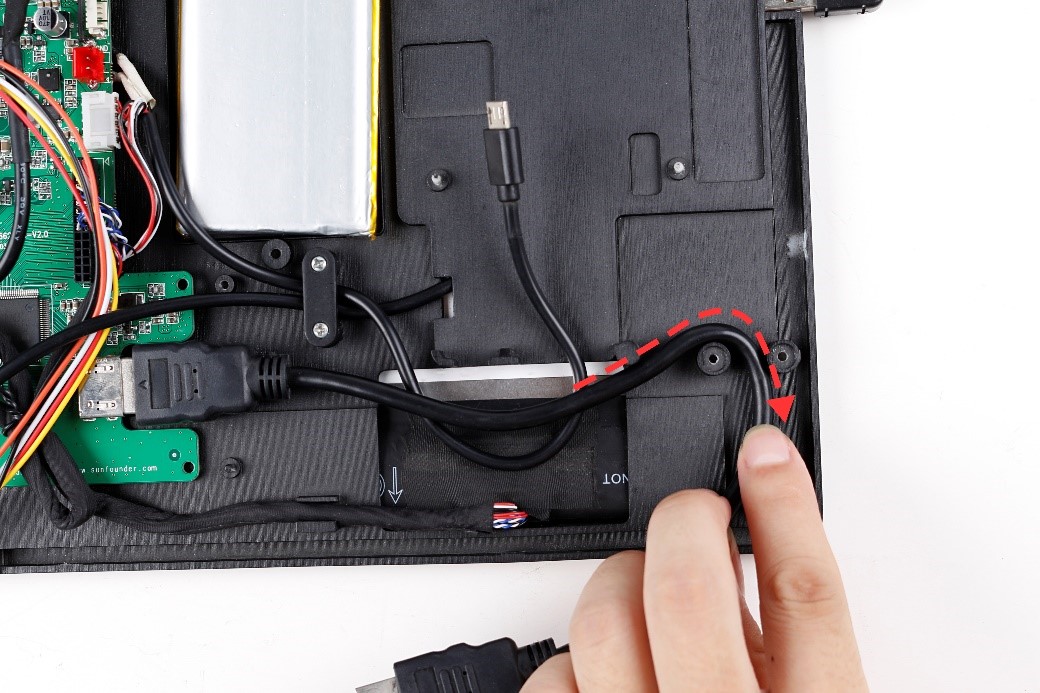
| − | + | 9. Note the HDMI placement path | |
| − | [[File:HDMI9.jpg]]<br> | + | [[File:HDMI9.jpg]]<br> |
| − | [[File:HDMI10.jpg]]<br> | + | [[File:HDMI10.jpg]]<br> |
| − | + | 10. Screw on | |
| − | [[File:HDMI11.jpg]]<br> | + | [[File:HDMI11.jpg]]<br> |
| − | + | 11. Place HDMI in the correct position | |
| − | [[File:HDMI12.jpg]]<br> | + | [[File:HDMI12.jpg]]<br> |
| − | + | 12. Note that the line is placed in the correct position | |
| − | [[File:HDMI13.jpg]]<br> | + | [[File:HDMI13.jpg]]<br> |
| − | + | 13. Screw all the screws and attach all silicone pads | |
| − | [[File:HDMI14.jpg]]<br> | + | [[File:HDMI14.jpg]]<br> |
| − | + | 14. Complete HDMI replacement | |
| − | [[File:HDMi15.jpg]]<br> | + | [[File:HDMi15.jpg]]<br> |
Latest revision as of 05:54, 15 August 2018
1. Place the Raspad on the reverse side and Open the Raspberry Pi cover
2. Uncover the silicone pad and unscrew the screw
3. Repeat step 2 until all is complete
4. Open the back cover
5. Uncover the tape
6. Unscrew the screw
7. Unplug HDMI
8. Replace with new HDMI
9. Note the HDMI placement path
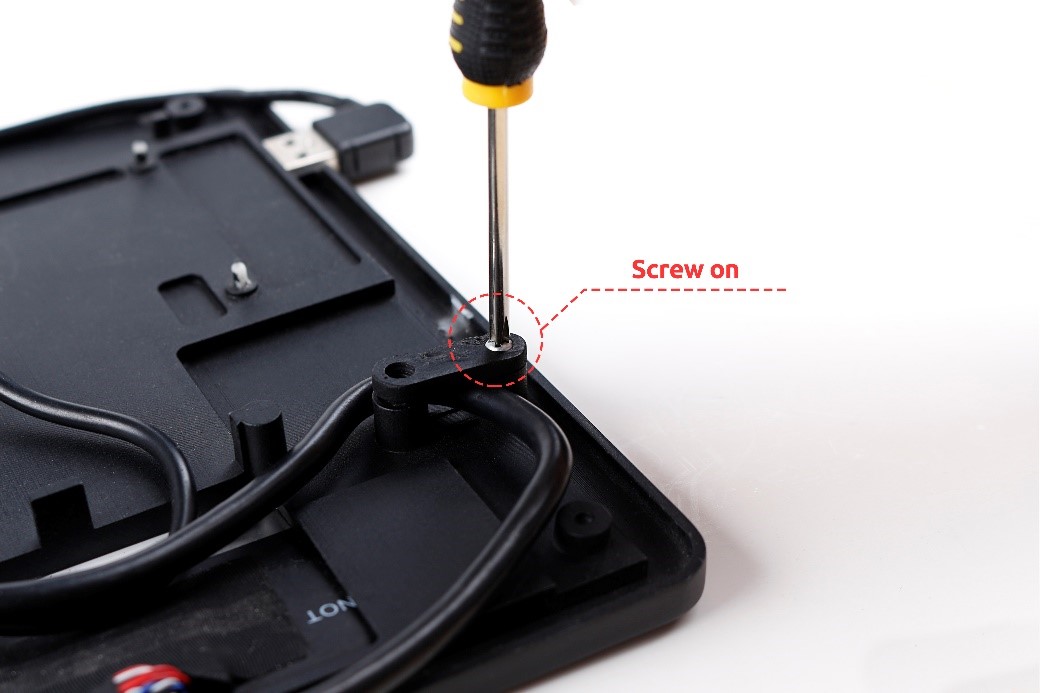
10. Screw on
11. Place HDMI in the correct position
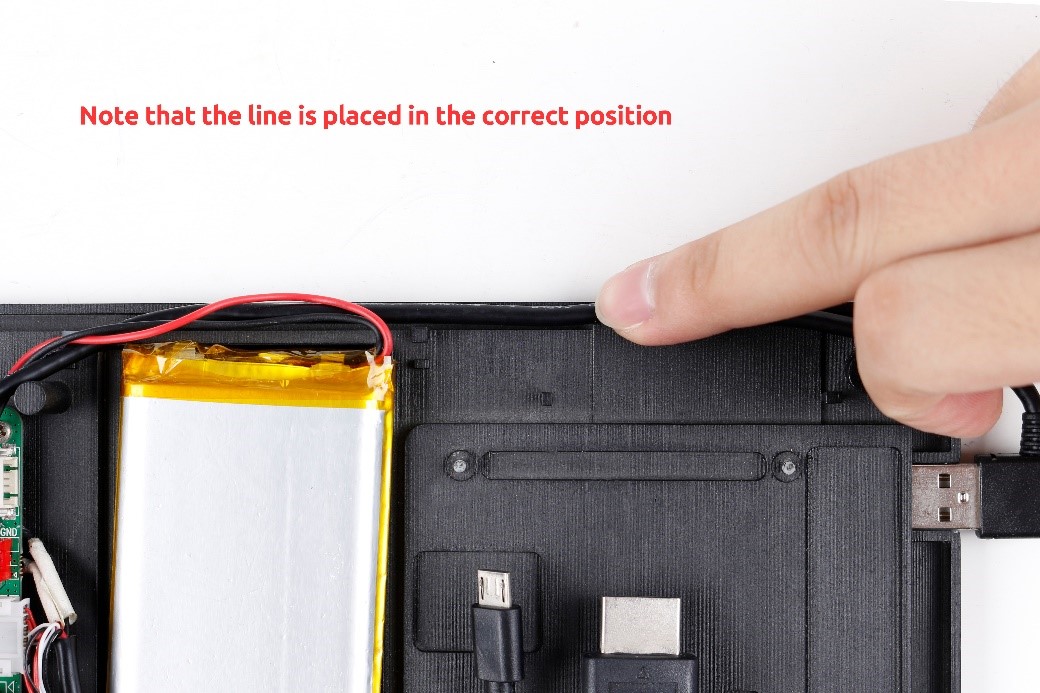
12. Note that the line is placed in the correct position
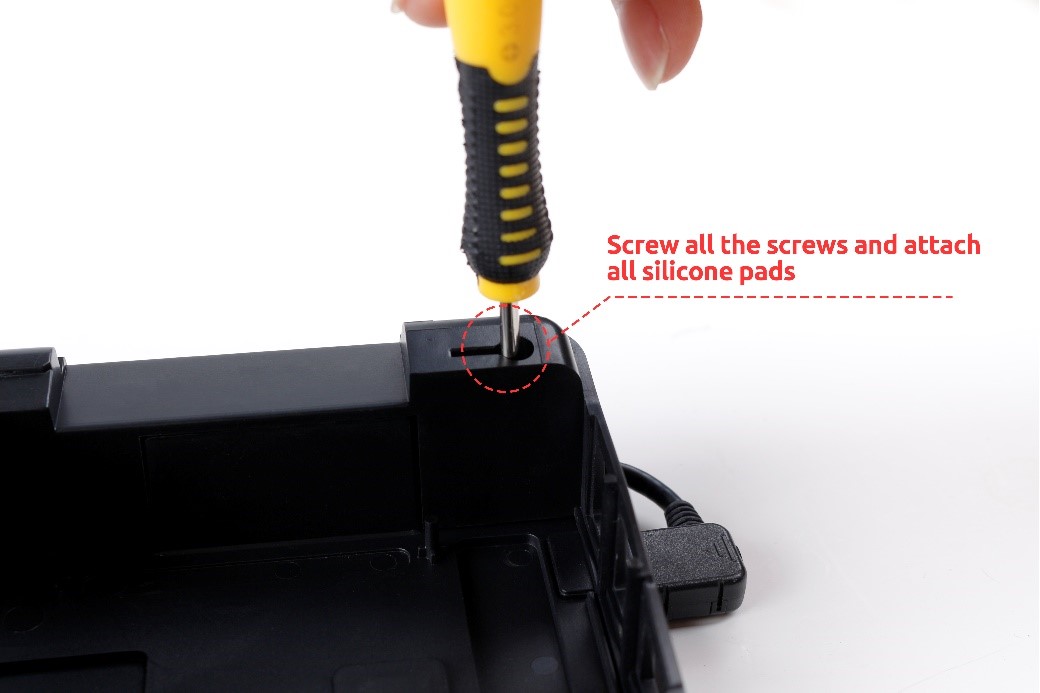
13. Screw all the screws and attach all silicone pads
14. Complete HDMI replacement
