Difference between revisions of "10.1 Inch Touch Screen for Raspberry Pi(NEW)"
(→How to add speakers) |
|||
| (2 intermediate revisions by the same user not shown) | |||
| Line 9: | Line 9: | ||
SunFounder 10.1'' IPS monitor is a 5-point capacitive touch screen with a resolution of 1280x800, bringing you perfect visual experience. <br> | SunFounder 10.1'' IPS monitor is a 5-point capacitive touch screen with a resolution of 1280x800, bringing you perfect visual experience. <br> | ||
It works with various operating systems including Raspbian, Ubuntu, Ubuntu Mate, Windows, Android, and Chrome OS (you may need an USB extension cable). <br> | It works with various operating systems including Raspbian, Ubuntu, Ubuntu Mate, Windows, Android, and Chrome OS (you may need an USB extension cable). <br> | ||
| + | Ideal for applications like retro gaming, industrial control, as a secondary monitor, in home automation, for 3D printing control, and as a [https://www.sunfounder.com/blogs/news/raspberry-pi-system-monitor-for-pc-enhancing-performance-and-remote-monitoring PC monitoring device]. | ||
| + | |||
| + | |||
[[File:10.1touch26.jpg|1000px]]<br> | [[File:10.1touch26.jpg|1000px]]<br> | ||
| Line 41: | Line 44: | ||
This product is not equipped with speakers by default, you need to add according to your preferences <br> | This product is not equipped with speakers by default, you need to add according to your preferences <br> | ||
The speaker interface is in the upper right corner of the motherboard <br> | The speaker interface is in the upper right corner of the motherboard <br> | ||
| − | [[File:10.1zb.jpg |500px]] | + | [[File:10.1zb.jpg |500px]]<br><br> |
'''model of the speaker'''<br><br> | '''model of the speaker'''<br><br> | ||
<ol> | <ol> | ||
| Line 49: | Line 52: | ||
</ol> | </ol> | ||
'''Pin description'''<br><br> | '''Pin description'''<br><br> | ||
| − | [[File:10.1ysq.jpg]] | + | [[File:10.1ysq.jpg|300px]] |
== '''Burn the System to TF Card''' == | == '''Burn the System to TF Card''' == | ||
Latest revision as of 08:23, 27 December 2023
Contents
Introduction
Resolution: 1280x800
Power: DC 12V/1.5A
Consumption: 4W
LCD Type: IPS
Capactive Touch
5-point Touch Screen
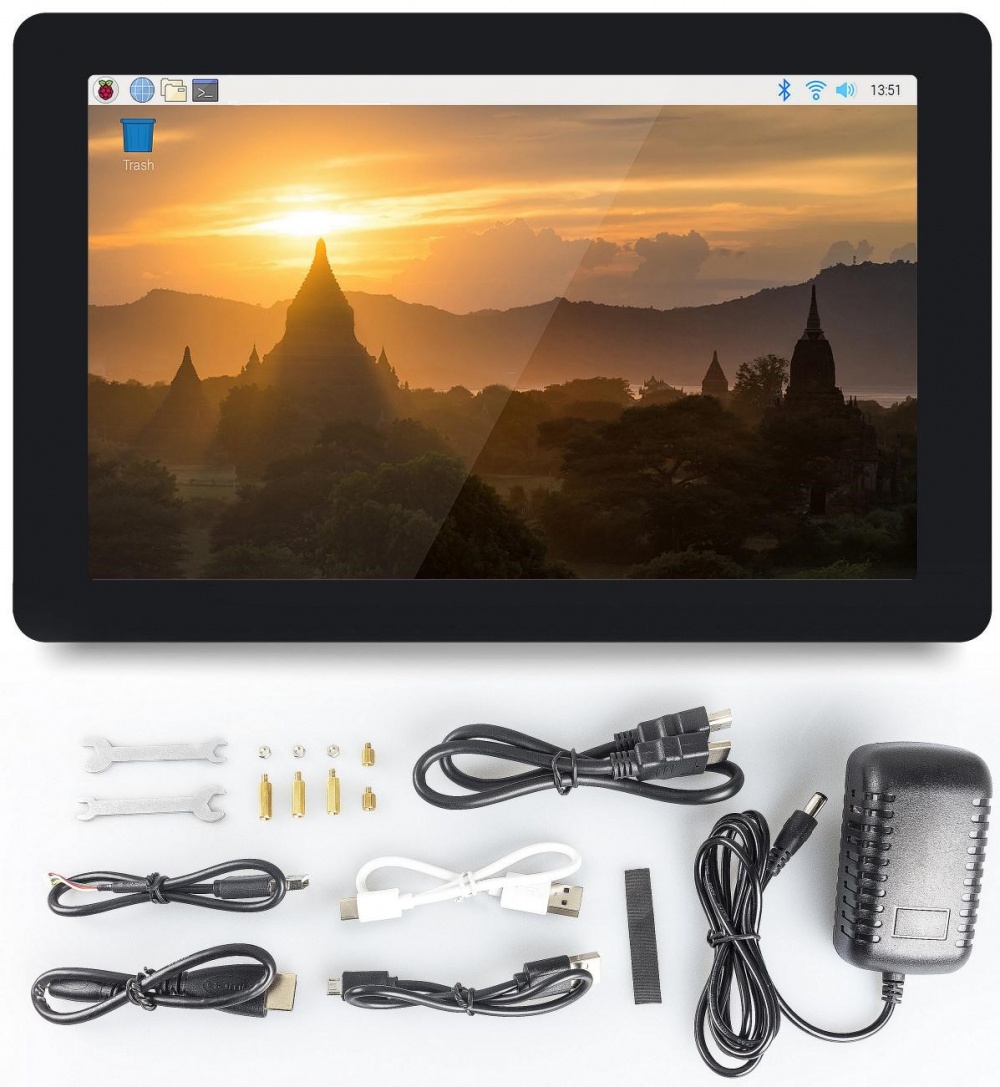
SunFounder 10.1 IPS monitor is a 5-point capacitive touch screen with a resolution of 1280x800, bringing you perfect visual experience.
It works with various operating systems including Raspbian, Ubuntu, Ubuntu Mate, Windows, Android, and Chrome OS (you may need an USB extension cable).
Ideal for applications like retro gaming, industrial control, as a secondary monitor, in home automation, for 3D printing control, and as a PC monitoring device.
Hardware Description
LED Indicators
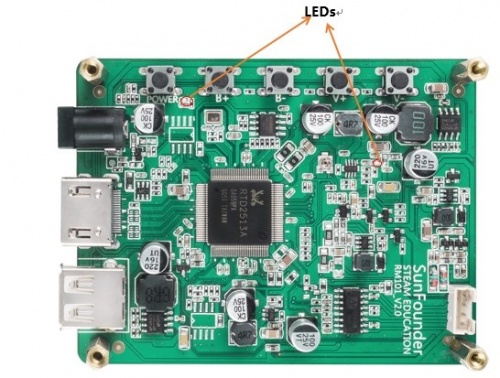
There are 2 LED indicators on the main board of the screen to show different signals:
- Power on the screen, after the green LED flashes one time, it lights on continuously; and the red LED lights on immediately.
- If there's no HDMI signal, only the red LED will turn on.
- If there's an HDMI signal, these two LEDs will turn on.
- If you press the power button, the green LED will turn off and the red LED will keep turning on.
- If you remove the power cord, both of the two LEDs will turn off.
Buttons
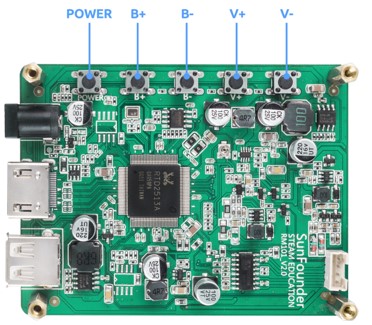
Buttons on the main board and their functions:
- Power:Short press to switch ON/OFF(go into the sleep mode) the screen. Long press to power ON/OFF the device(Raspberry Pi).
- B+:Increase screen brightness.
- B-:Reduce screen brightness.
- V+:Volume up.
- V-:Volume down.
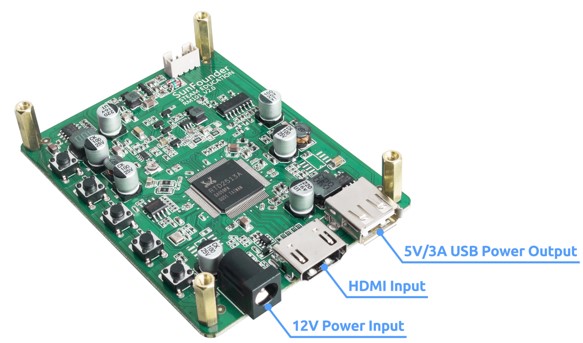
On one side of the main board there are ports of HDMI input, 12V power input, and 5V/3A USB power output.
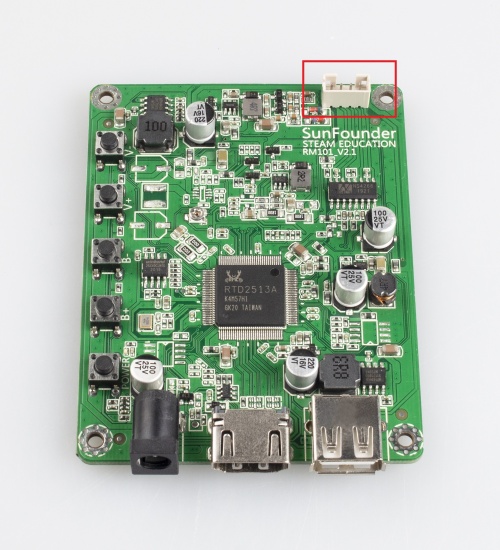
How to add speakers
This product is not equipped with speakers by default, you need to add according to your preferences
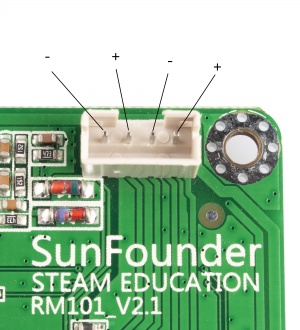
The speaker interface is in the upper right corner of the motherboard
model of the speaker
- interface : 4pin
- resistance : 3Ω
- power : 3W
Burn the System to TF Card
Note:
- Do not install the Raspbian system by means of NOOBS, otherwise there appears touch failure.
- On other displays, if you have installed the system on your Raspberry Pi by means of NOOBS, you can still use the 10.1-inch touch screen.
- If you have already installed the system, you can directly skip this chapter. Turn to next chapter to refer to Connect the Raspberry Pi and Screen, and you can get to use the 10.1-inch touch screen.
You can use the official raspberry PI mirror burning tool directly
link: https://www.raspberrypi.org/downloads/
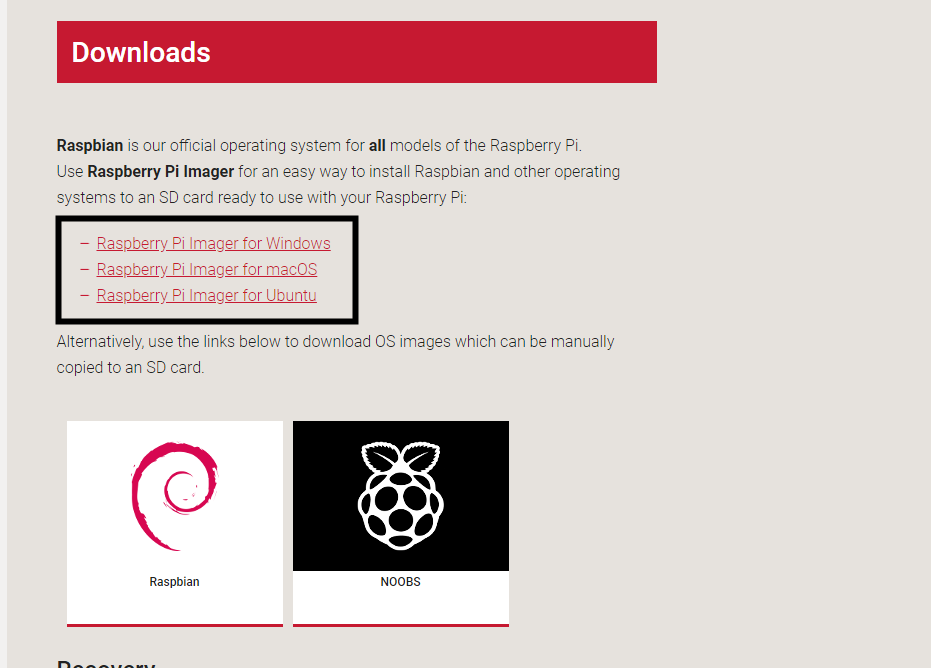
Insert the card reader, select the system you want to burn, and then click "WRITE" to burn
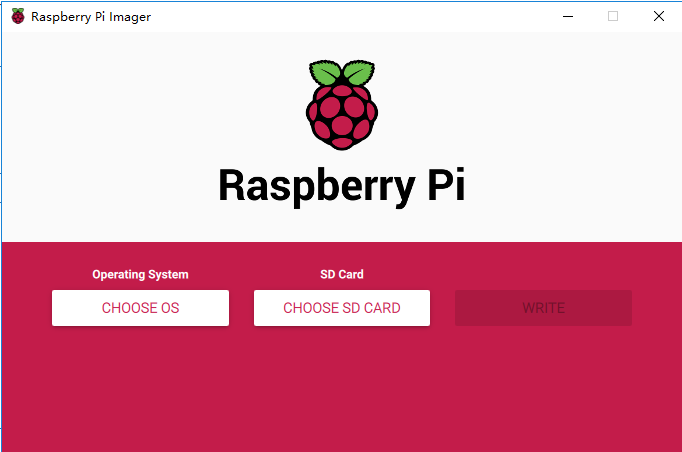
But if you do this, the download process of the system files may be slow, and the system files will not be retained after the burning is completed.
If you want to use the TORRENT file to download the system, or burn the system to multiple SD cards, you can follow the following Steps to operate
Step 1
Prepare the tool of image burning. Here we use the Etcher. You can download the software from the
link: https://www.balena.io/etcher/
Step 2
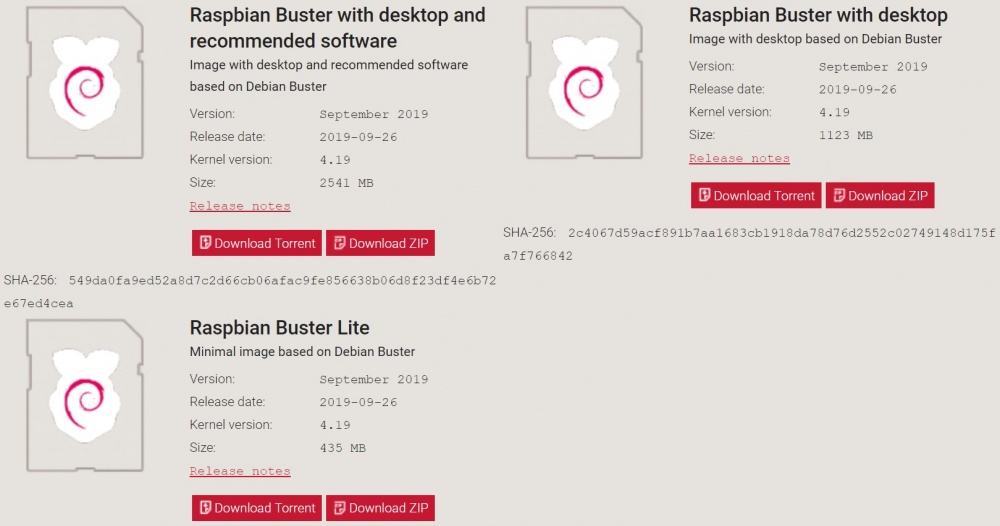
Download the complete image on the official website by clicking this
link: https://www.raspberrypi.org/downloads/raspbian/.
There are three different kinds of Raspbian Stretches available,
among which the Raspbian Buster with desktop and recommended software will be the best choice if you have no other special requirements.
Step 3
Unzip the package downloaded and you will see the .img file inside.
Note: DO NOT extract the file.
Step 4
With the application of Etcher, flash the image file, raspbian into the Micro SD card.
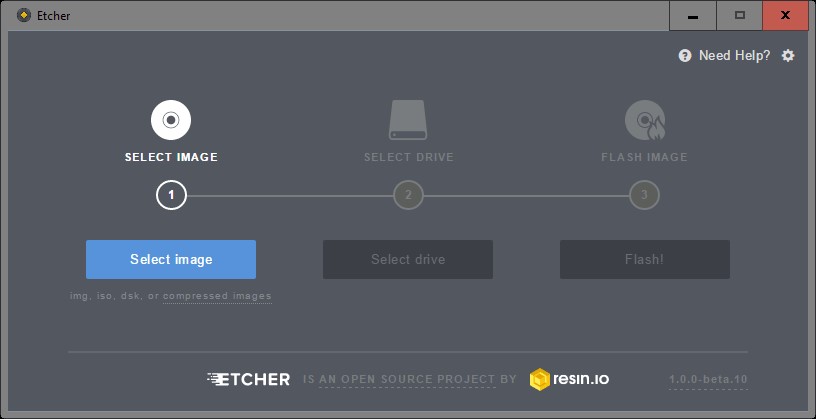
At this point, the Micro SD card pops up. Insert the Micro SD card into the Raspberry Pi.
Connect the Raspberry Pi and Screen
Step1
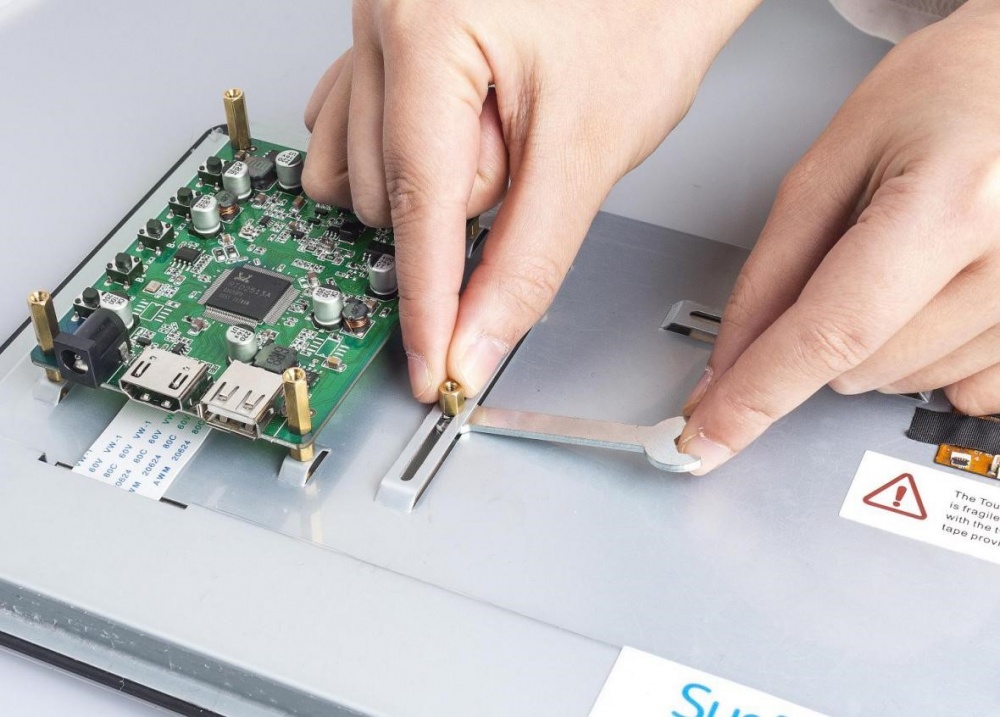
Fix the Raspberry Pi (or other boards) on the screen back case. There are a vertical slot and a horizontal one on the back of the screen,
so you can fix boards with different sizes by moving the nuts and 2.5*6 standoffs with the small wrench.
Step2
If you want to use a Raspberry Pi with the screen, then you don't need to adjust the standoffs since they are preset for it.
Just place the Raspberry Pi on the plate and fasten them with 2.5*14.4 standoffs.
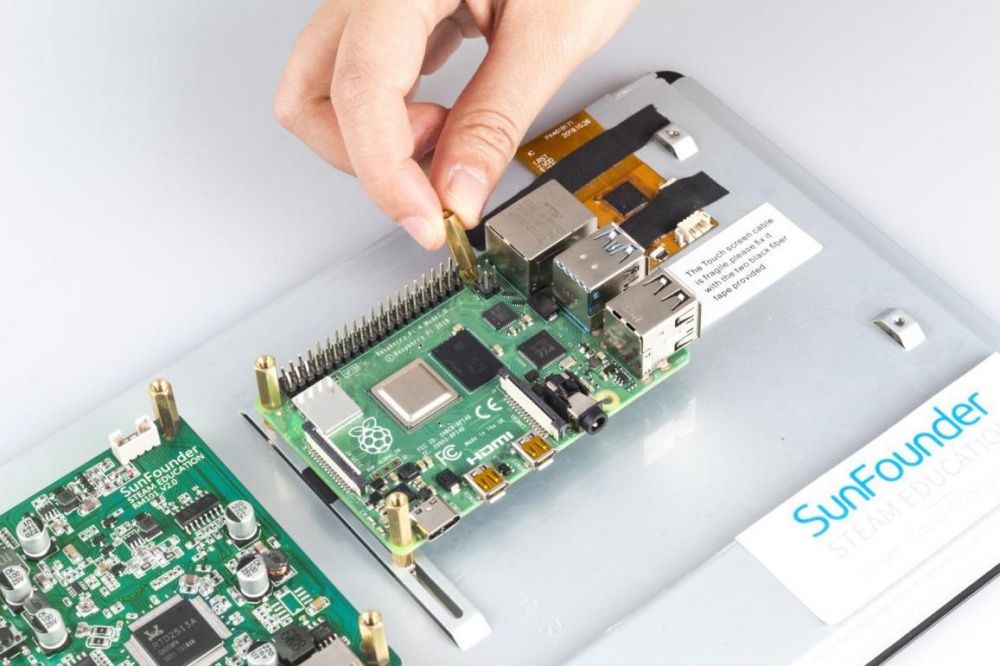
Step3
Insert the two 2.5*22 standoffs into the holes on the back to keep the screen balanced.
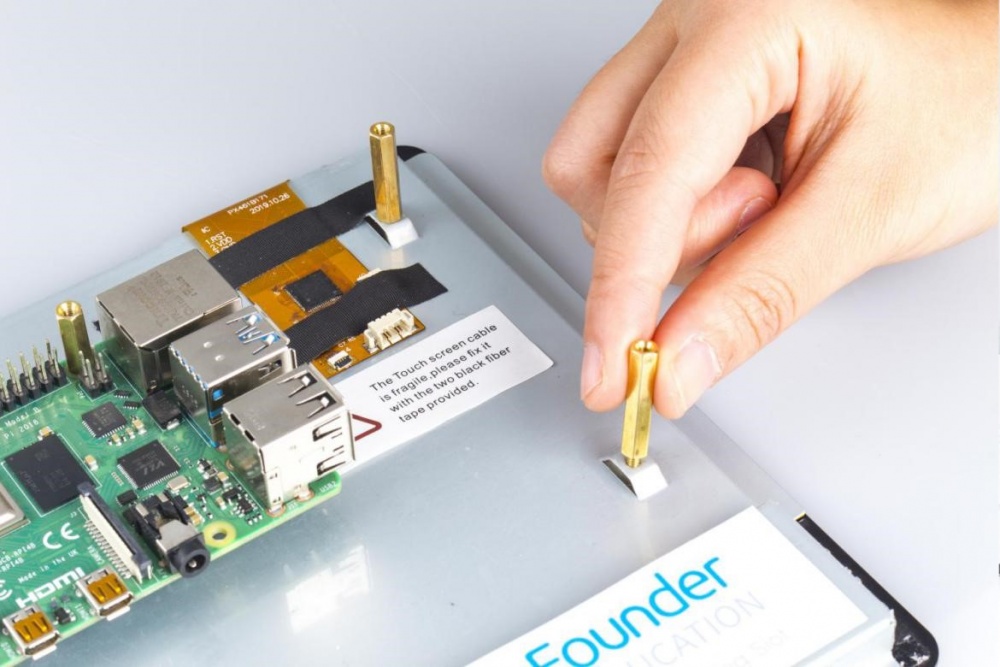
Step4
Connect the HDMI port of the Raspberry Pi and the screen via an HDMI cable.
Note: In this kit, 2 types of HDMI cables and 2 types of power cords of Raspberry Pi are provided for Raspberry Pi 3 and Raspberry Pi 4.
P4
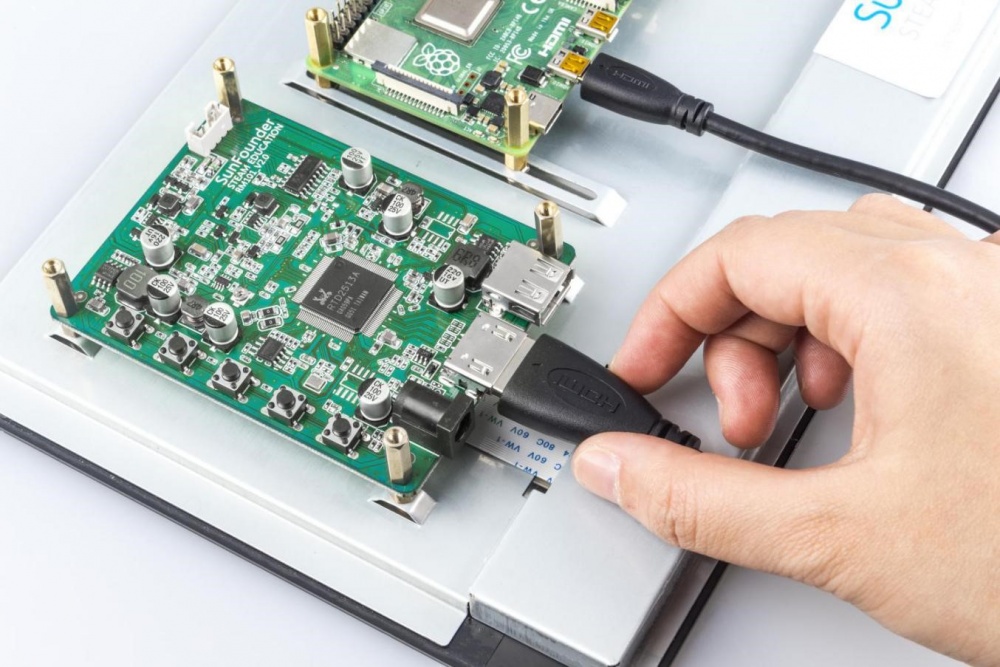
P3
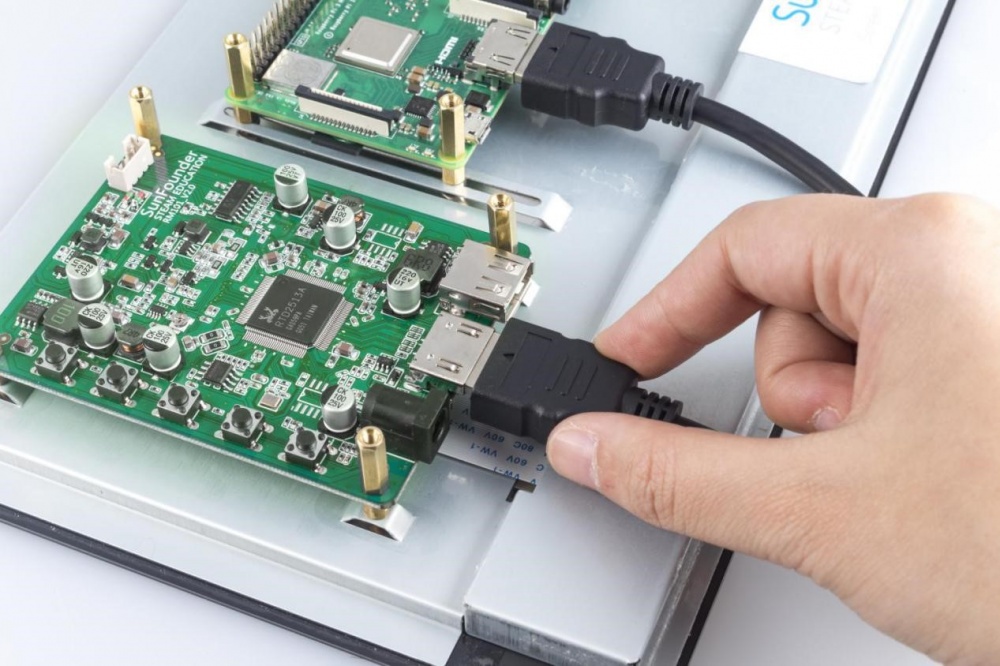
Step5
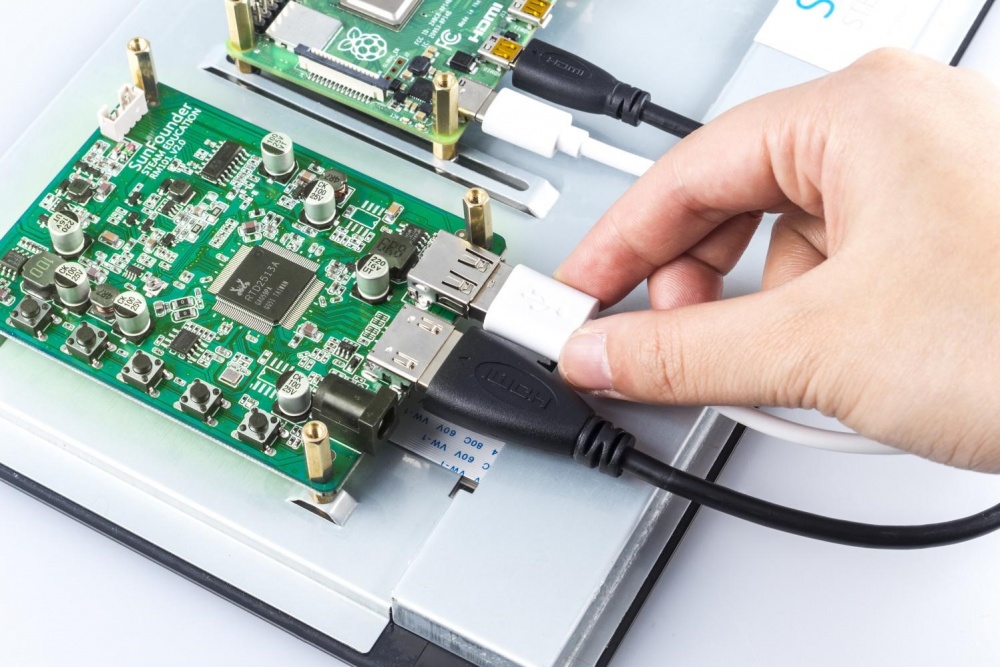
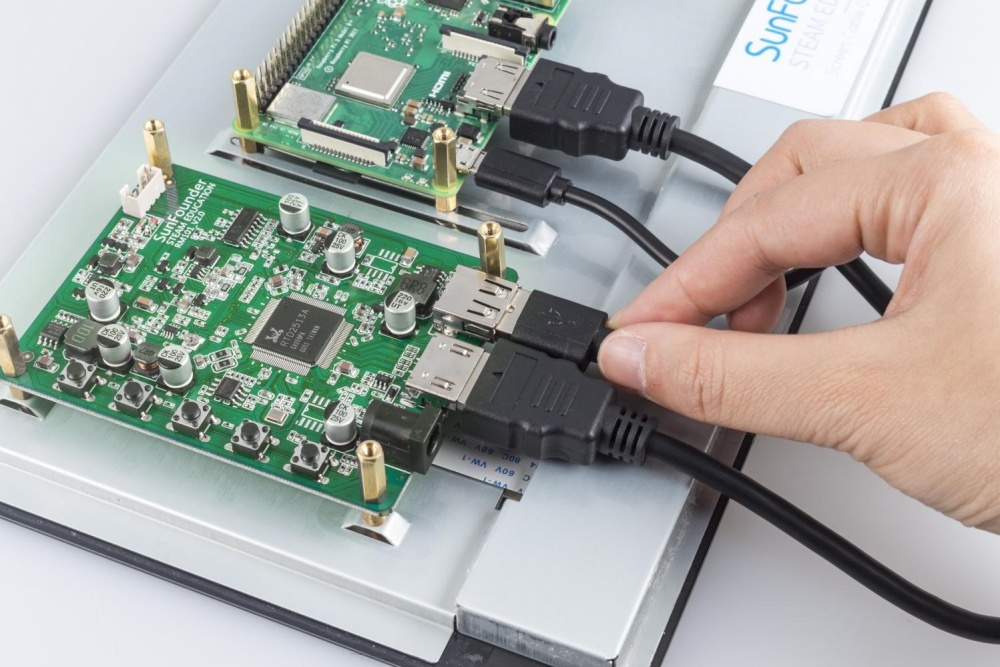
Connect the power port of the Raspberry Pi to the USB port of the main board via a USB cable.
P4
P3
Step6
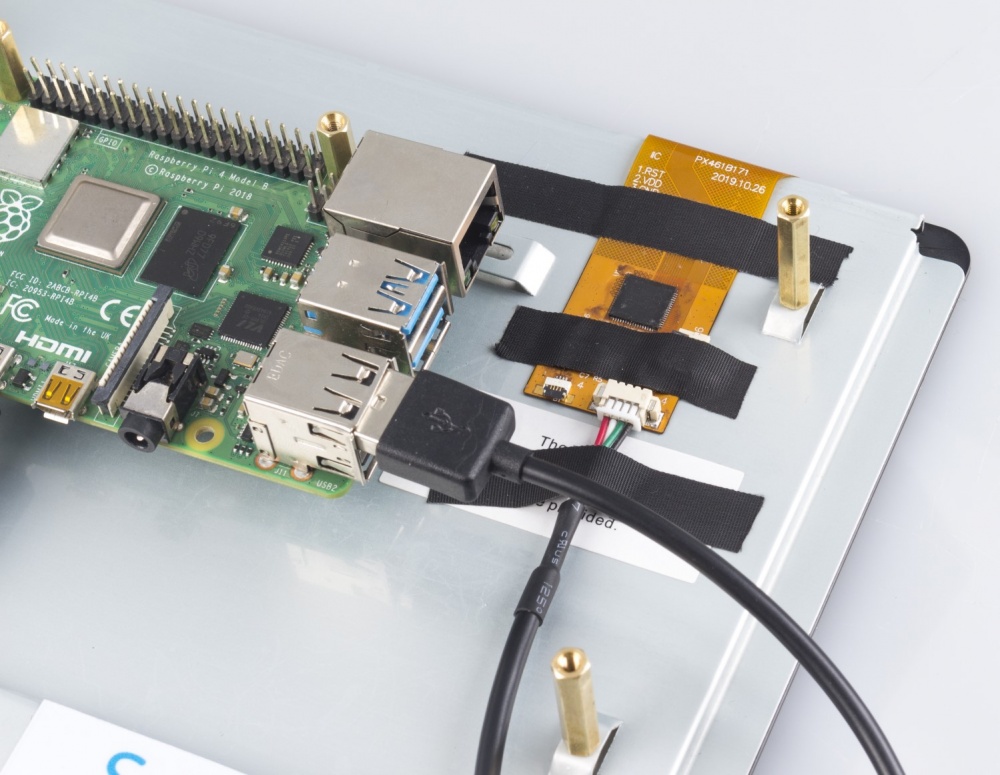
Connect the USB port of the Raspberry Pi and the screen with a 4-pin USB cable. To prevent the cable from falling off, use tape to fix it.
Note: In the following assembly steps, the method of Raspberry Pi 3 is the same as that of Raspberry Pi 4, so we take Raspberry Pi 4 as an example to introduce.
Step7
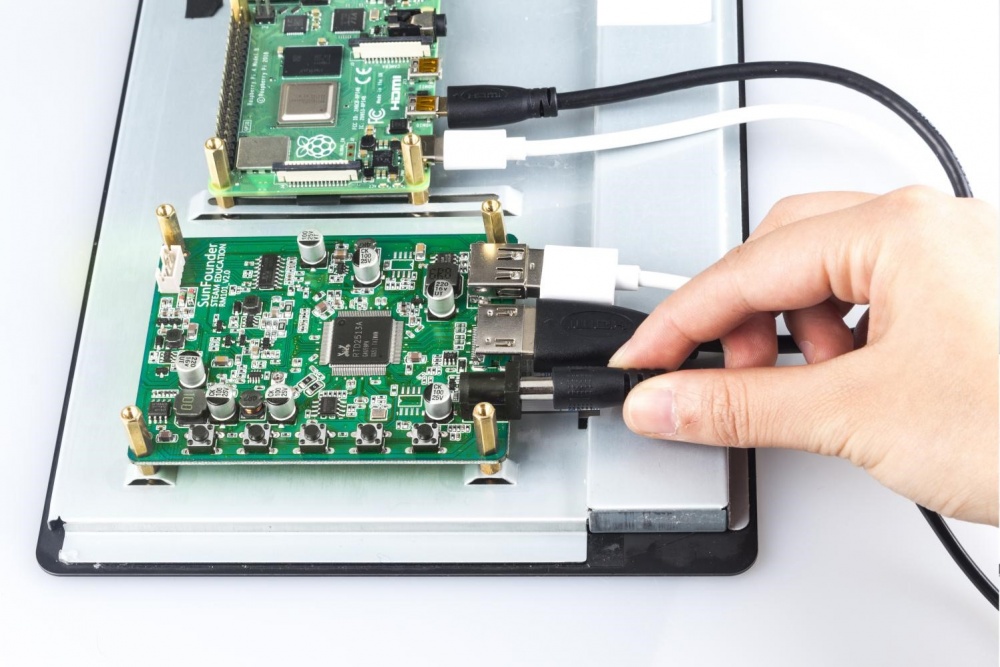
Connect the power cable of the supply to power the main board of the screen.
Step8
Then power it on and the boot screen will appear.
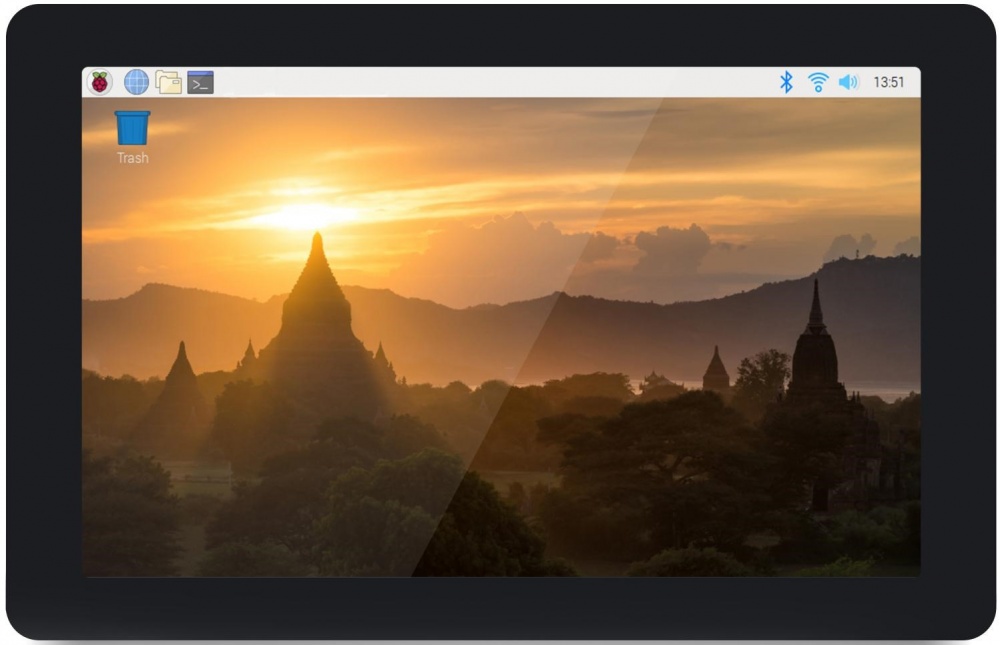
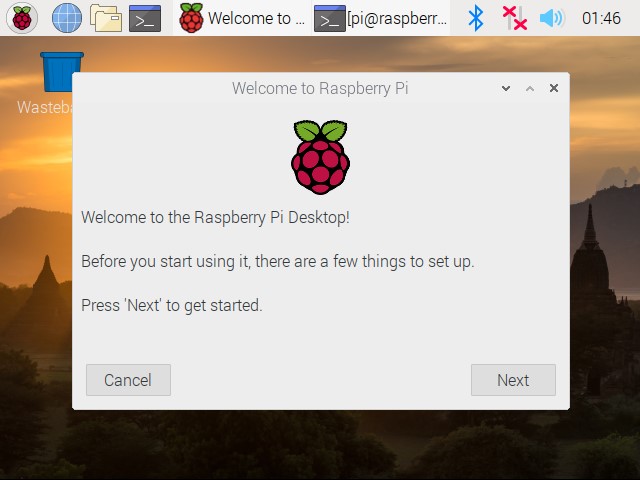
Set up the Raspberry Pi Desktop
When you start your Raspberry Pi for the first time, the Welcome to Raspberry Pi application will pop up and guide you through the initial setup.
Click Next to start the setup.
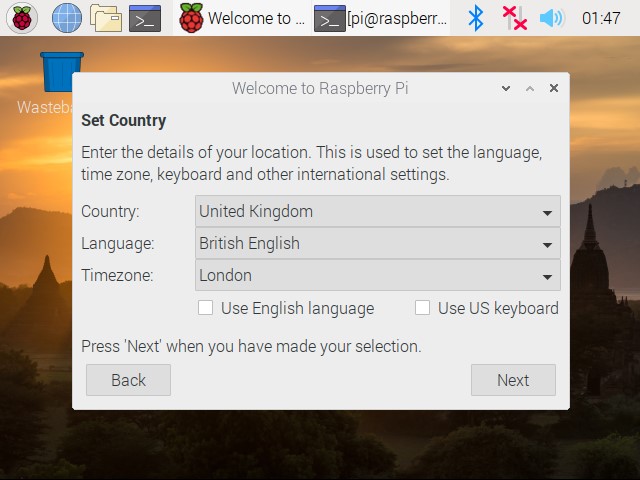
Set your Country, Language, and Timezone, then click Next again.
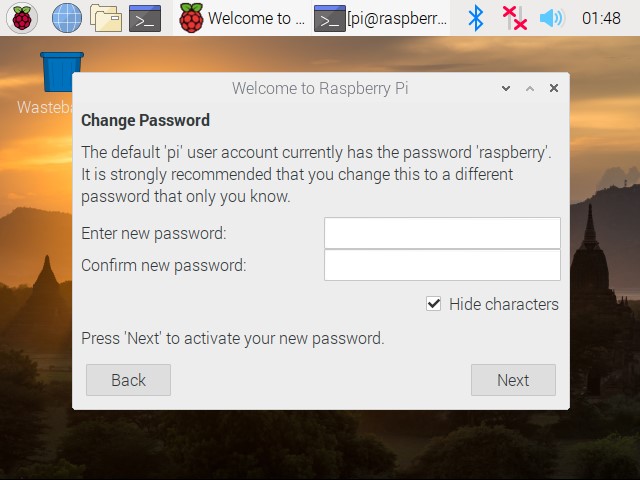
Enter a new password for your Raspberry Pi and click Next. In this step, you need to plug a keyboard into the Raspberry Pi to help you input the new password.
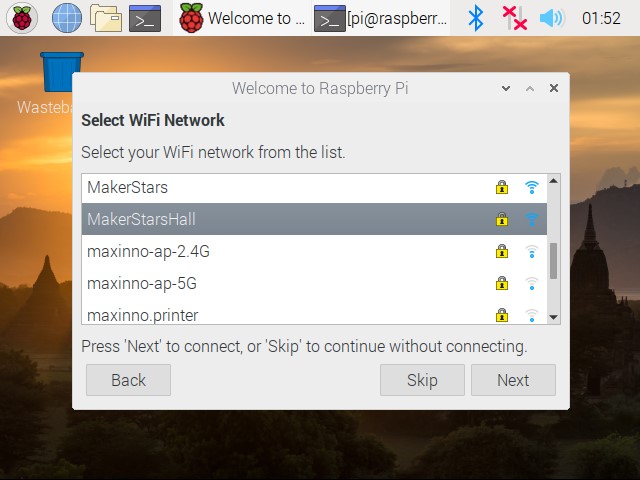
Connect to your WiFi network by selecting its name, entering the password, and clicking Next.
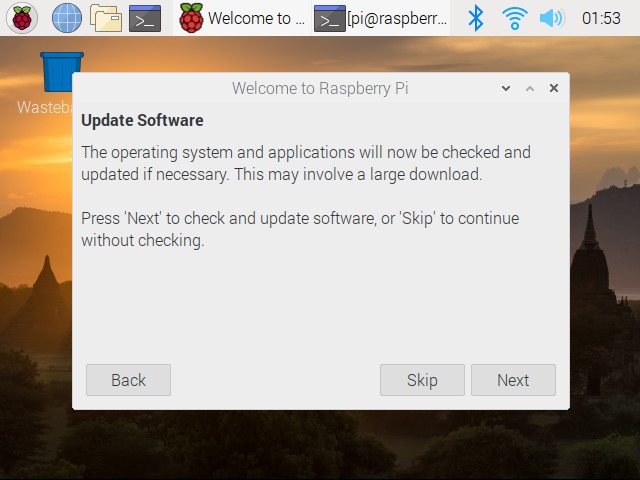
Click Next let the wizard check for updates to Raspbian and install them (this might take a little while).
Install the Virtual Keyboard
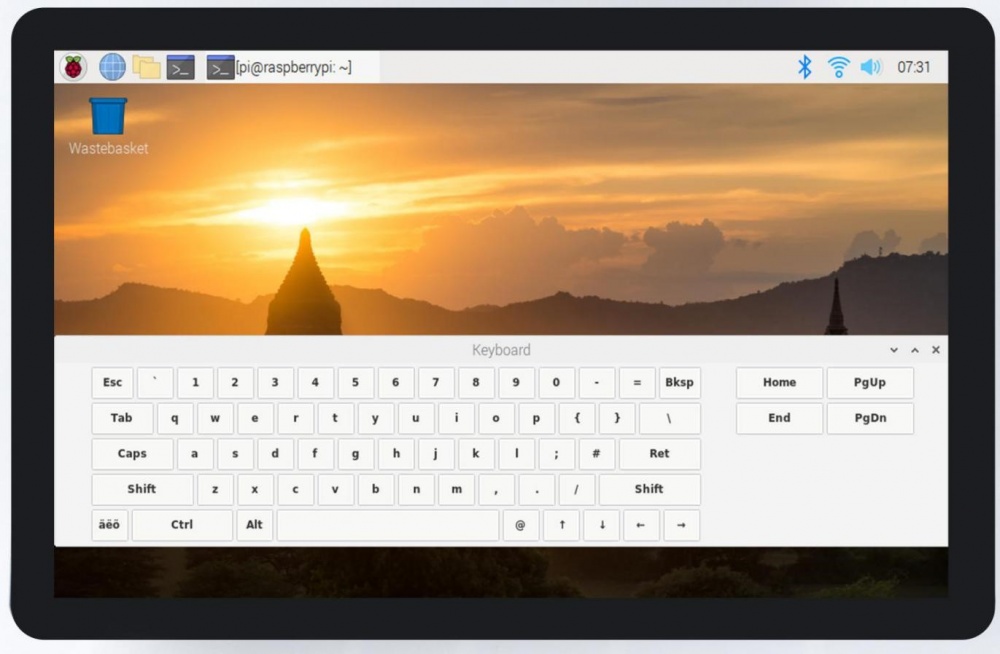
Open a terminal and run the command, after the installation is done successfully, the keyboard is on the system menu, open it as shown:
sudo apt-get install matchbox-keyboard
Using as Extension Screen for PC
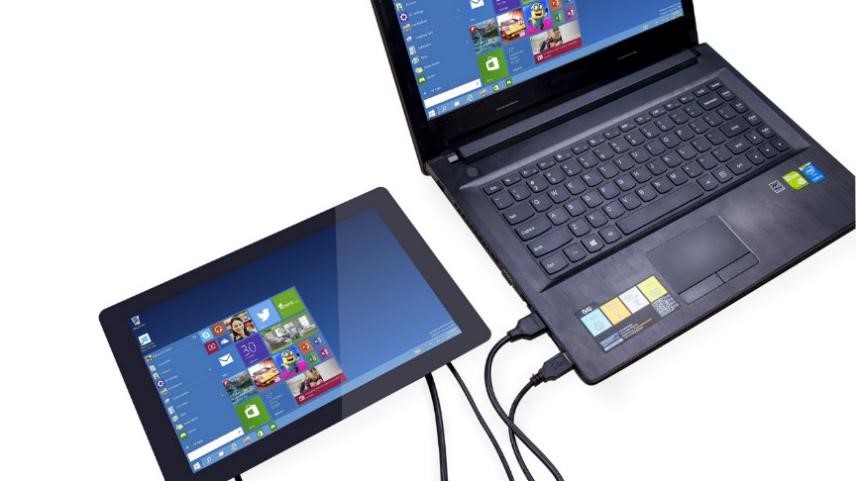
Connect the computer with the main board via an HDMI cable, and connect the USB port of the PC and the screen with a 4-pin USB cable.
Now you can use the screen as an extension one of your computer.
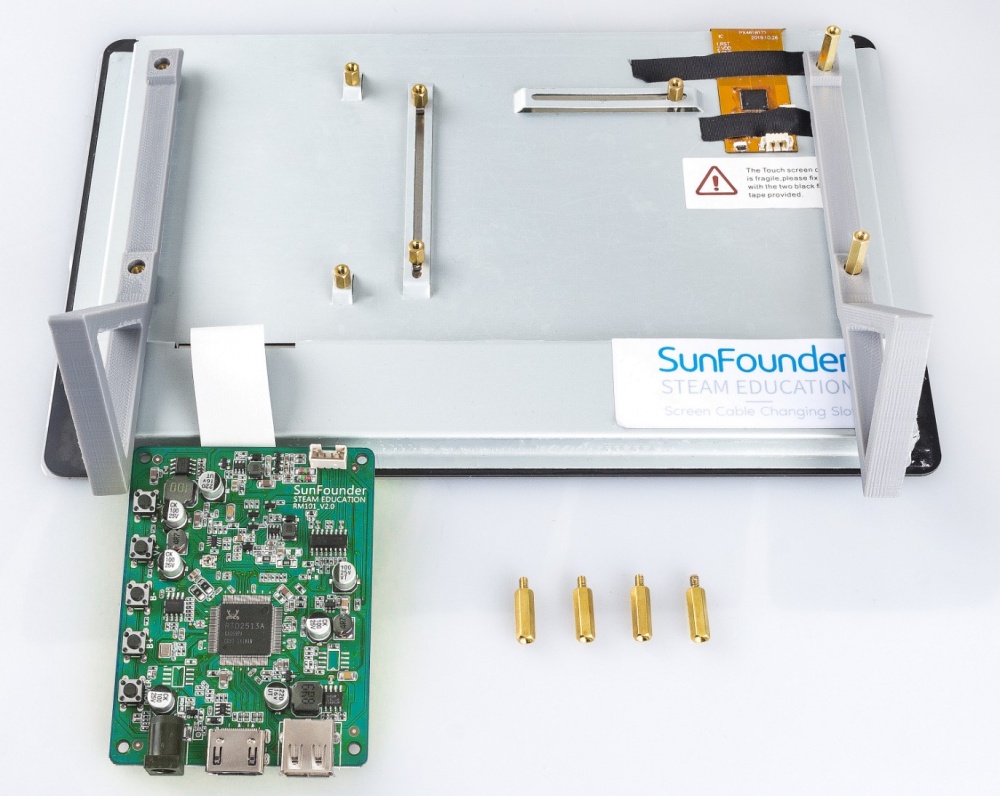
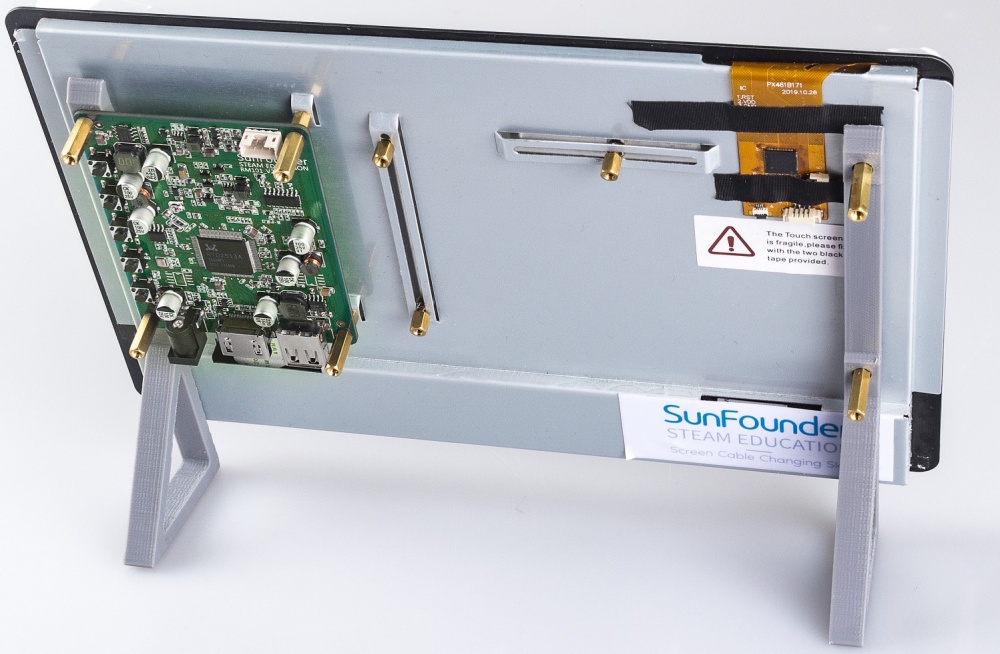
3D-printed Touch Screen Support
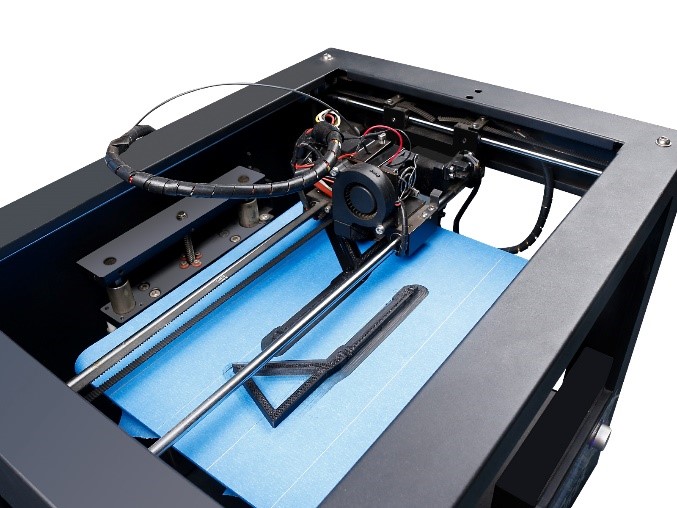
If you need to place the touch screen more conveniently, you can use a 3D printer to print a support. The 3D printer file is on our official website
WIKI: http://wiki.sunfounder.cc/index.php?title=File:Stand.zip
Installation process is shown as follow.
Step1
Get ready for 3D printing.
Step 2
Remove the touch screen main board and let the standoff thread the holes of holders.
Step 4
Assemble the extension board again, now you can get a stand-up touch screen.
Copyright Notice
All contents including but not limited to texts, images, and code in this manual are owned by the SunFounder Company. You should only use it for personal study,
investigation, enjoyment, or other non-commercial or nonprofit purposes, under the related regulations and copyrights laws, without infringing the legal rights of
the author and relevant right holders. For any individual or organization that uses these for commercial profit without permission, the Company reserves the right
to take legal action.
