Difference between revisions of "SF-A01 Video Transmission Module"
(→How to Connect the Image Transmission Module and Camera) |
|||
| (11 intermediate revisions by the same user not shown) | |||
| Line 5: | Line 5: | ||
[[File:SF-AV01-7.jpg]]<br> | [[File:SF-AV01-7.jpg]]<br> | ||
| − | [[File:SF-AV01- | + | Here is its frequency and channel: <br> |
| + | |||
| + | [[File:SF-AV01-20.jpg.png]]<br> | ||
[[File:SF-AV01-5.png]][[File:SF-AV01-6.png]]<br> | [[File:SF-AV01-5.png]][[File:SF-AV01-6.png]]<br> | ||
| Line 20: | Line 22: | ||
TP1, TP2 and TP3 are three different indicators which represent three different powers. When only TP1 indicator lights up, the power is 25mW; When both the TP1 and TP2 light up, the power is 200mW. Its power reaches 600mW when all the three indicators light up. <br> | TP1, TP2 and TP3 are three different indicators which represent three different powers. When only TP1 indicator lights up, the power is 25mW; When both the TP1 and TP2 light up, the power is 200mW. Its power reaches 600mW when all the three indicators light up. <br> | ||
Press and hold SW1 for 3s for power increase each time. The power increases progressively according to the following order: '''<font color="green">25mW ->200mW -> 600mW.</font>'''<br> | Press and hold SW1 for 3s for power increase each time. The power increases progressively according to the following order: '''<font color="green">25mW ->200mW -> 600mW.</font>'''<br> | ||
| + | |||
| + | Button '''SW2:'''<br> | ||
| + | Press and hold SW2 for 2s to choose the frequency. There are A, B, C, D, and E, in total 5 groups of frequency to choose. Press for 2s for frequency group change each time. The frequency will increase progressively in a circle: '''<font color="green">A->B->C->D->E->A…… </font>'''<br> | ||
| + | Press SW2 for no more than 1 second to choose the channel (CH1 - CH8). For each press, the channel changes from CH1 to CH8 in sequence circularly. <br> | ||
| + | Thus we have selected the frequency of the video transmission module successfully. Please refer to the previous table '''Frequency channel list (MHZ)''' on P3.<br> | ||
| + | Press and hold SW2 for 5 seconds to turn on or turn off the volume. When it’s on, the LED1 (figure (b)) lights up. <br> | ||
| + | |||
| + | ==How to Connect the Image Transmission Module and Camera== | ||
| + | Before filming videos with your camera, you still need to connect your image transmission module and the camera. Take the following steps.<br> | ||
| + | '''Step 1:''' Install the 5.8 GHz antenna on the image transmission module by screwing.<br> | ||
| + | |||
| + | [[File:SF-AV01-8.jpg.png]]<br> | ||
| + | |||
| + | '''Step 2:''' Find the 6-pin anti-reverse cable on the connecting line and plug it into the 6-pin port on the module.<br> | ||
| + | |||
| + | [[File:SF-AV01-9.jpg.png]]<br> | ||
| + | |||
| + | '''Step 3:''' Find the 3-pin anti-reverse cable on the connecting line and plug it into the port on the camera module. <br> | ||
| + | |||
| + | [[File:SF-AV01-10.jpg.png]]<br> | ||
| + | |||
| + | '''Step 4:''' Plug the male connector of the power cord in the female connector on the connecting line so as to connect them to the power source (12V).<br> | ||
| + | |||
| + | [[File:SF-AV01-11.jpg.png]]<br> | ||
| + | |||
| + | '''Step 5:''' Cover the camera with the variable camera fixing base and fasten them with the self-tapping screws. <br> | ||
| + | |||
| + | [[File:SF-AV01-12.jpg.png.jpg]]<br> | ||
| + | |||
| + | '''Step 6:''' Insert the connecting piece into the camera fixing base and fasten them with the screw and nut.<br> | ||
| + | |||
| + | [[File:SF-AV01-13.jpg.png.jpg]]<br> | ||
| + | |||
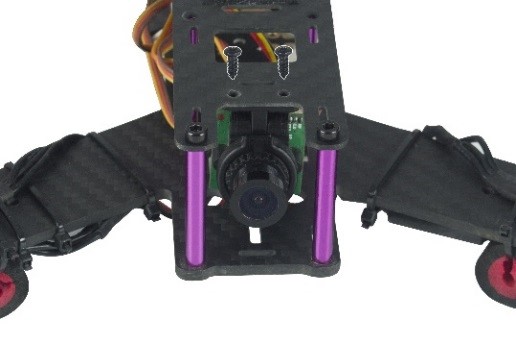
| + | '''Step 7:''' Put the assembled camera in front of the airframe and fasten them with two self-tapping screws.<br> | ||
| + | |||
| + | [[File:SF-AV01-14.jpg.png.jpg]]<br> | ||
Latest revision as of 03:56, 26 May 2017
Contents
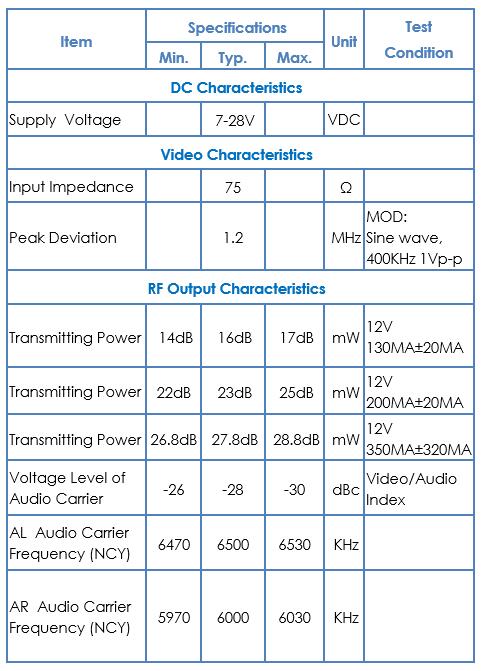
Technical Specifications
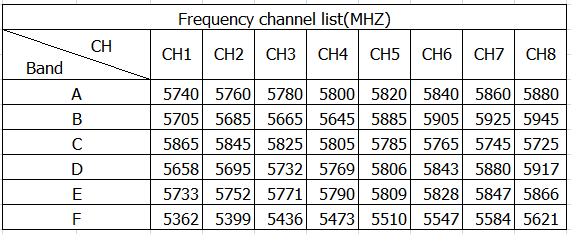
Here is its frequency and channel:
Features
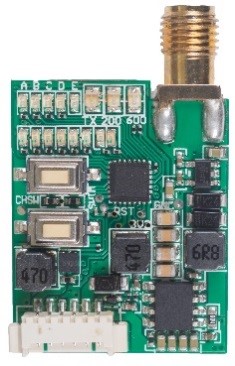
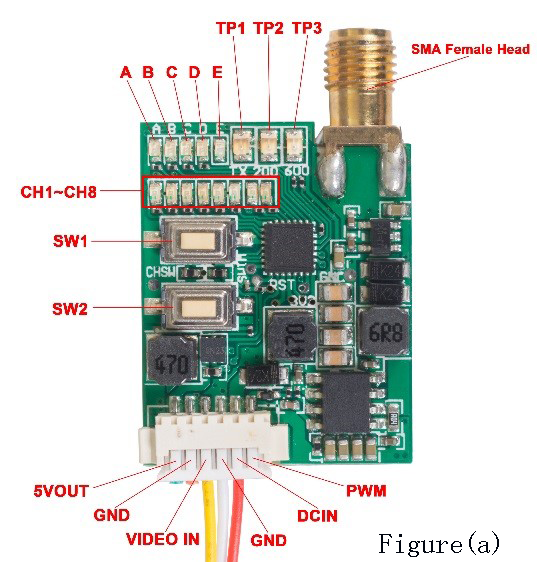
The blue LED indicates the frequency group. If the indicator A lights up, it indicates that the current frequency group is A group.
The green LED indicates the channel. If the indicator CH1 lights up, it indicates that the current channel is CH1.
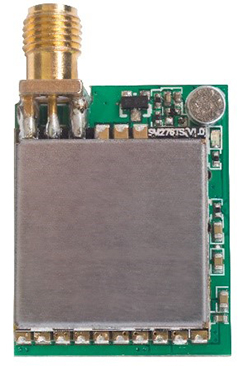
Dimensions: 28.5 x 22.4 x 7.7 mm
Model: SF-A01 (5.8G, 40ch); Weight: 6.9g
Button Function
Button SW1:
Double-press SW1 to switch on or off the TP1 LED. The module starts transmitting signals when the indicator TP1 lights up. The LED will be off when the module doesn’t transmit signals.
When connecting to the power supply for the first time, its power is as low as 14dBm. Since it has memory function, when it's power on again, the power remains the same as when it's power off last time.
TP1, TP2 and TP3 are three different indicators which represent three different powers. When only TP1 indicator lights up, the power is 25mW; When both the TP1 and TP2 light up, the power is 200mW. Its power reaches 600mW when all the three indicators light up.
Press and hold SW1 for 3s for power increase each time. The power increases progressively according to the following order: 25mW ->200mW -> 600mW.
Button SW2:
Press and hold SW2 for 2s to choose the frequency. There are A, B, C, D, and E, in total 5 groups of frequency to choose. Press for 2s for frequency group change each time. The frequency will increase progressively in a circle: A->B->C->D->E->A……
Press SW2 for no more than 1 second to choose the channel (CH1 - CH8). For each press, the channel changes from CH1 to CH8 in sequence circularly.
Thus we have selected the frequency of the video transmission module successfully. Please refer to the previous table Frequency channel list (MHZ) on P3.
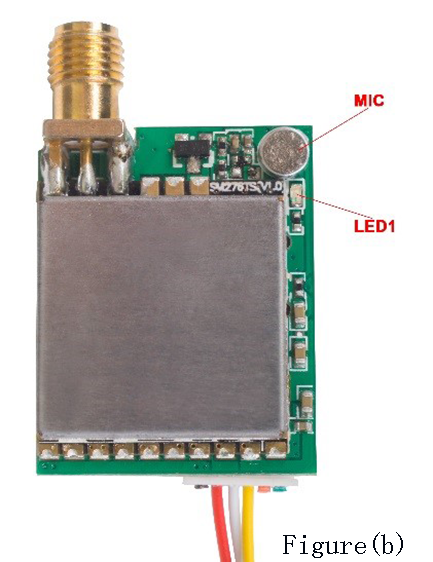
Press and hold SW2 for 5 seconds to turn on or turn off the volume. When it’s on, the LED1 (figure (b)) lights up.
How to Connect the Image Transmission Module and Camera
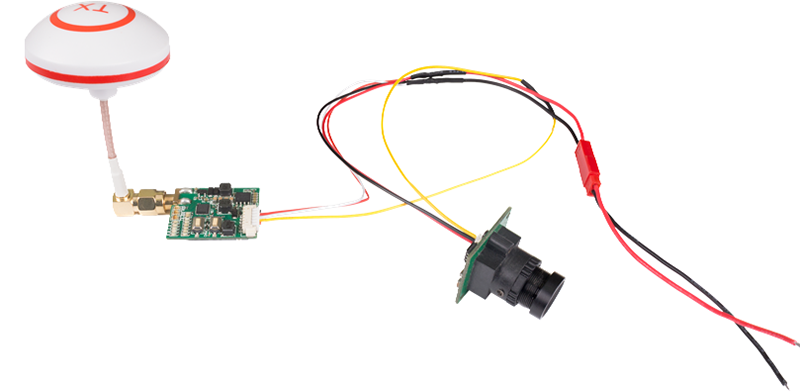
Before filming videos with your camera, you still need to connect your image transmission module and the camera. Take the following steps.
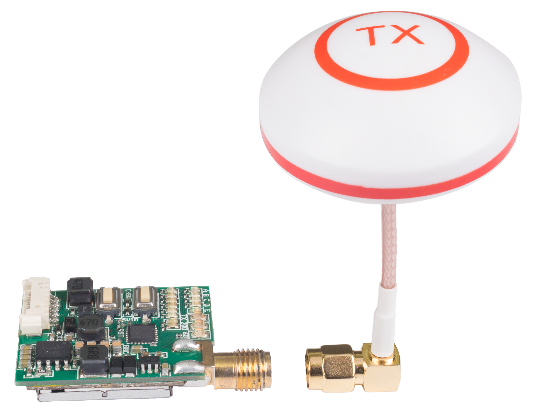
Step 1: Install the 5.8 GHz antenna on the image transmission module by screwing.
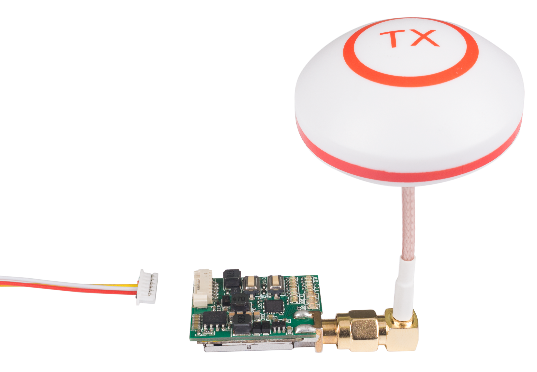
Step 2: Find the 6-pin anti-reverse cable on the connecting line and plug it into the 6-pin port on the module.
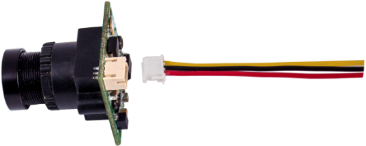
Step 3: Find the 3-pin anti-reverse cable on the connecting line and plug it into the port on the camera module.
Step 4: Plug the male connector of the power cord in the female connector on the connecting line so as to connect them to the power source (12V).
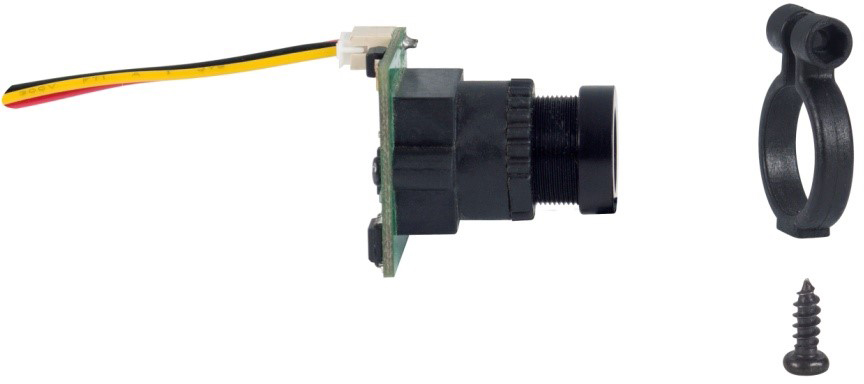
Step 5: Cover the camera with the variable camera fixing base and fasten them with the self-tapping screws.
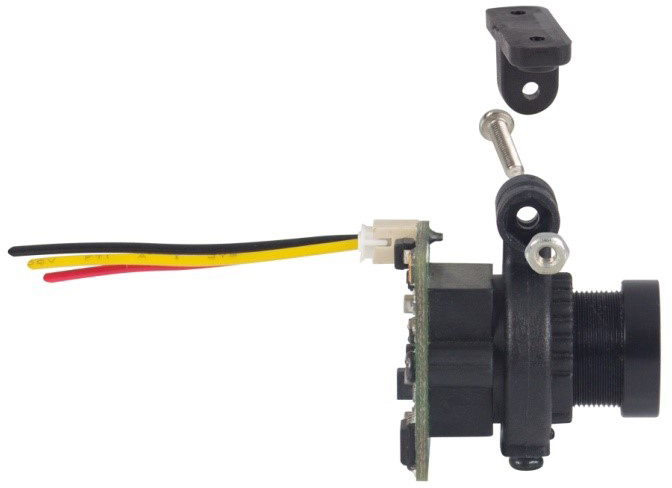
Step 6: Insert the connecting piece into the camera fixing base and fasten them with the screw and nut.
Step 7: Put the assembled camera in front of the airframe and fasten them with two self-tapping screws.
