2.4 Inch TFT Screen LCD Display HAT
Contents
Introduction
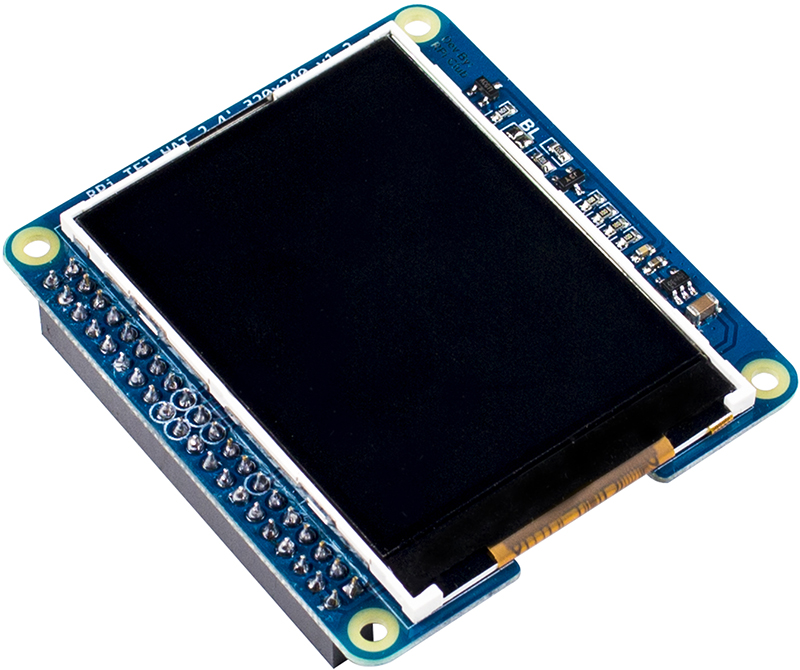
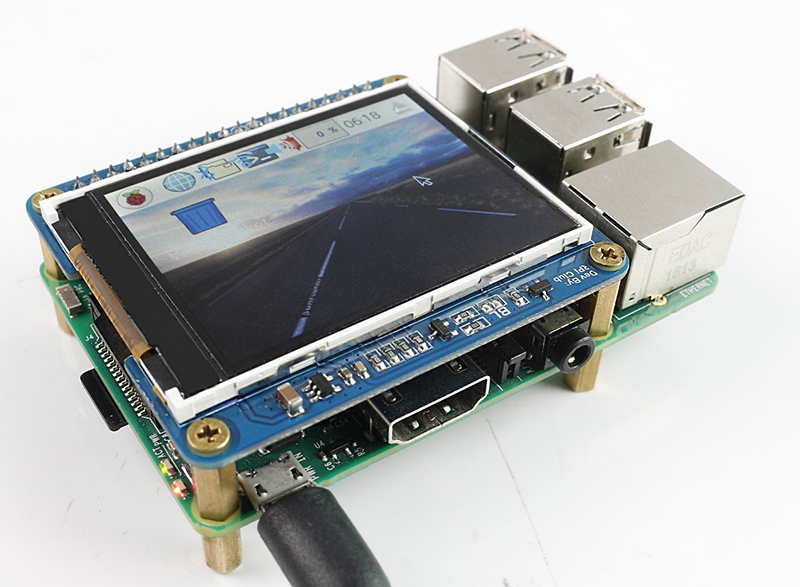
This monitor is specially designed for Raspberry Pi. You're recommended to download and install the image we provide. It is written based on the Raspbian Jessie 2016-9-23 version and we've pre-installed the driver and pre-set the calibration program. So you can just burn it on your card for use. If you want to change the calibration, you can just find the program and alter it.
Download the image at the bottom of the page, unzip the package downloaded and you'll see an .img file. Burn it to your TF card by win32imager.
Next, connect the monitor to the Raspberry Pi, and the HDMI board. Plug in the TF card with the image file burnt. Connect the power and you can start the use.
Features
- Supports a resolution of 320x240; 2.4 inch screen nearly fully covers the HAT expansion board, providing maximum display area with portability.
- Works with Raspberry Pi B +, Pi2 and Pi3.
- Size: 65mm × 56.5mm, fits with a Raspberry Pi HAT board.
- Powered by Raspberry Pi, no need for external power source.
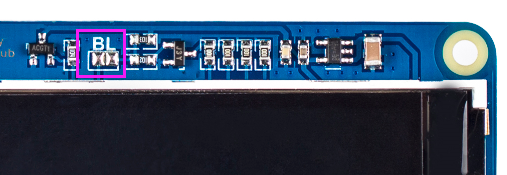
- Backlight can be controlled by soldering its BL jump on the top
How It Works
Image Burning
a. Download the image we provide (2.4-inch-LCD-2016-09-23-raspbian-jessie) and unzip it, burn the .img file to the TF card through win32 Disk Imager.
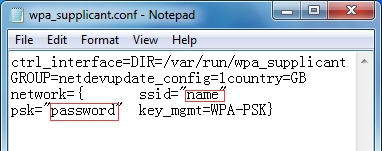
b. Next, configure the network. Open file wpa_supplicant.conf, input the ID and password in the red frame of ssid =“name”, psk =“password” as shown below. Then save the file and copy it to the /boot directory in TF card.
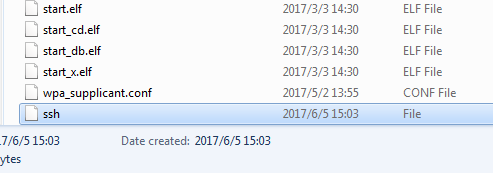
c. Enable remote login to the Raspberry Pi. Create a file ssh (no suffix), leave the content empty.
d. Insert the TF card and the display to the RPi, and power it on, the graphic UI will be shown automatically on the screen.
Script Installation (Driver)
For users who want to use their own OS, you can just install the script pitft_setup to make 2.4 inch display work.
a. Prepare a TF card with the Raspbian image burnt, then configure the network and enable ssh.
b. Log into the Raspberry Pi remotely. For Windows users, you can use PuTTY, when Linux users can do directly with ssh.
c. In the terminal of remote login
1) Update the code to the latest
sudo rpi-update
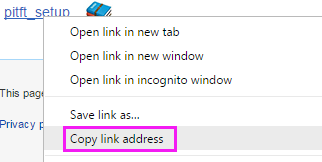
2) Download the installation-simplified pitft_setup.tar.gz package. Then right-click on this file, and select copy link address.
On the terminal, type in:
wget https://s3.amazonaws.com/sunfounder/Raspberry/images/2.2LCD-Show/pitft_setup.tar.gz
3) Extract the package
tar xzvf pitft_setup.tar.gz
4) Change directory to the extracted folder
cd pitft_setup
5) Run the script for simplified installation
sudo python pitft_setup.py
6) Then there are a few prompts, just type in Y (for Yes)
Are you sure to change the file(/boot/config.txt) with new line?(y/n):y
One is to ask you to set the screen rotation angles. Set according to your need. You can leave empty for default setting.
Set up screen:
    Input the rotation of the screen (0, 90, 180, 270, 360 or leave empty for default setting 270):
The default one is as follows:
7) Follow the prompts to complete the installation. Wait after rebooting, you can see a graphic user interface (GUI) is displayed on the screen.
===============

   Finished!

===============

Reboot..
Backlight Control
BL is the switch for backlight control. First, solder the BL JUMP on the top, then using the wiringPi (or similar) to control Pi’s GPIO27 level (HIGH = active backlight).
gpio -g mode 27 in  # Switch off
gpio -g mode 27 out # Switch on
Attention
Warning:sometimes the driver installation may fail to be completed, and will further cause data missing, so you will need to reburn the system. You should clear about the risk.
Suggestion:Copy the important information on SD card to another one before driver installation.
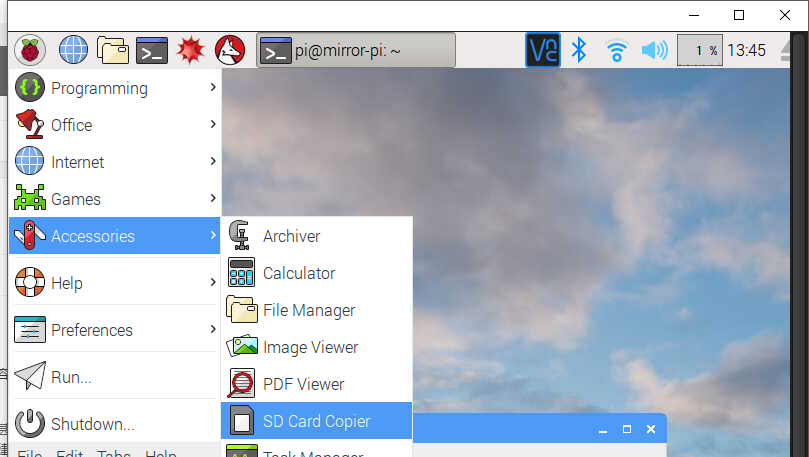
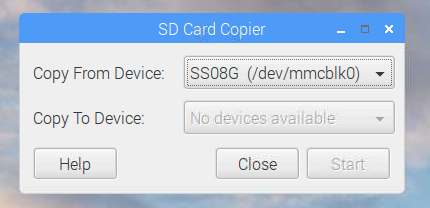
Here is how:Connect the Raspberry Pi to the display, click menu -> Accessories -> SD Card Copier, and select the proper device to start.
