Difference between revisions of "To use USB mini microphone on Raspbian"
(→FAQ) |
(→FAQ) |
||
| Line 96: | Line 96: | ||
=='''FAQ'''== | =='''FAQ'''== | ||
===Q1: Not working with raspberry pi (raspbian) and also not working with Windows 7, it doesnt detect a single sound.=== | ===Q1: Not working with raspberry pi (raspbian) and also not working with Windows 7, it doesnt detect a single sound.=== | ||
| + | Not working 具体表现是什么呢? | ||
| + | 在树莓派上你可以打开Audio Device Settings, | ||
| + | 然后在Sound Card一项的下拉菜单看到USB PNP Sound Card | ||
| + | 选择后,默认下方没有显示任何设置,你需要点击Select Controls | ||
| + | 然后勾选两个控制, 再点击Close关闭页面 | ||
| + | 这时你就可以看到两个Tab, Capture 和Switches | ||
| + | 把Capture的音量调到最大,并点击ok关闭设置 | ||
| + | |||
| + | 测试: | ||
| + | 现在你可以打开Terminal,输入命令 arecord -l | ||
| + | 可以看到USB PnP Sound Device | ||
| + | |||
| + | 然后输入命令: | ||
| + | arecord -D plughw:1,0 -d 3 test.wav | ||
| + | 就可以录制3秒的声音并储存到test.wav | ||
| + | 然后可以使用aplay test.wav来听 | ||
Revision as of 05:51, 11 July 2017
Contents
Introduction
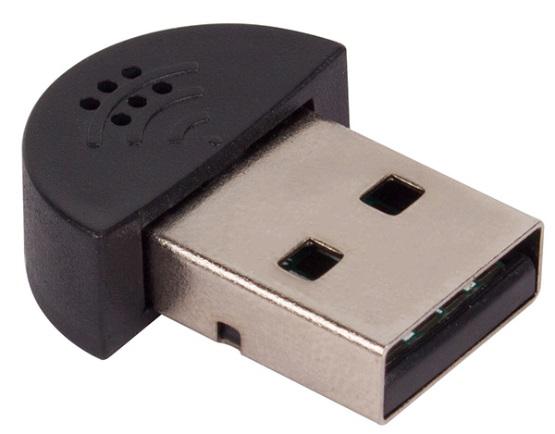
This is a tiny USB Microphone that plugs into your laptop or desktop computer. No microphone on your computer? No problem - just plug this incredibly small microphone into a USB port and add microphone functionality. No need to install any extra software; Microsoft Windows will detect the device and automatically install it. Simply launch within any program such as Skype or Google Hangouts.
There is no need to configure the USB mini microphone, it can be used directly. You can also use it in Rasperry Pi which has been burned with Raspbian, Here are the steps.
Components
-Raspberry Pi
-A TF card burned with the Raspbian
-5V DC power adapter, 2A or above with micro USB interface
-HDMI interface display (or VGA interface display with a VGA to HDMI adaptor)
-USB mouse and keyboard
-Speakers or headphones in the standard of 3.5mm
-USB mini microphone
Steps
Step1: Ready to start the Raspberry Pi and insert the mini microphone module as well as audio/headphones.
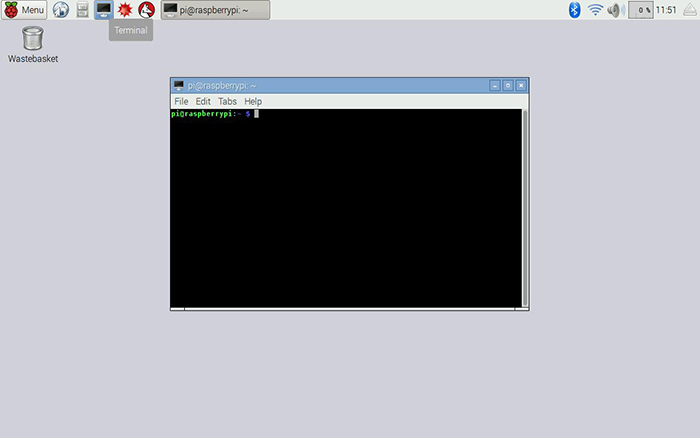
Open the Terminal of the Raspberry Pi
Step2: Check the USB connection
Enter the following commands to check the usb connection
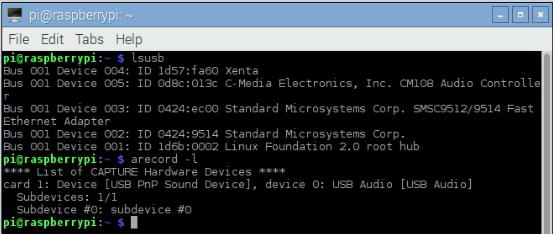
lsusb
You can see the USB devices connected by the Raspberry Pi
“C-Media Electronics, Inc. CM108 Audio Controller” is the USB mini microphone. Check the microphone with arecord
arecord -l
(“l” is lower “L”). You will see the recording device:
You will see device card1, device0. Use plughw:1,0 to represent.
Step3: Records testing
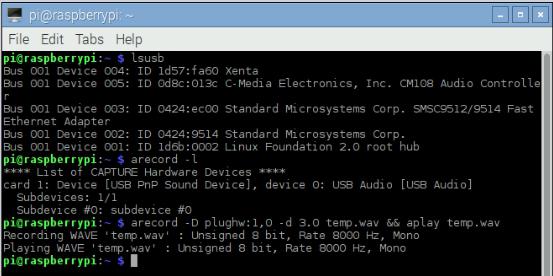
Record for three seconds and play it
arecord -D plughw:1,0 -d 3.0 test.wav && aplay test.wav
Here we use arecord to record and aplay to play;“-D” to choose the device and “-d” to set the recording time
You can input “arecord --help” and “aplay --help” for details.
If the sound is low, you can adjust the gain of the microphone.
Step4: Adjust the gain of the microphone
Open the Audio Device Settings: Open the Menu in the top left corner, and go through Preferences => Audio Device Settings.
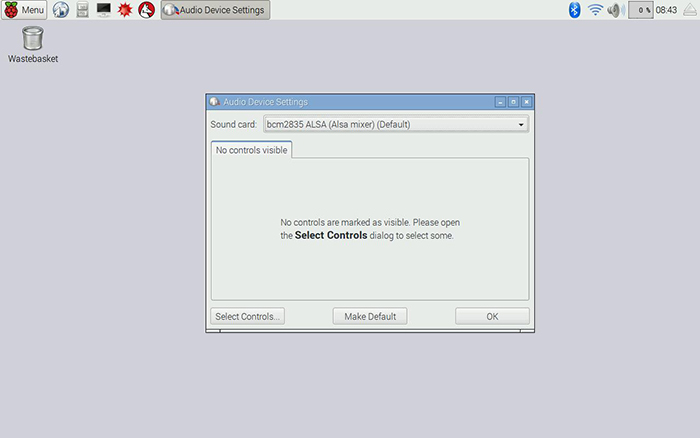
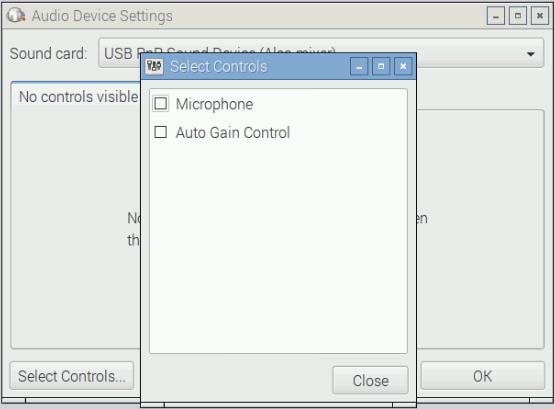
Choose USB PnP Sound Device(Alsa mixer)in the Sound card column. It there appears No controls visible, open the Select Controls in the lower left corner.
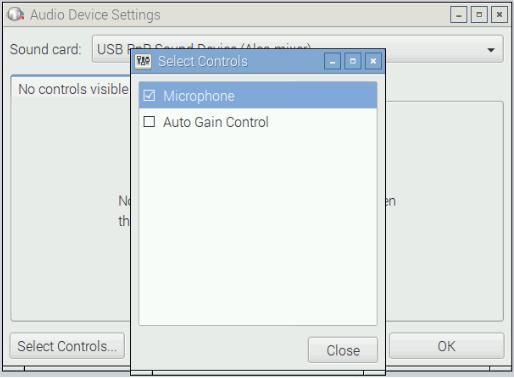
Tick the Microphone in the Select Controls page and click Close in the lower right corner.
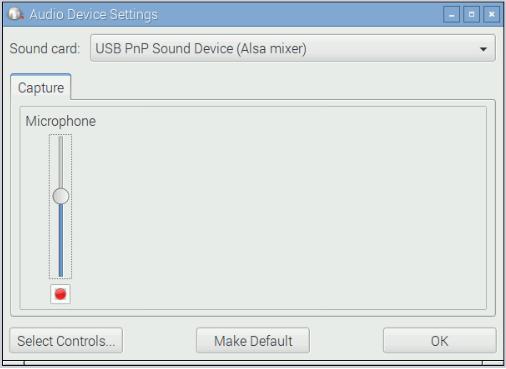
At this time, No controls visible in the middle of the Audio Device Settings page becomes Capture.
Adjust the slider below to adjust the gain of the microphone.
After adjusting, record again:
arecord -D plughw:1,0 -d 3.0 test.wav && aplay test.wav
Enjoy!
FAQ
Q1: Not working with raspberry pi (raspbian) and also not working with Windows 7, it doesnt detect a single sound.
Not working 具体表现是什么呢? 在树莓派上你可以打开Audio Device Settings, 然后在Sound Card一项的下拉菜单看到USB PNP Sound Card 选择后,默认下方没有显示任何设置,你需要点击Select Controls 然后勾选两个控制, 再点击Close关闭页面 这时你就可以看到两个Tab, Capture 和Switches 把Capture的音量调到最大,并点击ok关闭设置
测试: 现在你可以打开Terminal,输入命令 arecord -l 可以看到USB PnP Sound Device
然后输入命令: arecord -D plughw:1,0 -d 3 test.wav 就可以录制3秒的声音并储存到test.wav 然后可以使用aplay test.wav来听
